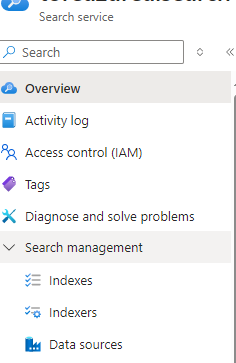
https://blazorise.com/docs/components/date-picker
This date picker does not support highlighting certain dates. It do support enabling specified dates or disabling specified dates. But highlighting dates is not possible. I have added a Github repo where this is added support for :
https://github.com/toreaurstadboss/BlazoriseDatePickerWithHolidays
First off, the following custom Blazor component provides the custom date picker with the support for highlighting specified dates.
CustomDatePicker.razor
@using Blazorise
@using Blazorise.Localization
@using BlazoriseDatePickerWithHolidays.Service
@using System.Globalization
@using static BlazoriseDatePickerWithHolidays.Service.HolidayService
@inject IJSRuntime JS
@inject ITextLocalizerService TextLocalizerService

<Addons>
    <Addon AddonType="AddonType.Body">
        <DatePicker TValue="DateTime"
                    Date="@SelectedDate"
                    FirstDayOfWeek="@FirstDayOfWeek"
                    DateChanged="@OnDateChanged"
                    InputFormat="@InputFormat"
                    InputMode="@InputMode"
                    DisplayFormat="@DisplayFormat"
                    Placeholder="@Placeholder"
                    TimeAs24hr="@TimeAs24hr"
                    @attributes="@AdditionalAttributes"
                    @ref="datePicker" />
    </Addon>
    <Addon AddonType="AddonType.End">
        <Button Class="addon-margin" Color="Color.Primary" Clicked="@(() => datePicker?.ToggleAsync())">
            <Icon Name="IconName.CalendarDay" />
        </Button>
    </Addon>
</Addons>

@code {
    /// <summary>
    /// List of dates to be highlighted in the date picker. Each date can have an annotation (e.g., holiday name) that will be shown as a tooltip.
    /// </summary>
    [Parameter]
    [EditorRequired]
    public List<AnnotatedDateTime> HighlightedDays { get; set; }

    /// <summary>
    /// The CSS class to apply to highlighted dates in the calendar.
    /// </summary>
    [Parameter]
    public string HighlightCssClass { get; set; } = "pink-day"; //Default CSS class pink-day is a custom CSS class defined in wwwroot/css/app.css

    /// <summary>
    /// The first day of the week in the date picker calendar. Defaults to Monday.
    /// </summary>
    [Parameter]
    public DayOfWeek FirstDayOfWeek { get; set; } = DayOfWeek.Monday;

    /// <summary>
    /// Whether to display time in 24-hour format. Defaults to true.
    /// </summary>
    [Parameter]
    public bool TimeAs24hr { get; set; } = true;

    /// <summary>
    /// The locale to use for the date picker, which affects date formatting and localization.
    /// Supported locales : https://blazorise.com/docs/helpers/localization
    /// </summary>
    [Parameter]
    public string Locale { get; set; } = "en-US";

    /// <summary>
    /// The input mode for the date picker, which can be either Date or DateTime or Month.
    /// </summary>
    [Parameter]
    public DateInputMode InputMode { get; set; } = DateInputMode.Date;

    /// <summary>
    /// The currently selected date in the date picker.
    /// </summary>
    [Parameter]
    public DateTime SelectedDate { get; set; }

    /// <summary>
    /// Event callback triggered when the selected date changes.
    /// </summary>
    [Parameter]
    public EventCallback<DateTime> SelectedDateChanged { get; set; }

    /// <summary>
    /// The input format string for displaying the date in the input field.
    /// </summary>
    [Parameter]
    public string? InputFormat { get; set; } = "dd.MM.yyyy";

    /// <summary>
    /// The display format string for showing the date in the calendar.
    /// </summary>
    [Parameter]
    public string? DisplayFormat { get; set; } = "dd.MM.yyyy";

    /// <summary>
    /// Placeholder text to display when no date is selected.
    /// </summary>
    [Parameter]
    public string? Placeholder { get; set; }

    /// <summary>
    /// Whether to show the clear button in the date picker.
    /// </summary>
    [Parameter]
    public bool ShowClearButton { get; set; } = true;

    /// <summary>
    /// Additional attributes to be splatted onto the underlying DatePicker component.
    /// </summary>
    [Parameter(CaptureUnmatchedValues = true)]
    public Dictionary<string, object>? AdditionalAttributes { get; set; }

    /// <summary>
    /// Handles component rendering and registers JS interop for month and year changes.
    /// </summary>
    protected override async Task OnAfterRenderAsync(bool firstRender)
    {
        if (firstRender)
        {
            _dotNetRef = DotNetObjectReference.Create(this);
            await JS.InvokeVoidAsync("registerFlatpickrMonthChange", "input.flatpickr-input", _dotNetRef);
            await JS.InvokeVoidAsync("registerFlatpickrYearChange", "input.flatpickr-input", _dotNetRef);
        }
        await ReloadDatesToHighlight();
    }

    protected override void OnParametersSet()
    {
        if (Locale != null){
            TextLocalizerService.ChangeLanguage(Locale);
        }
    }

    /// <summary>
    /// Invoked from JS when the month is changed in the calendar.
    /// </summary>
    [JSInvokable]
    public async Task OnMonthChanged()
    {
        await ReloadDatesToHighlight();
    }

    /// <summary>
    /// Invoked from JS when the year is changed in the calendar.
    /// </summary>
    [JSInvokable]
    public async Task OnYearChanged()
    {
        await ReloadDatesToHighlight();
    }

    /// <summary>
    /// Disposes JS interop references and the DatePicker component.
    /// </summary>
    public async ValueTask DisposeAsync()
    {
        _dotNetRef?.Dispose();
        if (datePicker != null)
            await datePicker.DisposeAsync();
    }

    /// <summary>
    /// Highlights the specified dates in the calendar using JS interop.
    /// </summary>
    private async Task ReloadDatesToHighlight()
    {
        if (HighlightedDays == null)
            return;

        string chosenLocale = this.Locale ?? "en-US";

        //Console.WriteLine("chosenLocale:" + chosenLocale);

        var datesToHighlight = HighlightedDays
            .Select(d => new { annotation = d.Annotation, date = d.Value.ToString("MMMM d, yyyy", new CultureInfo(chosenLocale)) })
            .ToArray();

        //Console.WriteLine(System.Text.Json.JsonSerializer.Serialize(datesToHighlight));

        await JS.InvokeVoidAsync(
            "highlightFlatpickrDates",
            ".flatpickr-calendar",
            datesToHighlight,
            HighlightCssClass // Pass the class as an extra argument
        );
    }

    /// <summary>
    /// Optionally provides a CSS class for a given date. Not used in this implementation.
    /// </summary>
    private string GetDateClass(DateTime date)
    {
        return string.Empty;
    }

    /// <summary>
    /// Handles the date change event from the DatePicker and propagates it to the parent component.
    /// </summary>
    private async Task OnDateChanged(DateTime newValue)
    {
        SelectedDate = newValue;
        await SelectedDateChanged.InvokeAsync(newValue);
    }

    private DatePicker<DateTime>? datePicker;
    private DotNetObjectReference<CustomDatePicker>? _dotNetRef;
}
Notice the trick done to capture unmatched values in case some parameters of DatePicker in the custom date picker is missing and we still want the user of this component to set
a parameter of the date picker component :
    ///
    /// Additional attributes to be splatted onto the underlying DatePicker component.
    ///
    [Parameter(CaptureUnmatchedValues = true)]
    public Dictionary<string, object>? AdditionalAttributes { get; set; }
The calls to IJSRunTime to register callback script handlers will register callbacks for the component, this is done in this line :
_dotNetRef = DotNetObjectReference.Create(this);
await JS.InvokeVoidAsync("registerFlatpickrMonthChange", "input.flatpickr-input", _dotNetRef);
await JS.InvokeVoidAsync("registerFlatpickrYearChange", "input.flatpickr-input", _dotNetRef);
The following client side script is registeret into the global window object to provide script event handlers that will be called when the end-user changes selected year or month, either via the UI controls or just entering the date.
datepicker-highlight.js
window.highlightFlatpickrDates = (selector, dates, highlightCssClass) => {
    //debugger
    const calendar = document.querySelector(selector);
    if (!calendar) {
        return; //Wait for Flatpickr to render days
    }
    //debugger
    setTimeout(() => {
        //
        dates.forEach(date => {
            //debugger
            const dayElem = calendar.querySelector(`.flatpickr-day[aria-label="${date.date}"]`);
            if (dayElem) {
                dayElem.classList.add(highlightCssClass);
                dayElem.setAttribute('title', date.annotation);
            }
        });
    }, 50);
};

window.registerFlatpickrMonthChange = (selector, dotNetHelper) => {
    const fpInput = document.querySelector(selector);
    if (!fpInput || !fpInput._flatpickr) {
        setTimeout(() => window.registerFlatpickrMonthChange(selector, dotNetHelper), 50);
        return;
    }
    fpInput._flatpickr.config.onMonthChange.push(function () {
        dotNetHelper.invokeMethodAsync('OnMonthChanged');
    });
};

window.registerFlatpickrYearChange = (selector, dotNetHelper) => {
    const fpInput = document.querySelector(selector);
    if (!fpInput || !fpInput._flatpickr) {
        setTimeout(() => window.registerFlatpickrYearChange(selector, dotNetHelper), 50);
        return;
    }
    fpInput._flatpickr.config.onYearChange.push(function () {
        dotNetHelper.invokeMethodAsync('OnYearChanged');
    });
};
The following test page test out the component.
StyledDatePicker.razor
@page "/"
@using BlazoriseDatePickerWithHolidays.Components
@using BlazoriseDatePickerWithHolidays.Service
@using System.Globalization
@using static BlazoriseDatePickerWithHolidays.Service.HolidayService
@inject IHolidayService HolidayService

<h3>Custom Date Picker with Highlighted Days</h3>

<p>

    <b>The date picker used here is from Blazorise library and customized to allow setting days to highlight including tooltips annotating a description of the date being highlighted.</b>
    <br />
    Blazorise DatePicker component is described here:
    <br /><br />
    <a href="https://blazorise.com/docs/components/date-picker">https://blazorise.com/docs/components/date-picker</a>
    <br /><br />
    The highlighted dates selected for this demo are Christian Holidays and other public days off in Norway.
    In Norwegian, these days off are called 'Offentlige høytidsdager'.<br />
    These days are marked with a pink background, white foreground and rounded corners. <br />
    Tooltips are added showing the Holiday name <br/>

</p>

<div class="container-fluid">
    <div class="row">
        <div class="col-md-2">
            <CustomDatePicker
                @bind-SelectedDate="selectedDate"
                Locale="en-US"
                FirstDayOfWeek="DayOfWeek.Monday"
                InputMode="DateInputMode.DateTime"
                DisplayFormat="HH:mm dd.MM.yyyy"
                InputFormat="HH:mm dd.MM.yyyy"
                TimeAs24hr="true"
                HighlightedDays="_holidays"
                @ref="@_datePicker" />
        </div>
    </div>
</div>

@{
    var chosenLocale = new CultureInfo(_datePicker?.Locale ?? "en-US");
}

<p class="mt-3">Selected date <strong>@selectedDate.ToString("HH:mm dd.MM.yyyy", chosenLocale)</strong></p>

@code {
    private DateTime selectedDate = new DateTime(2025, 5, 4);
    private static int minYear = DateTime.Today.AddYears(-20).Year;
    private List<AnnotatedDateTime>? _holidays;

    private CustomDatePicker? _datePicker;

    protected override void OnParametersSet()
    {
        _holidays = Enumerable.Range(minYear, 40)
            .SelectMany(y => HolidayService.GetHolidays(y))
            .ToList();
    }

}
The dates to select uses an implementation of IHolidayService. This implemented like this, note that this finds 'Offentlige høytidsdager' and (Christian-belief) holidays in Norway.
HolidayService.cs
namespace BlazoriseDatePickerWithHolidays.Service;

public interface IHolidayService
{
    DateTime AddWorkingDaysToDate(DateTime date, int days);
    List<string> GetHolidayNames();
    IEnumerable<HolidayService.AnnotatedDateTime> GetHolidays(int year);
    bool IsHoliday(DateTime date);
    bool IsWorkingDay(DateTime date);
}

public partial class HolidayService : IHolidayService
{

    private static MemoryCache<int, HashSet<AnnotatedDateTime>> holidays = new();

    private static readonly List<string> holidayNames = new List<string> {
            "1. nyttårsdag",
            "Palmesøndag",
            "Skjærtorsdag",
            "Langfredag",
            "1. påskedag",
            "2. påskedag",
            "Offentlig høytidsdag",
            "Grunnlovsdag",
            "Kristi Himmelfartsdag",
            "1. pinsedag",
            "2. pinsedag",
            "1. juledag",
            "2. juledag"
    };

    /// <summary>
    /// Adds the given number of working days to the given date. A working day is
    /// specified as a regular Norwegian working day, excluding weekends and all
    /// national holidays.
    ///
    /// Example 1:
    /// - Add 5 working days to Wednesday 21.03.2007 -> Yields Wednesday
    /// 28.03.2007. (skipping saturday and sunday)
    ///
    /// Example 2:
    /// - Add 5 working days to Wednesday 04.04.2007 (day before
    /// easter-long-weekend) -> yields Monday 16.04.2007 (skipping 2 weekends and
    /// 3 weekday holidays).
    /// </summary>
    /// <param name="date">The original date</param>
    /// <param name="days">The number of working days to add</param>
    /// <returns>The new date</returns>
    public DateTime AddWorkingDaysToDate(DateTime date, int days)
    {
        var localDate = date;
        for (var i = 0; i < days; i++)
        {
            localDate = localDate.AddDays(1);
            while (!IsWorkingDay(localDate))
            {
                localDate = localDate.AddDays(1);
            }
        }
        return localDate;
    }

    /// <summary>
    /// Will check if the given date is a working day. That is check if the given
    /// date is a weekend day or a national holiday.
    /// </summary>
    /// <param name="date">The date to check</param>
    /// <returns>true if the given date is a working day, false otherwise</returns>
    public bool IsWorkingDay(DateTime date)
    {
        return date.DayOfWeek != DayOfWeek.Saturday && date.DayOfWeek != DayOfWeek.Sunday
               && !IsHoliday(date);
    }

    public List<string> GetHolidayNames()
    {
        return holidayNames;
    }

    /// <summary>
    /// Check if given Date object is a holiday.
    /// </summary>
    /// <param name="date">date to check if is a holiday</param>
    /// <returns>true if holiday, false otherwise</returns>
    public bool IsHoliday(DateTime date)
    {
        var year = date.Year;
        var holidaysForYear = GetHolidaySet(year);
        foreach (var holiday in holidaysForYear)
        {
            if (CheckDate(date, holiday.Value))
            {
                return true;
            }
        }
        return false;
    }

    /// <summary>
    /// Return a sorted array of holidays for a given year.
    /// </summary>
    /// <param name="year">The year to get holidays for</param>
    /// <returns>Holidays, sorted by date</returns>
    public IEnumerable<AnnotatedDateTime> GetHolidays(int year)
    {
        var days = GetHolidaySet(year);
        var listOfHolidays = new List<AnnotatedDateTime>(days);
        listOfHolidays.Sort((date1, date2) => date1.Value.CompareTo(date2.Value));
        return listOfHolidays;
    }

    /// <summary>
    /// Get a set of holidays for a given year
    /// </summary>
    /// <param name="year">The year to get holidays for</param>
    /// <returns>Holidays for year</returns>
    private IEnumerable<AnnotatedDateTime> GetHolidaySet(int year)
    {
        if (holidays == null)
        {
            holidays = new MemoryCache<int, HashSet<AnnotatedDateTime>>();
        }
        if (holidays.Get(year) == null)
        {
            var yearSet = new HashSet<AnnotatedDateTime>();

            // Add set holidays.
            yearSet.Add(new AnnotatedDateTime("1. nyttårsdag " + year, new DateTime(year, 1, 1)));
            yearSet.Add(new AnnotatedDateTime("Offentlig høytidsdag " + year, new DateTime(year, 5, 1)));
            yearSet.Add(new AnnotatedDateTime("Grunnlovsdag " + year, new DateTime(year, 5, 17)));
            yearSet.Add(new AnnotatedDateTime("1. juledag " + year, new DateTime(year, 12, 25)));
            yearSet.Add(new AnnotatedDateTime("2. juledag " + year, new DateTime(year, 12, 26)));

            // Add movable holidays - based on easter day.
            var easterDay = GetEasterDay(year);

            // Sunday before easter.
            yearSet.Add(new AnnotatedDateTime("Palmesøndag " + year, easterDay.AddDays(-7)));

            // Thurday before easter.
            yearSet.Add(new AnnotatedDateTime("Skjærtorsdag " + year, easterDay.AddDays(-3)));

            // Friday before easter.
            yearSet.Add(new AnnotatedDateTime("Langfredag " + year, easterDay.AddDays(-2)));

            // Easter day.
            yearSet.Add(new AnnotatedDateTime("1. påskedag " + year, easterDay));

            // Second easter day.
            yearSet.Add(new AnnotatedDateTime("2. påskedag " + year, easterDay.AddDays(1)));

            // "Kristi himmelfart" day.
            yearSet.Add(new AnnotatedDateTime("Kristi Himmelfartsdag " + year, easterDay.AddDays(39)));

            // "Pinse" day.
            yearSet.Add(new AnnotatedDateTime("1. pinsedag " + year, easterDay.AddDays(49)));

            // Second "Pinse" day.
            yearSet.Add(new AnnotatedDateTime("2. pinsedag " + year, easterDay.AddDays(50)));

            holidays.Add(year, yearSet);
        }
        return holidays.GetAsValue(year)!;
    }

    /// <summary>
    ///  Calculates easter day (sunday) by using Spencer Jones formula found here:
    ///  http://no.wikipedia.org/wiki/P%C3%A5skeformelen
    /// </summary>
    /// <param name="year">year</param>
    /// <returns>easterday for year</returns>
    private DateTime GetEasterDay(int year)
    {
        int a = year % 19;
        int b = year / 100;
        int c = year % 100;
        int d = b / 4;
        int e = b % 4;
        int f = (b + 8) / 25;
        int g = (b - f + 1) / 3;
        int h = (19 * a + b - d - g + 15) % 30;
        int i = c / 4;
        int k = c % 4;
        int l = (32 + 2 * e + 2 * i - h - k) % 7;
        int m = (a + 11 * h + 22 * l) / 451;
        int n = (h + l - 7 * m + 114) / 31; // This is the month number.
        int p = (h + l - 7 * m + 114) % 31; // This is the date minus one.

        return new DateTime(year, n, p + 1);
    }

    private bool CheckDate(DateTime date, DateTime other)
    {
        return date.Day == other.Day && date.Month == other.Month;
    }

}
Also, some CSS rules are added here for the custom control :
App.css
.flatpickr-day.pink-day {
    background: #ff69b4 !important; /* Hot pink */
    color: white !important;
    border-radius: 50%;
}

.addon-margin {
    margin-left: 0.25rem !important; /* Adjust as needed */
}
Finally, a screenshot showing how the Custom date picker works. We have highlighted dates in May 2025 here, I chose to generate holidays for +- 20 years here. Obviously, an optimization would be the possibility to only pass in the chose year of the date picker and not a wide range of years. This is however looking to be fast anyways and I believe you can pass in a large number of dates to highlight here.
Hopefully, this article has given you more inspiration how to add highlighting of dates into the Blazorise Datepicker component for Blazor !


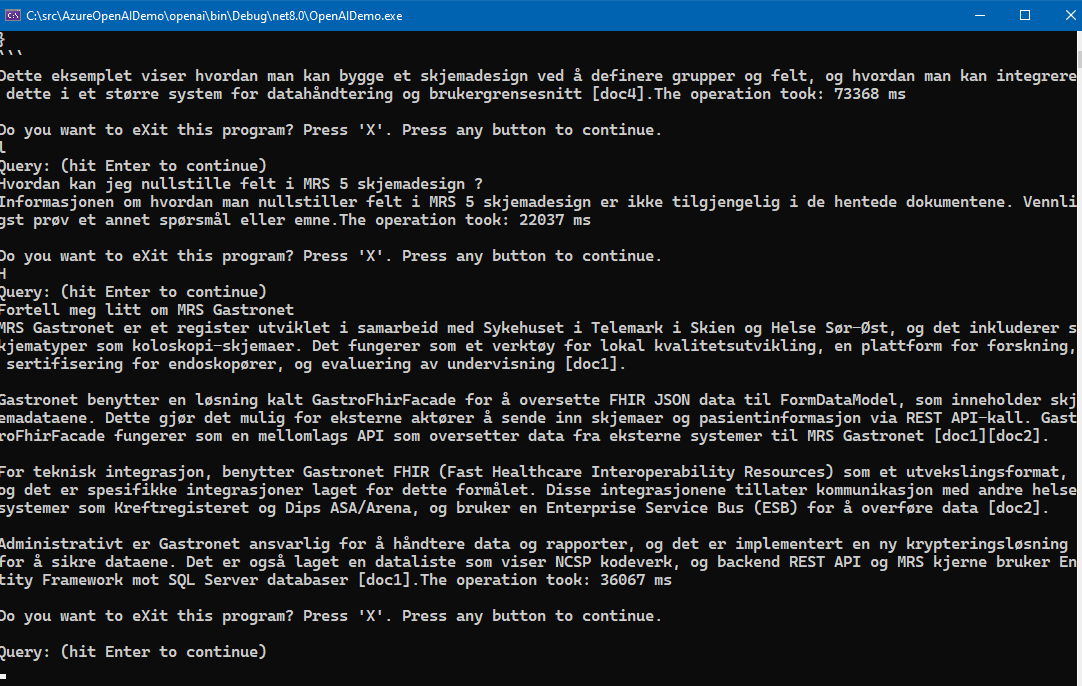 Please note that the Free tier of Azure AI Search is rather slow and seems to only allow queryes at a certain interval, it will suffice to just test it out. To really test it out in for example an Intranet scenario, the standard tier Azure AI search service is recommended, at about 250 USD per month as noted.