Tuesday 21 August 2018

Creating a validation attribute for multiple enum values in C#

This article will present a validation attribute for multiple enum value in C#. In C#, generics is not supported in attributes. The following class therefore specifyes the type of enum and provides a list of invalid enum values as an example of such an attribute.


using System;
using System.Collections.Generic;
using System.ComponentModel.DataAnnotations;

namespace ValidateEnums
{

    public sealed class InvalidEnumsAttribute : ValidationAttribute
    {

        private List<object> _invalidValues = new List<object>();


        public InvalidEnumsAttribute(Type enumType, params object[] enumValues)
        {
            foreach (var enumValue in enumValues)
            {
                var _invalidValueParsed = Enum.Parse(enumType, enumValue.ToString());
                _invalidValues.Add(_invalidValueParsed);
            }
        }

        public override bool IsValid(object value)
        {
            foreach (var invalidValue in _invalidValues)
            {
                if (Enum.Equals(invalidValue, value))
                    return false;
            }
            return true;
        }

    }

}

Let us make use of this attribute in a sample class.

 public class Snack
    {
        [InvalidEnums(typeof(IceCream), IceCream.None, IceCream.All )]
        public IceCream IceCream { get; set; }

    }

We can then test out this attribute easily in NUnit tests for example:

[TestFixture]
    public class TestEnumValidationThrowsExpected
    { 

        [Test]
        [ExpectedException(typeof(ValidationException))]
        [TestCase(IceCream.All)]
        [TestCase(IceCream.None)]
        public void InvalidEnumsAttributeTest_ThrowsExpected(IceCream iceCream)
        {
            var snack = new Snack { IceCream = iceCream };
            Validator.ValidateObject(snack, new ValidationContext(snack, null, null), true);
        }

        [Test]
        public void InvalidEnumsAttributeTest_Passes_Accepted()
        {
            var snack = new Snack { IceCream = IceCream.Vanilla };
            Validator.ValidateObject(snack, new ValidationContext(snack, null, null), true);
            Assert.IsTrue(true, "Test passed for valid ice cream!"); 
        }


Sunday 19 August 2018

ConfigurationManager for .Net Core

.Net Core is changing a lot of the underlying technology for .Net developers migrating to this development environment. System.Configuration.ConfigurationManager class is gone and web.config and app.config files, which are XML-based are primrily replaced with .json files, at least in Asp.NET Core 2 for example. Let's look at how we can implement a class to let you at least be able to read AppSettings in your applicationSettings.json file which can be later refined. This implementation is my first version.

using Microsoft.AspNetCore.Hosting;
using Microsoft.Extensions.Configuration;
using System.IO;
using System.Linq;

namespace WebApplication1
{

    public static class ConfigurationManager
    {

        private static IConfiguration _configuration;

        private static string _basePath;

        private static string[] _configFileNames;

        public static void SetBasePath(IHostingEnvironment hostingEnvironment)
        {
            _basePath = hostingEnvironment.ContentRootPath;
            _configuration = null;

            //fix base path
            _configuration = GetConfigurationObject();
        }

        public static void SetApplicationConfigFiles(params string[] configFileNames)
        {
            _configFileNames = configFileNames;
        }

        public static IConfiguration AppSettings
        {
            get
            {
                if (_configuration != null)
                    return _configuration;

                _configuration = GetConfigurationObject();
                return _configuration;
            }
        }

        private static IConfiguration GetConfigurationObject()
        {
            var builder = new ConfigurationBuilder()
                .SetBasePath(_basePath ?? Directory.GetCurrentDirectory());
            if (_configFileNames != null && _configFileNames.Any())
            {
                foreach (var configFile in _configFileNames)
                {
                    builder.AddJsonFile(configFile, true, true);
                }
            }
            else
                builder.AddJsonFile("appsettings.json", false, true);
            return builder.Build(); 
              
        }
    }
}

We can then easily get app settings from our config file:

  string endPointUri = ConfigurationManager.AppSettings["EmployeeWSEndpointUri"];

Sample appsettings.json file:
  {
  "Logging": {
    "IncludeScopes": false,
    "Debug": {
      "LogLevel": {
        "Default": "Warning"
      }
    },
    "Console": {
      "LogLevel": {
        "Default": "Warning"
      }
    }
  },
  "EmployeeWSEndpointUri": "https://someserver.somedomain.no/someproduct/somewcfservice.svc"

}

 
If you have nested config settings, you can refer to these using the syntax SomeAppSetting:SomeSubAppSetting, like "Logging:Debug:LogLevel:Default".

Creating a VM in Azure with Powershell core in Linux

This article will describe how a virtual machine in Azure from a command line in Linux. Powershell core will be used and I have tested this procedure using the Linux distribution MX-17 Horizon. First, we will update the package list for APT (Advanced Packaging Tool), get the latest versions of cURL and apt-transport-https and add the GPG key for the Microsoft repository for Powershell core. Then APT is once more updated and the package powershell is installed. The following script works on Debian-based distributions:
 sudo apt-get install 
 sudo apt-get install curl apt-transport-https
 curl https://packages.microsoft.com/keys/microsoft.asc | sudo apt-key add -
 
 sudo sh -c 'echo "deb [arch=amd64] https://packages.microsoft.com/repos/microsoft-debian-jessie-prod jessie main" > /etc/apt/sources.list.d/microsoft.list'

 sudo apt-get update
 sudo apt-get install -y powershell 
 
On my system however, I need to make use of Snap packages. This is because MX-Horizon fails to install powershell due to restrictions on libssl1.0 and libicu52. Anyways this route let me start up Powershell on MX-17 Horizon:
 sudo apt-get install snapd
 sudo snap install powershell-preview --classic
 sudo snap run powershell-preview 


Logging into Azure RM account

Running powershell-preview allows you to both run Powershell commands such as Get-ChildItem ("ls") and Unix tools such as ls (!) from the Powershell command line. We will first install the Powershell module AzureRM.NetCore inside the Powershell session, which is running.
 Install-Module AzureRM.Netcore
 Get-Command -Module AzureRM.Compute.Netcore
 

The last command is executed to check that the Powershell module is available. Type [Y] to allow the module installation in the first step. Next off, logging into the Azure Resource Manager. Type the following command in Powershell core:
 Login-AzureRMAccount
 
Running this command will prompt a code and tell you to open up a browser window and log on to: https://microsoft.com/devicelogin Then you log in to your Azure account and if you are successfully logged in, your Powershell core session is authenticated and you can access your Azure account and its resources!

Creating the Virtual machine in Azure

Creating the virtual machine is done in several steps. The script below is to be saved into a Powershell script file, forexample AzureVmCreate.ps1. There are many steps involved into establishing an installation of a VM in Azure. We will in this sample set up all the necessities to get an Ubuntu Server LTS. If you already have got for example a resource group in Azure, the script below can use this resource group instead of creating a new one. The list of steps are as follows to create a Linux VM in Azure:
  • Create a resource group
  • Create a subnet config
  • Create a virtual network, set it up with the subnet config
  • Create a public IP
  • Create a security rule config to allow port 22 (SSH)
  • Create a network security group nsg and add in the security rule config
  • Create a network interface card nic and associate it with the public ip and the nsg
  • Create a VM config and set the operating system, OS image and nic
  • Create a VM config's SHH public key config
  • Create a VM - Virtual Machine in Azure !

param([string]$resourceGroupName,
       [string]$resourceGroupLocation,
       [string]$vmComputerName,
       [string]$vmUser, 
       [string]$vmUserPassword,
       [string]$virtualNetworkName)
#Write-Host $resourceGroupName
#Write-Host $resourceGroupLocation
#Write-Host $vmComputerName
#Write-Host $vmUser
#Write-Host $vmUserPassword

# Definer user name and blank password
$securePassword = ConvertTo-SecureString ' ' -AsPlainText -Force
$cred = New-Object System.Management.Automation.PSCredential ("azureuser", $securePassword)

New-AzureRmResourceGroup -Name $resourceGroupName -Location $resourceGroupLocation 

$subnetConfig = New-AzureRmVirtualNetworkSubnetConfig -Name default -AddressPrefix 10.0.0.0/24  

$virtualNetwork = New-AzureRMVirtualNetwork -ResourceGroupName $resourceGroupName -Name `
$virtualNetworkName -AddressPrefix 10.0.0.0/16 -Location $resourceGroupLocation `
-Subnet $subnetConfig

Write-Host "Subnet id: " $virtualNetwork.Subnets[0].Id

# Create a public IP address and specify a DNS name
$pip = New-AzureRmPublicIpAddress -ResourceGroupName $resourceGroupName -Location $resourceGroupLocation `
  -Name "mypublicdns$(Get-Random)" -AllocationMethod Static -IdleTimeoutInMinutes 4

# Create an inbound network security group rule for port 22
$nsgRuleSSH = New-AzureRmNetworkSecurityRuleConfig -Name myNetworkSecurityGroupRuleSSH  -Protocol Tcp `
  -Direction Inbound -Priority 1000 -SourceAddressPrefix * -SourcePortRange * -DestinationAddressPrefix * `
  -DestinationPortRange 22 -Access Allow

# Create a network security group
$nsg = New-AzureRmNetworkSecurityGroup -ResourceGroupName $resourceGroupName -Location $resourceGroupLocation `
  -Name myNetworkSecurityGroup -SecurityRules $nsgRuleSSH

# Create a virtual network card and associate with public IP address and NSG
$nic = New-AzureRmNetworkInterface -Name myNic -ResourceGroupName $resourceGroupName -Location $resourceGroupLocation `
  -SubnetId $virtualNetwork.Subnets[0].Id -PublicIpAddressId $pip.Id -NetworkSecurityGroupId $nsg.Id


# Create a virtual machine configuration
$vmConfig = New-AzureRmVMConfig -VMName $vmComputerName -VMSize Standard_D1 | `
Set-AzureRmVMOperatingSystem -Linux -ComputerName $vmComputerName -Credential $cred -DisablePasswordAuthentication | `
Set-AzureRmVMSourceImage -PublisherName Canonical -Offer UbuntuServer -Skus 14.04.2-LTS -Version latest | `
Add-AzureRmVMNetworkInterface -Id $nic.Id


# Configure SSH Keys
$sshPublicKey = Get-Content "$HOME/.ssh/id_rsa.pub"
Add-AzureRmVMSshPublicKey -VM $vmconfig -KeyData $sshPublicKey -Path "/home/azureuser/.ssh/authorized_keys"

# Create a virtual machine
New-AzureRmVM -ResourceGroupName $resourceGroupName -Location $resourceGroupLocation -VM $vmConfig

 
We can then instantiate a new VM in Azure running the script above, which will create a standard D1 blade server in Azure with approx. 3,5 GB RAM and 30 GB disk space with Ubuntu Server LTS latest from the publisher Canonical by calling this script like for example: ./AzureVmCreate.ps1 -resourceGroupName "SomeResourceGroup" -resourceGroupLocation "northcentralus" "SomeVmComputer" -vmUser "adminUser" -password "s0m3CoolPassw0rkzzD" -virtualNetworkName "SomeVirtualNetwork" After the VM is created, which for me took about 5 minutes time before the VM was up and running in Azure, you can access it by visiting the Azure portal at https://portal.azure.com You can then take notice of the public IP adress that the script in this article created and connect with : ssh azureuser@ip_address_to_linux_VM_you_just_created_in_Azure! The following images shows me logging into the Ubuntu Server LTS Virtual Machine that was created with the Powershell core script in this article!
A complete list of available Linux images can be seen in the Azure marketplace or in the Microsoft Docs: Linux VMs in Azure overview After installation, you can run the following cmdlet to clean up the resource group and all its resources, including the VM you created for testing.
  Remove-AzureRmResourceGroup -Name myResourceGroup
 

Thursday 9 August 2018

Detect USB drives in a WPF application


We can use the class System.IO.DriveInfo to retrieve all the drives on the system and look for drives where the DriveType is Removable. In addition, the removable drive (USB usually) must be ready, which is accessible as the property IsReady. First off, we define a provider to retrieve the removable drives:
    using System.Collections.Generic;
    using System.IO;
    using System.Linq;

    namespace TestPopWpfWindow
    {

    public static class UsbDriveListProvider
    {


        public static IEnumerable<DriveInfo> GetAllRemovableDrives()
        {
            var driveInfos = DriveInfo.GetDrives().AsEnumerable();
            driveInfos = driveInfos.Where(drive => drive.DriveType == DriveType.Removable);
            return driveInfos;
        }

    }
}

Let us use the MVVM pattern also, so we define a ViewModelbase class, implementing INotifyPropertyChanged.
using System.ComponentModel;

namespace TestPopWpfWindow
{

    public class ViewModelBase : INotifyPropertyChanged
    {

        public event PropertyChangedEventHandler PropertyChanged;

        public void RaisePropertyChanged(string propertyName)
        {
            if (PropertyChanged != null)
                PropertyChanged(this, new PropertyChangedEventArgs(propertyName));
        }


    }
}
It is also handy to have an implemetation of ICommand:
    using System;
    using System.Windows.Input;

    namespace TestPopWpfWindow
    {

        public class RelayCommand : ICommand
        {

            private Predicate<object> _canExecute;

            private Action<object> _execute;  


            public RelayCommand(Predicate<object> canExecute, Action<object> execute)
            {
                _canExecute = canExecute;
                _execute = execute;
            }

            public bool CanExecute(object parameter)
            {
                return _canExecute(parameter); 
            }

            public event EventHandler CanExecuteChanged;

            public void Execute(object parameter)
            {
                _execute(parameter); 
            }

        }
    }

We also set the DataContext of MainWindow to an instance of a demo view model defined afterwards:
namespace TestPopWpfWindow
{

    /// <summary>
    /// Interaction logic for MainWindow.xaml
    /// </summary>
    public partial class MainWindow : Window
    {

        public MainWindow()
        {
            InitializeComponent();
            DataContext = new UsbDriveInfoDemoViewModel();
        }

    }
}

We then define the view model itself and use System.Management.ManagementEventWatcher to look for changes in the drives mounted onto the system.
  using System;
    using System.Collections.Generic;
    using System.Diagnostics;
    using System.IO;
    using System.Management;
    using System.Windows;
    using System.Windows.Input;

    namespace TestPopWpfWindow
    {

        public class UsbDriveInfoDemoViewModel : ViewModelBase, IDisposable
        {

            public UsbDriveInfoDemoViewModel()
            {
                DriveInfos = new List<DriveInfo>();
                ReloadDriveInfos();
                RegisterManagementEventWatching(); 
                TargetUsbDrive = @"E:<"; 
                AccessCommand = new RelayCommand(x => true, x => MessageBox.Show("Functionality executed."));
            }

            public int UsbDriveCount { get; set; }

            private string _targetUsbDrive;

            public string TargetUsbDrive
            {
                get { return _targetUsbDrive; }
                set
                {
                    if (_targetUsbDrive != value)
                    {
                        _targetUsbDrive = value; 
                        RaisePropertyChanged("TargetUsbDrive");
                        RaisePropertyChanged("DriveInfo");
                    }
                }
            }

            public ICommand AccessCommand { get; set; }

            private void ReloadDriveInfos()
            {
                var usbDrives = UsbDriveListProvider.GetAllRemovableDrives();

                Application.Current.Dispatcher.Invoke(() =>
                {
                    DriveInfos.Clear();

                    foreach (var usbDrive in usbDrives)
                    {
                        DriveInfos.Add(usbDrive);
                    }
                    UsbDriveCount = DriveInfos.Count;
                    RaisePropertyChanged("UsbDriveCount");
                    RaisePropertyChanged("DriveInfos");
                }); 
            }

            public List<DriveInfo> DriveInfos { get; set; }

            private ManagementEventWatcher _watcher;

            private void RegisterManagementEventWatching()
            {
                _watcher = new ManagementEventWatcher();
                var query = new WqlEventQuery("SELECT * FROM Win32_VolumeChangeEvent");
                _watcher.EventArrived += watcher_EventArrived;
                _watcher.Query = query;
                _watcher.Start();
            }

            private void watcher_EventArrived(object sender, EventArrivedEventArgs e)
            {
                Debug.WriteLine(e.NewEvent);
                ReloadDriveInfos();
            }


            public void Dispose()
            {
                if (_watcher != null)
                {
                    _watcher.Stop();
                    _watcher.EventArrived -= watcher_EventArrived;
                }
            }

        }

    }

We also define a WPF multi-converter next to enable the button:
using System;
using System.Collections.Generic;
using System.Globalization;
using System.IO;
using System.Linq;
using System.Windows.Data;

namespace TestPopWpfWindow
{

    public class UsbDriveAvailableEnablerConverter : IMultiValueConverter
    {

        public object Convert(object[] values, Type targetType, object parameter, CultureInfo culture)
        {
            if (values == null || values.Count() != 2)
                return false;

            var driveInfos = values[1] as List<DriveInfo>;
            var targetDrive = values[0] as string; 
            if (driveInfos == null || !driveInfos.Any() || string.IsNullOrEmpty(targetDrive))
                return false;
            return driveInfos.Any(d => d.IsReady && d.Name == targetDrive);
        }


        public object[] ConvertBack(object value, Type[] targetTypes, object parameter, CultureInfo culture)
        {
            throw new NotImplementedException();
        }
    }
}

And we define a GUI to test this code:
<Window x:Class="TestPopWpfWindow.MainWindow"
        xmlns="http://schemas.microsoft.com/winfx/2006/xaml/presentation"
        xmlns:x="http://schemas.microsoft.com/winfx/2006/xaml"
        xmlns:local="clr-namespace:TestPopWpfWindow"
        Title="MainWindow" Height="350" Width="525">

    <Window.Resources>

        <Style x:Key="usbLabel" TargetType="Label">
            <Style.Triggers>
                <DataTrigger Binding="{Binding IsReady}" Value="False">
                    <Setter Property="Background" Value="Gray"></Setter>
                </DataTrigger>
                <DataTrigger Binding="{Binding IsReady}" Value="True">
                    <Setter Property="Background" Value="Green"></Setter>
                </DataTrigger>
            </Style.Triggers>
        </Style>

        <local:UsbDriveAvailableEnablerConverter x:Key="usbDriveAvailableEnablerConverter"></local:UsbDriveAvailableEnablerConverter>

    </Window.Resources>


    <Grid>
        <Grid.RowDefinitions>
            <RowDefinition Height="Auto"></RowDefinition>
            <RowDefinition Height="Auto"></RowDefinition>
            <RowDefinition Height="Auto"></RowDefinition>

        </Grid.RowDefinitions>

        <StackPanel Orientation="Vertical">
            <TextBlock Text="USB Drive-detector" FontWeight="DemiBold" HorizontalAlignment="Center" FontSize="14" Margin="2"></TextBlock>
            <TextBlock Text="Removable drives on the system" FontWeight="Normal" HorizontalAlignment="Center" Margin="2"></TextBlock>
            <TextBlock Text="Drives detected:" FontWeight="Normal" HorizontalAlignment="Center" Margin="2"></TextBlock>
            <TextBlock Text="{Binding UsbDriveCount, UpdateSourceTrigger=PropertyChanged}" FontWeight="Normal" HorizontalAlignment="Center" Margin="2"></TextBlock>

            <ItemsControl Grid.Row="0" ItemsSource="{Binding DriveInfos, UpdateSourceTrigger=PropertyChanged}"
                          Width="100" BorderBrush="Black" BorderThickness="1">
                <ItemsControl.ItemTemplate>
                    <DataTemplate>
                        <StackPanel Orientation="Vertical">
                            <Label Style="{StaticResource usbLabel}" Width="32" Height="32" FontSize="18" Foreground="White" Content="{Binding Name}">
                            </Label>
                        </StackPanel>

                    </DataTemplate>
                </ItemsControl.ItemTemplate>
            </ItemsControl>
        </StackPanel>

        <Button Grid.Row="1" Height="24" Width="130" VerticalAlignment="Top" Margin="10" Content="Access functionality" Command="{Binding AccessCommand}">
            <Button.IsEnabled>
                <MultiBinding Converter="{StaticResource usbDriveAvailableEnablerConverter}">
                    <MultiBinding.Bindings>
                        <Binding Path="TargetUsbDrive"></Binding>
                        <Binding Path="DriveInfos"></Binding>
                    </MultiBinding.Bindings>
                </MultiBinding>
            </Button.IsEnabled>
        </Button>

        <StackPanel Grid.Row="2" Orientation="Horizontal" HorizontalAlignment="Center">
            <TextBlock Margin="2" Text="Target this USB-drive:"></TextBlock>
            <TextBox Margin="2" Text="{Binding TargetUsbDrive, UpdateSourceTrigger=LostFocus}" Width="100"></TextBox>
        </StackPanel>

    </Grid>

</Window>

I have now provided the Visual Studio 2013 solution with the code above available for download here:

Download VS 2013 Solution with source code above

Explore contents of a running container in Docker

This is a short tip how to explorer the contents of a running container in Docker.


Get Docker for windows from here: Docker for Windows First off, we can list our containers with the following command:

docker container ls
Note the CONTAINER ID value. Use this to explore the contents of the running container:

docker exec -it 231 bash

Note that in this example I just have to type the necessary part of the Guid of the CONTAINER ID to discern it from others and issue an exec command with the parameters -it (interactive and pseudo tty session) followed with bash. From now on, I can explore the container easily: ls -al The following image sums this up:
Another cool tip, how about installing a new nginx web server on port 81 on your Windows Dev Box? Simple!

docker run --detach publish 81:80 nginx

And the following command pulls a windowsservercore docker image (10,7 GB size) and starts it up and gives you a pseudo-terminal which is interactive:

docker run -it microsoft/windowsservercore

Wednesday 8 August 2018

Doubly Linked List in C#

I am reading the book "C#7 and .NET Core 2.0 High Performance" about data structures and came accross Doubly linked lists. This is an interesting data structure. We most often use arrays and lists in .NET in everyday use, but both are not as high performant as linked lists when it comes to inserting and removing items in their structure. Removing an item and inserting an item in a list is only quick, if we add to the end of the list or remove from the end of the list. Arrays have the same behavior, if you have a large data structure with many items, consider using a LinkedList instead. .NET already got a good implementation of linked lists in System.Collections.Generic with the LinkedListNode class, so this article just presents a class I wrote for fun on my own. If you want to see the source code of the .Net class, it is available here:
LinkedListNode implementation(Reference Source /.NET)
Now how fun is it to just use .NET's implementation, we want to learn something and do things ourselves as devoted coders? Therefore I present my own implementation! You can find the source code by cloning the following Git repo: Actually, the implementation is easy, the most cumbersome part is to be careful with the next and previous pointers. Just like the .NET implementation, this class supports generic and a payload of different types, in the demo I will use string as the payload of each node.

git clone https://toreaurstad@bitbucket.org/toreaurstad/doublylinkedlist.git


using System;
using System.Collections.Generic;
using System.Linq;
using System.Text;
// ReSharper disable ArrangeThisQualifier
// ReSharper disable RedundantNameQualifier

namespace DoublyLinkedList
{

    /// <summary>
    /// Node in a doubly linked list data structure with pointers to the previous and next item in the linked list, if any.
    /// Allows quick insertion and removal of values in even large data structures
    /// </summary>
    /// <typeparam name="T">The type of Data in each node of the doubly linked list</typeparam>
    public class LinkedListNode<T>
    {

        public LinkedListNode(T data)
        {
            _data = data;
            _prev = null; //Init previous reference to null
            _next = null; //Init next reference to null
        }


        public T Data
        {
            get { return _data; }
        }

        /// <summary>
        /// Attempts to find a value in the doubly linked list. Uses object.Equals for comparison. O(N) complexity.
        /// </summary>
        /// <param name="value">Value to find</param>
        /// <returns>The first node with the matching value, if any.</returns>
        public LinkedListNode<T> Find(T value)
        {
            if (object.Equals(Data, value))
                return this;
            if (this._next is null)
                return null;
            return Find(this._next, value);
        }

        /// <summary>
        /// Attempts to find a value in the doubly linked list by a matchen with a given predicate. Returns null if no node values matches. O(N) complexity 
        /// </summary>
        /// <param name="searchCondition"></param>
        /// <returns></returns>
        public LinkedListNode<T> Find(Predicate<LinkedListNode<T>> searchCondition)
        {
            if (searchCondition(this))
                return this;
            if (this._next != null)
                return this._next.Find(searchCondition);
            return null;
        }

        /// <summary>
        /// Searches for multiple values and returns the nodes found. The search returns the first match if any for every search value. O(N*N) complexity.
        /// </summary>
        /// <param name="values"></param>
        /// <returns></returns>
        public LinkedListNode<T>[] FindMultiple(params T[] values)
        {
            if (values is null)
                throw new ArgumentNullException(nameof(values));
            if (!values.Any())
                throw new ArgumentException("Please provide a nonempty array of values!");
            var foundValues = new List<LinkedListNode<T>>();
            foreach (T value in values)
            {
                LinkedListNode<T> foundValue = Find(value);
                if (foundValue != null)
                    foundValues.Add(foundValue);
            }

            return foundValues.ToArray();
        }

        // ReSharper disable once UnusedMember.Local
        private LinkedListNode<T> Find(LinkedListNode<T> node, Predicate<T> searchCondition)
        {
            if (node is null)
                return null;
            if (searchCondition(node.Data))
                return node;
            if (node._next != null)
                return Find(node._next, searchCondition);
            return null;
        }

        private LinkedListNode<T> Find(LinkedListNode<T> node, T value)
        {
            if (node is null)
                return null;
            if (object.Equals(node.Data, value))
                return node;
            if (node._next != null)
                return Find(node._next, value);
            return null;
        }

        /// <summary>
        /// Inserts a node into the doubly linked list. Adjusts the prev and next pointers of the inserted node. O(1) complexity.
        /// </summary>
        /// <param name="node">The node to insert, node's prev and next pointers will be overwritted if already set.</param>
        /// <returns>The inserted node with updated prev and next pointers</returns>
        public LinkedListNode<T> Insert(LinkedListNode<T> node)
        {
            if (node is null)
                throw new ArgumentNullException(nameof(node));

            LinkedListNode<T> nextNode = this._next;
            node._prev = this;
            this._next = node;
            node._next = nextNode;
            if (nextNode != null)
                nextNode._prev = node;

            return node;
        }

        /// <summary>
        /// Inserts multiple nodes into the doubly linked list by building nodes with passed in values. O(1) complexity.
        /// </summary>
        /// <param name="values"></param>
        /// <returns></returns>
        public LinkedListNode<T>[] Insert(params T[] values)
        {
            if (values is null)
                throw new ArgumentNullException(nameof(values));
            if (!values.Any())
                throw new ArgumentException("Please provide a nonempty array of values!");

            values = values.Reverse().ToArray(); //Reverse order so insertion behaves sequentially 

            var inserted = new List<LinkedListNode<T>>();

            foreach (T value in values)
            {
                LinkedListNode<T> node = new LinkedListNode<T>(value);
                inserted.Add(Insert(node));
            }

            return inserted.ToArray();
        }

        /// <summary>
        /// Removes a node from the linked list. Adjusts the previous and next pointers of removed node. O(1) complexity.
        /// </summary>
        /// <param name="node"></param>
        /// <returns></returns>
        public LinkedListNode<T> Remove(LinkedListNode<T> node)
        {
            if (node is null)
                throw new ArgumentNullException(nameof(node)); 

            if (node._prev != null)
                node._prev._next = node._next;
            if (node._next != null)
                node._next._prev = node._prev;

            //Set unneeded references to null now and to avoid misuse
            node._prev = null;
            node._next = null;

            return node;
        }

        public void Remove()
        {
            if (this._prev != null)
                this._prev._next = this._next;
            if (this._next != null)
                this._next._prev = this._prev;

            //Set unneeded references to null now and to avoid misuse
            this._prev = null;
            this._next = null;
        }

        public override string ToString()
        {
            StringBuilder sb = new StringBuilder();
            if (this._prev is null)
                sb.Append(Head);
            sb.Append(_data + GetArrow(this));
            IterateLinkedList(this._next, sb);
            return sb.ToString();
        }

        /// <summary>
        /// Iterates the doubly linked list and builds a string to output in the ToString() method
        /// </summary>
        /// <param name="node">LinkedListNode</param>
        /// <param name="sb">StringBuilder</param>
        private void IterateLinkedList(LinkedListNode<T> node, StringBuilder sb)
        {
            if (node != null)
            {
                sb.Append(node.Data + GetArrow(node));
                if (node._next != null)
                    IterateLinkedList(node._next, sb);
            }
        }

        private string GetArrow(LinkedListNode<T> node)
        {
            if (node != null)
            {
                if (node._next != null && node._next._prev != null)
                    return DoubleArrow;
                if (node._next != null && node._next._prev == null)
                    return Arrow;
                if (node._next == null)
                    return Arrow + NullString;
            }

            return ArrowUndefined;
        }

        private const string Head = "HEAD->";

        private const string Arrow = "->";

        private const string DoubleArrow = "<->";

        private const string ArrowUndefined = "??MISSINGLINK??";

        private const string NullString = "NULL";

        private readonly T _data;

        private LinkedListNode<T> _prev;

        private LinkedListNode<T> _next;

    }
}


This implementation has not got a specific pointer to the head of the list like a circular linked list can provide. The following code makes use of this class to demonstrate its usage:

using System;
using System.Diagnostics;
using System.Linq;

namespace DoublyLinkedList
{
    class Program
    {
        // ReSharper disable once UnusedParameter.Local
        static void Main(string[] args)
        {
            var root = new LinkedListNode("Hello");
            root.Insert(new LinkedListNode("world"));
            root.Insert(new LinkedListNode("Testing"));
            root.Insert(new LinkedListNode("Double linked list!"));

            root.Insert("Inserting", "some", "values!");

            root.Insert("Delete", "me", "please");

            root.FindMultiple("Delete", "me").ToList().ForEach(n => n.Remove(n));

            root.Find(n => n.Data.Contains("pl")).Remove();

            var mismatch = root.Find("Nonexisting value");
            Debug.Assert(mismatch is null, "Expected to not find any item in this doubly linked list with this search value");

            string rootRepresentation = root.ToString();

            Debug.Assert(rootRepresentation == @"HEAD->Hello<->Inserting<->some<->values!<->Double linked list!<->Testing<->world->NULL");

            Console.WriteLine(rootRepresentation);

            Console.ReadKey();
        }
    }
}

The output of this linked list is displaying the contents of the doubly linked list:

HEAD->Hello<->Inserting<->some<->values!<->Double linked list!<->Testing<->world->NULL

As we can see, with our ToString implementation we can deduce that the first and last node is special, the first one lacks a prev pointer illustrated by "HEAD->" and the last node lacks a next pointer illustrated with "->NULL". You will find this in the implementation of the class. I have decided to actually revert the order if the client wants to insert multiple values, as that ordering behaves more naturally. The client can look after a value or multiple values or search with a given predicate, or pass in a node and use it to search. Also, it is possible to remove a node. We end up with an implementation of a Doubly Linked list that can be used in many scenarios. I would advice you to use the .NET version as it supports more features, such as a pointer to the HEAD node. But this implementation is compact and easy to understand for many developers. You will usually use linked list in scenarios where you have much data and want to quickly insert or remove one or several nodes in the linked list. It also supports quick navigation from a node to its previous or next node. Imagine for example working with a class called Book which needs to have an iterable structure ("Pages") to move to the next and previous page and at the same time insert new pages or removing a page from the middle of the data structure. Using an array or a list would be low performant and slow, while a doubly linked list would actually allow the developer to create code that quickly inserts a new page or removes a page at an arbitrary position in the data structure of the Book. This class can of course be optimized to support for example circular linked list with a pointer always to HEAD, or maybe you want to have pointer to HEAD and TAIL and not have a circular list? The source code should be relatively self explanatory for the intermediate C#-developer to revise and improve. I hope you found this article interesting.

Tuesday 7 August 2018

Swapping variables in C# Unmanaged / Managed

This article will shortly present two ways of swapping variables in C#. Specifically, these two ways are only both available for value types and structs and unmanaged types, while the managed swap by using ref is available for values, structs and managed structs. The method UnsafeSwap swaps two variables by using unsafe code and pointers. By passing in the address of the two variables to swap, it is possible to use the dereference operator * to not only copy into a temporary variable but also use the syntax *a = *b to exchange the address the variable is pointing to, effectively we swap to variables with their content, here int is used. Another way is do a SafeSwap where we pass in the ref of the variables and just change their contents. Note that if you want to exchange two strings, you must pin the pointer of the chars using the fixed keyword.

unsafe void Main()
{
 int one = 20;
 int two = 30;

 Console.WriteLine("Before swap, one: {0}, two: {1}", one, two);

 UnsafeSwap(&one, &two);
 
 Console.WriteLine("Unsafe swap, one: {0}, two: {1}", one, two); 
 
 SafeSwap(ref one, ref two);

 Console.WriteLine("Safe swap back again, one: {0}, two: {1}", one, two);

}

unsafe void UnsafeSwap(int* a, int* b){
 int temp = *a;
 *a = *b;
 *b = temp; 
}

void SafeSwap(ref int a, ref int b){
 int temp = a;
 a = b;
 b = temp;
}


To exchange two string variables, we must use the fixed keyword and of course only be able to exchange the characters from the char array consisting the first variable to be exchanged with the char array of the second variable. In addition, the string in C# is at a low level actually a character array null terminated with the '\0' sequence, at least when a string is treated as a character array.. The following method will exchange two string variables using unsafe / unmanaged code. Note that the two strings differ in length, so the last character is not exchanged. That is - our string is actually a character array and consists of multiple memory addresses.
unsafe void Main()
{
 fixed (char* one = "hello??")
 {
  fixed (char* two = "world!")
  {
   char* ptrone = one;
   char* ptrtwo = two;

   while (*ptrone != '\0' && *ptrtwo != '\0')
   {
    Swap(ptrone, ptrtwo);
    Console.WriteLine("one: {0}", GetString(one));
    Console.WriteLine("two: {0}", GetString(two));
    ++ptrone;
    ++ptrtwo;
   }

  }
 }
 
}

unsafe void Swap(char* first, char* second){
 char temp = *first;
 *first = *second;
 *second = temp;
}

unsafe string GetString(char* input){
 char* ptr = input; 
 var sw = new StringBuilder();
 while (*ptr != '\0')
 {
  sw.Append(ptr->ToString());
  ++ptr;
 }
 return sw.ToString();
}

The output in Linqpad gives as the exchange of the string or actually a null terminated character array progresses:

one: wello?? two: horld! one: wollo?? two: herld! one: worlo?? two: helld! one: worlo?? two: helld! one: world?? two: hello! one: world!? two: hello?

Monday 6 August 2018

Simple Base64 encoder in C#

Just read a bit about Base64 encoding and decided to try out writing my own in Linqpad for strings! The way you Base64 encode is to treat each char in the input string as a byte value with groups of six bytes (this byte value is zero padded left) and then mapping the 2^6 values into a Base64 table and outputting the corresponding values into a resulting string. Note that you also pad the Base64 string with '=' char to ensure the entire bit length is divisible with three. That is why Base64 strings in .NET always have 0,1 or 2 '=' chars at the end. The characters used in the Base64 encoding is in .NET the chars [A-z] and [0-9] plus + and slash /.

void Main()
{
 string wordToBase64Encode = "Hello world from base64 encoder. This is a sample input string, does it work?"; 
 string wordBase64EncodedAccordingToNet = Convert.ToBase64String(Encoding.ASCII.GetBytes(wordToBase64Encode)).Dump();
 string wordBase64EncodedAccordingToCustomBase64 = wordToBase64Encode.ToBase64String().Dump();
 (("Are the two strings equal?: ") + string.Equals(wordBase64EncodedAccordingToNet, wordBase64EncodedAccordingToCustomBase64)).Dump();
 
}

public static class LowLevelBase64Extensions {

    private static readonly char[] _base64Table =
 {
  'A', 'B', 'C', 'D', 'E', 'F', 'G', 'H', 'I', 'J', 'K', 'L', 'M', 
  'N', 'O', 'P', 'Q', 'R', 'S', 'T', 'U', 'V', 'W', 'X', 'Y', 'Z',
  'a', 'b', 'c', 'd', 'e', 'f', 'g', 'h', 'i', 'j', 'k', 'l', 'm', 
  'n', 'o', 'p', 'q', 'r', 's', 't', 'u', 'v', 'w', 'x', 'y', 'z',
  '0', '1', '2', '3', '4', '5', '6', '7', '8', '9', '+', '/',
 };

 public static string ToBase64String(this string toBeEncoded){
     byte[] toBeEncodedByteArray = Encoding.ASCII.GetBytes(toBeEncoded);
  string toBeEncodedBinaryString = 
  string.Join("", 
   toBeEncodedByteArray.Select(b => (Convert.ToString(b, 2).PadLeft(8, '0'))));
   
  //toBeEncodedBinaryString.Length.Dump();
   
  int padCharacters = toBeEncodedBinaryString.Length % 3;
  //toBeEncoded.Dump();
       
  StringWriter sw = new StringWriter();

  for (var i = 0; i < toBeEncodedBinaryString.Length; i = i + 6)
  {
   string encodingToMap =
    toBeEncodedBinaryString.Substring(i, Math.Min(toBeEncodedBinaryString.Length - i, 6))
    .PadRight(6, '0');
   //encodingToMap.Dump();
   byte encodingToMapByte = Convert.ToByte(encodingToMap, 2);
   char encodingMapped = _base64Table[(int)encodingToMapByte];
   sw.Write(encodingMapped);
  }
  
  sw.Write(new String('=', padCharacters));
  
  //Check 24 bits / 3 byte padding 
  return sw.ToString();
 }
}

Note - the casting to int of the encodingToMapByte also works if you cast the byte representation to short or byte. I have compared this custom Base64Encoder with .NET's own Convert.ToBase64String(), and they give equal strings in the use cases I have tried out. Make note that this is just playing around, .NET's own method is optimized for speed. This is more to show what happens with the input string to generate a Base64 encoded string. You can use this code as a basis for custom encoding shemes like Base32. I have used Encoding.ASCII.GetBytes to look up the ASCII code. So this implementation primarily supports input strings in languages using ASCII and Extended ASCII characters, at least that is what I have tested it with. The output in Linqpad shows the following corresponding results:

Sunday 5 August 2018

Consuming video from WCF as a Base64 encoded strings

This article follows up our quest of loading up video byte arrays from WCF efficiently, but now the byte array is converted into a Base64 encoded string. You can start by cloning the repository I have prepared from here:
git clone https://toreaurstad@bitbucket.org/toreaurstad/wcfaudiostreamdemo.git git fetch && git checkout VideBase64String_05082018
Base64 encoded strings take six bits from the byte array and designates is as a char where the char can be one of 64 characters, in MIME implementation it is [A-z][0-9] and + and /, which is 64 different characters that the six bytes are encoded into. This means that 24 bits can be represented as three Base64 encodeded characters, that is 3 bytes in our byte array can be represented as FOUR base64 encoded chars. This 3:4 ratio is the rationale behind the MTOM optimization in WCF (to be discussed later). However, recap from the previous article where we downloaded a video sizing 4 MB on disk and Fiddler reporting it to be about 3 times larger. This is bloated data that I want to explore if we can fix up a bit. The bloated data is because I have managed not to truly enforce the XMLHttpRequest to send the data through the WCF REST binding (webHttpBinding) as true binary data - binary data is still sent as a string object to Javascript. This is sad, and I want to try to speed this up and avoid bloated data. To get this size down, we can start by using a Base64 encoded string instead in our XmlHttpRequest. First off, we define a service contract operation to return our string with Base64 data:
        [OperationContract]
        [WebGet(UriTemplate = "mediabytes/{videofile}")]
        string GetVideoAsBase64(string videofile);
Now our Service Implementation looks like this:

using System;
using System.IO;
using System.ServiceModel.Activation;
using System.ServiceModel.Web;
using System.Web;
using WcfStreamAudioDemo.Common;

namespace WcfStreamAudioDemo.Host
{

    [AspNetCompatibilityRequirements (RequirementsMode = AspNetCompatibilityRequirementsMode.Allowed)]
    public class VideoService : IVideoServiceContract
    {

        public Stream GetVideo(string videofile)
        {
            return GetVideoStream(videofile, ".mp4");
        }

        public string GetVideoAsBase64(string videofile)
        {
            Stream videoStream = GetVideoStream(videofile, ".mp4");

            byte[] buffer = new byte[32*1024];
            int count;
            var memoryStream = new MemoryStream();

            while ((count = videoStream.Read(buffer, 0, buffer.Length)) > 0)
            {
                memoryStream.Write(buffer, 0, count);
            }

            return Convert.ToBase64String(memoryStream.ToArray()); 
        }

        private Stream GetVideoStream(string videofile, string extension)
        {
            string mediaFolder = HttpContext.Current.Server.MapPath("~/media");
            string videoFileFullPath = Path.Combine(mediaFolder, videofile) + extension;
            return File.OpenRead(videoFileFullPath);
        }

    }
}


The client side code will now retrieve a Base64Encoded string. The following client side scripts loads up our video:

 <script type="text/javascript">

        window.onload = init;
      
        var source; //Video buffer 

        function init() {
            loadByteArray('http://myserver/WcfStreamAudioDemo.Host/VideoService.svc/mediabytes/sintel_trailer-480p');
        }

        function base64ToArrayBuffer(base64) {
            var binaryString =  window.atob(base64);
            var len = binaryString.length;
            var bytes = new Uint8Array( len );
            for (var i = 0; i < len; i++)        {
                bytes[i] = binaryString.charCodeAt(i);
            }
            return bytes.buffer;
        }

        function loadByteArray(url) {
            
            var request = new XMLHttpRequest();

            //request.overrideMimeType('text\/plain; charset=x-user-defined');
            //request.responseType = 'blob';

            request.open('GET', url, true);
            //request.setRequestHeader("Content-Type", "video/mp4");


            request.onload = function() {
                //console.log(request.response);
                debugger;

                var responseData = request.response;
                if (responseData === undefined || responseData === null)
                    return;

                responseData = responseData.slice(0, -9);
                responseData = responseData.substring(68);

                var videoByteArrayView = base64ToArrayBuffer(responseData);
            
                var blob = new Blob([videoByteArrayView], { type: "text/plain;charset=utf-8" });

                var blobUrl = URL.createObjectURL(blob);

                var videoCtrlFedByByteArray = document.getElementById("videoCtrlFedByByteArray");

                videoCtrlFedByByteArray.setAttribute("src", blobUrl);


            } //request.onload 

            request.send();

        }

    </script>

There is still a lot of manual Js scripting here to prepare the video here, I will try to explain. We have now managed to drastically reduce the bloated data of our original 4.4 MB video down from 15+ MB to just 5.8 MB using Base64 encoded string. The retrieved Base64 encoded string is first decoded with the Js atob() function ("ASCII to BINARY"). A Uint8Array is initialized with the length of this decoded binary string and the binary string is iterated by using the charCodeAt method, returning the ArrayBuffer inside the constructed Uint8Array. Note that I got the Base64 encoded string as a XML first, which is why I do some chopping off the string using slice and substring. Anyways, after getting an ArrayBuffer from the Uint8Array's buffer property, we can construct a Blob object (Binary large object) and create an object url and then set the "src" attribute of our HTML5 Video control to this blobUrl. This is still not very elegant, I have seen examples using "arraybuffer" as responseType of the XmlHttpRequest object in Js to retrieve binary data, but I got garbled data back trying to use it with WCF REST. So in this article you have seen a way to send binary data from a WCF method by using a Base64 encoded string as an intermediary between the Server and the client. We got the file size of the request according to Fiddler inspection down to much less than the bloated binary array transfer that actually sent the byte array as a text string back to the client.

Wcf byte array + HTML 5 Video + Custombinding

Again, this article looks at different ways to load byte array from WCF representing video data to web clients, this approach will return a byte array and use a CustomBinding in WCF. You can start by cloning the repository I have prepared from here:
git clone https://toreaurstad@bitbucket.org/toreaurstad/wcfaudiostreamdemo.git git fetch && git checkout VideBase64String_05082018
The following method is added to our WCF service contract, note that now we leave the webHttpBinding and use a CustomBinding.

     [OperationContract]
     byte[] GetVideoBytes(string videofile);

There is no [WebGet] attribute this time, as noted we will not use WCF REST but SOAP instead. The web.config of the host website for the WCF services exposes this CustomBinding:

<system.serviceModel>

    <services>
      
      <service name="WcfStreamAudioDemo.Host.AudioService">
        <endpoint behaviorConfiguration="RestBehaviorConfig" binding="webHttpBinding" bindingConfiguration="HttpStreaming" contract="WcfStreamAudioDemo.Common.IAudioServiceContract" />
      </service>
      
      <service name="WcfStreamAudioDemo.Host.VideoService">
        <endpoint behaviorConfiguration="RestBehaviorConfig" binding="webHttpBinding" bindingConfiguration="HttpStreaming" contract="WcfStreamAudioDemo.Common.IVideoServiceContract" />
        <endpoint address="custom" binding="customBinding" bindingConfiguration="CustomBinding" contract="WcfStreamAudioDemo.Common.IVideoServiceContract" />
      </service> 

    </services>
    

    <bindings>
      
     <customBinding>
        <binding name="CustomBinding">
          <binaryMessageEncoding>
            <readerQuotas maxArrayLength="100000000" maxStringContentLength="100000000"/>
          </binaryMessageEncoding>
          <httpTransport />
        </binding>
      </customBinding>

      <webHttpBinding>
        <binding name="HttpStreaming" transferMode="Streamed" maxReceivedMessageSize="1000000000" maxBufferPoolSize="100000000">
          <readerQuotas maxArrayLength="100000000" maxStringContentLength="100000000"/>
        </binding>
      </webHttpBinding>
    </bindings>
    
    <behaviors>

      <serviceBehaviors>
        <behavior>
          <!-- To avoid disclosing metadata information, set the values below to false before deployment -->
          <serviceMetadata httpGetEnabled="true" httpsGetEnabled="true"/>
          <!-- To receive exception details in faults for debugging purposes, set the value below to true.  Set to false before deployment to avoid disclosing exception information -->
          <serviceDebug includeExceptionDetailInFaults="true"/>
        </behavior>
      </serviceBehaviors>
     
      <endpointBehaviors>
        <behavior name="RestBehaviorConfig">
          <webHttp />
        </behavior>
      </endpointBehaviors>

    </behaviors>
    <protocolMapping>
        <add binding="basicHttpsBinding" scheme="https" />
    </protocolMapping>    
    <serviceHostingEnvironment aspNetCompatibilityEnabled="true" multipleSiteBindingsEnabled="true" />
  </system.serviceModel>

Note that the custom binding allows us to set up a binaryMessageEncoding. The next step is to go to the client project and add a service reference to the host project containing the WCF service. The app.config file is then updated, relevant parts shown here:
 <system.webServer>
    <directoryBrowse enabled="true" />
    <security>
      <requestFiltering>
        <requestLimits maxAllowedContentLength="1073741824" />
      </requestFiltering>
    </security>
        <staticContent>
            <mimeMap fileExtension=".mp4" mimeType="video/mp4" />
        </staticContent>
  </system.webServer>


  <system.serviceModel>
    <bindings>
      
      <customBinding>
        <binding name="CustomBinding">
          <binaryMessageEncoding>
            <readerQuotas maxArrayLength="100000000" maxStringContentLength="100000000" />
          </binaryMessageEncoding>
          <httpTransport maxReceivedMessageSize="100000000" />
        </binding>
      </customBinding>

    </bindings>
    <client>
      <endpoint address="http://he139920.helsemn.no/WcfStreamAudioDemo.Host/VideoService.svc/custom" contract="VideoService.IVideoServiceContract" binding="customBinding" bindingConfiguration="CustomBinding" />
    </client>
    
  </system.serviceModel>
Note the changes of setting up a MIME map for .mp4 files and setting up requestlimits. I will explain this soon. The client script now actually consists both of a server side script run in ASP.NET that sets up the video control in two ways. One way is to construct a HTML5 Data Url. This clearly was demanding for the browser to cope with and is not recommended. The video is actually embed on the page as a base64 encoded string! For a small video such as our video, it is actually possible still. It is of course fascinating that we can embed an entire video on our ASPX web page just as a Base64 encoded string, like it or not. The way to do this anyways is like this:

<script runat="server">

    private void btnInvokeWcfService_OnClick(object sender, EventArgs e)
    {

        using (var proxy = new VideoServiceContractClient())
        {
            byte[] payload = proxy.GetVideoBytes("sintel_trailer-480p");

            SetVideoSourceToHtmlDataUri(payload);

        }
    }


    private void SetVideoSourceToHtmlDataUri(byte[] payload)
    {
        //Set a base64 Html data uri

        videoCtrlFedByByteArrayThroughProxy.Attributes["type"] = "video/mp4";

        string base64String = Convert.ToBase64String(payload);

        videoCtrlFedByByteArrayThroughProxy.Attributes["src"] = "data:video/mp4;base64," + base64String;
    }

</script>

The following image shows how this actually works! Of course, this gives rendering and performance issues, as the web page now got very large content - the entire video is embedded into the page! Another way is to write the byte array to a temporary file on the server, and set the src attribute to this temporary file.

<script runat="server">

    private void btnInvokeWcfService_OnClick(object sender, EventArgs e)
    {

        using (var proxy = new VideoServiceContractClient())
        {
            byte[] payload = proxy.GetVideoBytes("sintel_trailer-480p");

            SetVideoSourceToTempFile(payload);

        }
    }

    private void SetVideoSourceToTempFile(byte[] payload)
    {
        //write to a temp file 
        string tempfile = Path.GetRandomFileName() + ".mp4";
        string tempfilePathForWebServer = HttpContext.Current.Server.MapPath("media/") + tempfile;
        File.WriteAllBytes(tempfilePathForWebServer, payload);

        videoCtrlFedByByteArrayThroughProxy.Attributes["src"] = "media/" + tempfile;
    }

</script>

Note that in these two samples, I have adjusted the HTML5 video control to be accessible to ASP.NET like this:

   <asp:Button runat="server" ID="btnInvokeWcfService" Text="Load Video" OnClick="btnInvokeWcfService_OnClick"/>
        
        <video id="videoCtrlFedByByteArrayThroughProxy" type="video/mp4"  runat="server"  controls width="320" height="240">         
            <p>Your browser doesn't support HTML5 video. Here is a <a href="http://wcfaudiodemohost.azurewebsites.net/VideoService.svc/mediabytes/sintel_trailer-480p">link to the video</a> instead.</p> 
        </video>


This method of retrieving video from WCF is the quickest way, it only fetches the original byte array data and it loads quickly. An adjusted version would not write to a file directly accessible on the web server, but use for example IsolatedStorage instead. I will look into that in the future. Hope you found this article interesting. CustomBindings in WCF gives you a lot of flexibility!

Loading video from WCF into HTML5 Video

Live demo here!

WCF demo - Loading video using Stream or byte array into HTML5 Video control
This article will look at loading up a video into a HTML5 Video. First off, you can clone the repository I have prepared here:
git clone https://toreaurstad@bitbucket.org/toreaurstad/wcfaudiostreamdemo.git
git fetch && git checkout VideoDemo_04082018


The image below shows our user interface, a simple web page displaying two HTML5 Video controls. This article builds upon code from previous articles. Defining a WCF Service Contract IVideoServiceContract is as following:

using System.IO;
using System.ServiceModel;
using System.ServiceModel.Web;

namespace WcfStreamAudioDemo.Common
{
    
    [ServiceContract]
    public interface IVideoServiceContract
    {

        [OperationContract]
        [ContentType("video/mp4")]
        [WebGet(UriTemplate = "media/{videofile}")]
        Stream GetVideo(string videofile);

        [OperationContract]
        [WebGet(UriTemplate = "mediabytes/{videofile}", ResponseFormat = WebMessageFormat.Json)]
        byte[] GetVideoBytes(string videofile);


    }
}

This servicecontract consists of two operations (methods) and they are exposed to the WCF Rest programming model through the WebGet attribute and an uri template. The method GetVideo returns a Stream of the video file requested. This will allow the user to play off the video file as a stream and has many benefits. First off, the load time is quick - as soon as enough data is collected (and the video file format supports it), the video can play back. We will be using a video/mp4 format in this demo and it supports Streaming playback. An additional benefit of streaming is that it is lightweight. It has low latency, efficient bandwidth usage and allows the client to spend little memory to fetch data. The downside is that our Stream does not support any other type of playback than uni-directional, starting from the beginning. You cannot fast forward, rewind or go to a location in the video with just a Stream like this.

I have not looked into if we could provide some offset to the Stream and skip to for example a specified time in the video. Instead I have made another method called GetVideoBytes that returns a byte array. A client can then retrieve the entire video as a byte array and then dynamically build up a Blob object and create a Blob url and dynamically set the src of the video. The WCF service implementation looks like this:
 using System.IO;
using System.Web;
using WcfStreamAudioDemo.Common;

namespace WcfStreamAudioDemo.Host
{
    public class VideoService : IVideoServiceContract
    {

        public Stream GetVideo(string videofile)
        {
            return GetVideoStream(videofile, ".mp4");
        }

        public byte[] GetVideoBytes(string videofile)
        {
            Stream videoStream = GetVideoStream(videofile, ".mp4");

            byte[] buffer = new byte[32*1024];
            int count;
            var memoryStream = new MemoryStream();

            while ((count = videoStream.Read(buffer, 0, buffer.Length)) > 0)
            {
                memoryStream.Write(buffer, 0, count);
            }

            return memoryStream.ToArray();
        }

        private Stream GetVideoStream(string videofile, string extension)
        {
            string mediaFolder = HttpContext.Current.Server.MapPath("~/media");
            string videoFileFullPath = Path.Combine(mediaFolder, videofile) + extension;
            return File.OpenRead(videoFileFullPath);
        }

    }
}

Nothing special going on here, we grab hold of a FileStream of the video file using HttpContext.Current.Server.MapPath and Path.Combine to locate it in a media folder (there is no error handling in this simple sample) and then use System.IO.File.OpenRead. The method returning a byte array loops through the Stream using a MemoryStream and then returns a byte array from this stream again. Let's look at the client side code. Sadly, using a responsetype of 'arraybuffer' in a XMLHttpRequest has given bloated data. Instead, I must pass the byte array as raw data to the client and manually mold and bake the data into a working ArrayBuffer that then is used in an Uint8Array as a view for this Buffer and instatiating a Blob in Javascript with a Blob url with URL.createBlobUrl and then setting finally the src attribute of a video control in the page. It is not very elegant and there is a performance penalty, especially for larger video files, it would be problematic. Our sample video is just 4.32 MB and can be handled. Of course, this article is just for educational purposes and shows you what CAN be achieved, optimizing this for production purposes would of course need to get this ArrayBuffer to work more elegant. So here is my manual code to fix up the dynamic loading of a byte array into data that HTML5 Video can use:

    <script type="text/javascript">

        window.onload = init;

       
        var source; //Video buffer 

        function init() {
            loadByteArray('http://wcfaudiodemohost.azurewebsites.net/VideoService.svc/mediabytes/sintel_trailer-480p');
        }

        function loadByteArray(url) {
            
            var request = new XMLHttpRequest();

            request.overrideMimeType('text\/plain; charset=x-user-defined');
            //request.responseType = 'arraybuffer';
            request.open('GET', url, true);
            //request.setRequestHeader("Content-Type", "video/mp4");


            request.onload = function() {
                //console.log(request.response);
                debugger;

                var responseData = request.response;
                if (responseData === undefined || responseData === null)
                    return;

                if (responseData.charAt(0) === '[') {
                    responseData = responseData.substring(1);
                }
                if (responseData !== null &&
                    responseData !== undefined &&
                    responseData.charAt(responseData.length - 1) === ']') {
                    responseData = responseData.slice(0, -1);
                }

                if (responseData === undefined || responseData === null)
                    return;

                var videoByteArray = responseData.split(',');
                source = new ArrayBuffer(videoByteArray.length);

                var videoByteArrayView = new Uint8Array(source);


                for (var i = 0; i < videoByteArray.length; i++) {
                    videoByteArrayView[i] = videoByteArray[i];
                }

                var blob = new Blob([videoByteArrayView], { type: "text/plain;charset=utf-8" });

                var blobUrl = URL.createObjectURL(blob);

                var videoCtrlFedByByteArray = document.getElementById("videoCtrlFedByByteArray");

                videoCtrlFedByByteArray.setAttribute("src", blobUrl);

                saveAs(blob, "SintelTrailer_VideoReceived.mp4");

            } //request.onload 

            request.send();

        }

    </script>

Take note what I am doing here:
  request.overrideMimeType('text\/plain; charset=x-user-defined');
This enforces the byte array to be sent as a raw string. Our video with about 4.37 MB actually is 15.54 MB in Fiddler. Not very efficient. I will look into if this can be fixed up in a future article. Our GUI markup looks like this:
 <div>
        
        <h3>WCF Sample Video streaming example (<strong>System.IO.Stream</strong>)</h3>
        
        <p>Playing an wideo file (.mp4) using a custom WCF IDispatchMessageFormatter with REST (webHttpBinding).</p>
        
        <video controls width="320" height="240">
            <source src="http://wcfaudiodemohost.azurewebsites.net/VideoService.svc/media/sintel_trailer-480p" type="video/mp4" />
            <p>Your browser doesn't support HTML5 video. Here is a <a href="http://wcfaudiodemohost.azurewebsites.net/VideoService.svc/media/sintel_trailer-480p">link to the video</a> instead.</p> 
        </video>
        
        <h3>WCF Sample Video streaming example (<strong>byte[] array</strong>)</h3>
        
        <p>Playing an video file (.mp4) using a custom WCF IDispatchMessageFormatter with REST (webHttpBinding).</p>
        
        <video id="videoCtrlFedByByteArray" controls width="320" height="240">         
            <p>Your browser doesn't support HTML5 video. Here is a <a href="http://wcfaudiodemohost.azurewebsites.net/VideoService.svc/mediabytes/sintel_trailer-480p">link to the video</a> instead.</p> 
        </video>
        
    </div>

As you can see, the Stream method allowed us to set the src directly. The byte[] array instead needed us to do a lot of manual molding of the data. I hope you found this article interesting and helpful.

Friday 3 August 2018

Loading HTML5 Audio from byte array in WCF

Update:

Live demo!

Wcf Audio Demo - HTML 5 and Byte array!


The previous article presented a solution where the user can retrieve data from a WCF operation that returns a Stream. This approach is great, since the user can quickly load data and progressively retrieve it. This makes an efficient use of bandwidth and avoids latency. However, there is a downside to this approach. It is not possible to skip parts of the loaded Stream, so the user can only start from the beginning of the Stream. The article presented loading a Waveform Audio Format file (audio/wav). Another approach is instead to let the user play, rewind and skip to parts of the data, be it a video or audio file for example. This article will present a solution of this and also solve it in memory by returning a byte array from WCF and load it into the WebAudio AudioContext of a webpage and then set the src of a HTML5 Audio element. First off, you can clone my repository which I have prepared from Bitbucket and switch to the branch supporting a byte array.
 git clone https://toreaurstad@bitbucket.org/toreaurstad/wcfaudiostreamdemo.git
 git checkout ByteArrayWise_03082018
Let's first return a byte array to the client in a WCF service contract. We will return a byte array of a sample ogg/vorbis (mime: audio/ogg) file. The WCF Service contract now got a new method GetAudioBytes :

    [ServiceContract]
    public interface IAudioServiceContract
    {

        [OperationContract]
        [ContentType("audio/ogg")]
        [WebGet(UriTemplate = "media/{trackName}")]
        Stream GetAudio(string trackName);

        [OperationContract]
        [WebGet(UriTemplate = "mediabytes/{trackName}", ResponseFormat = WebMessageFormat.Json)]
        byte[] GetAudioBytes(string trackName);

    }

Next off, we implement the method GetAudioBytes :

        private static Stream GetStream(string trackName, string fileExtension)
        {
            var mediaDirectory = HttpContext.Current.Server.MapPath("~/media/");
            string track = string.Format("{0}.{1}", trackName, fileExtension);
            string filePath = Path.Combine(mediaDirectory, track);
            return File.OpenRead(filePath);
        }

        public byte[] GetAudioBytes(string trackName)
        {
            Stream track = GetStream(trackName, "ogg");

            long streamLengh = track.Length;
            byte[] buffer = new byte[32*1024];
            int count;

            var memoryStream = new MemoryStream();
            while ((count = track.Read(buffer, 0, buffer.Length)) > 0)
            {
                memoryStream.Write(buffer, 0, count);
            }

            return memoryStream.ToArray();
        }


The reading of the Stream into a byte array is done via a memory stream with a buffer of size 32 kB. I wrote the method above and checked with one of Jon Skeet's advice and it was identical :) e We now have got a byte array, then the client must get this byte array. Since I decided to create a web client, it is necessary to make use of a client library. I will use HTML 5 audio and WebAudio API for this. First off, we make an XMLHttpRequest to fetch the data, we set the responseType of the request to 'arraybuffer'. I encountered trouble in Javascript sending the byte array from WCF and ended up to force Js to send the data as plain text raw format. Then I had to manually build an arraybuffer by using an Uint8Array as a view to do the actual insertion. There is a lot of manual work done here to ultimately populate the ArrayBuffer with exact same bytes as returned from the WCF service. As I said, by first trying a manual retrieval, I ended up with bloated data that I had a to bake into shape by forcing a plain retrieval of data and then molding the data into an ArrayBuffer. Not very elegant, but it works.


    <script src="Scripts/FileSaver.js" type="text/javascript"></script>
    
    <script type="text/javascript">

        window.onload = init;

        var context; //AudioContext
        var source; //Audio buffer 

        function init() {
            if (!window.AudioContext) {
                alert("Your browser does not support any Audio Context and cannot play back this audio");
                return;
            }
            window.AudioContext = window.AudioContext || window.webkitAudioContext;

            context =  typeof AudioContext !== 'undefined' ? new AudioContext() : new webkitAudioContext();;

            loadByteArray('http://myserver/WcfStreamAudioDemo.Host/AudioService.svc/mediabytes/ACDC_-_Back_In_Black-sample');
        }

        function loadByteArray(url) {
            source = context.createBufferSource();
            var request = new XMLHttpRequest();
           
            request.overrideMimeType('text\/plain; charset=x-user-defined');
            //request.responseType = 'arraybuffer';
            request.open('GET', url, true);
            //request.setRequestHeader("Content-Type", "audio/ogg");


            request.onload = function() {
                //console.log(request.response);
                debugger;

                var audioByteArray = request.response.replace('[', '').replace(']','').split(',');
                source = new ArrayBuffer(audioByteArray.length);

                var audioByteArrayView = new Uint8Array(source);


                for (var i = 0; i < audioByteArray.length; i++) {
                    audioByteArrayView[i] = audioByteArray[i];
                }

                var blob = new Blob([audioByteArrayView], { type: "text/plain;charset=utf-8" });

                var blobUrl = URL.createObjectURL(blob);

                var audioCtrlFedByByteArray = document.getElementById("audioCtrlFedByByteArray");

                audioCtrlFedByByteArray.setAttribute("src", blobUrl);


                saveAs(blob, "ExampleReceived.ogg");
             
                context.decodeAudioData(source,
                    function (buffer) {
                        //Play off the audio file automatically
                        var innersource = context.createBufferSource();
                        innersource.buffer = buffer;
                        innersource.connect(context.destination);

                        innersource.start(0);

                      
                        //Hook up the HTML 5 audio control using MediaElementSource connecting to the AudioContext
                        var audioCtrlFedByByteArray = document.getElementById("audioCtrlFedByByteArray");
  
                        var mediaSource = context.createMediaElementSource(audioCtrlFedByByteArray);
                        mediaSource.connect(context.destination);
                        audioCtrlFedByByteArray.play();

                    },
                    function(e) {
                        console.log("Error with decoding audio data" + e.err);
                    }
            );

        }

            request.send();

        }

    </script>


There are three techniques presented into the client-side script. First off I show how you automtically can play downloaded audio into a web page! I use the AudioContext first and decodeAudioData by creating a bufferSource and connect that source to the AudioContext's destination (i.e. speakers). Then i choose start(0) of the bufferSource to automatically playback! Also demonstrated in the Javascript above is how I grab hold of the audio control and then setting the src attribute to a blobUrl created by URL.createObjectUrl feeding it a Blob (Binary large object) of the created Uint8Array populated by the raw data. This will set dynamically the source of the HTML 5 Audio media element on the page and let the user finally play the audio file and rewind or skip to different parts! It is much more user friendly, but the user will have to download the entire file first and the manual process by molding the retrieved raw data into a working ArrayBuffer with correct data will be slow when dealing with large files. The web page of the client defines the audio controls like this:

rm id="HtmlForm" runat="server">
    <div>
        
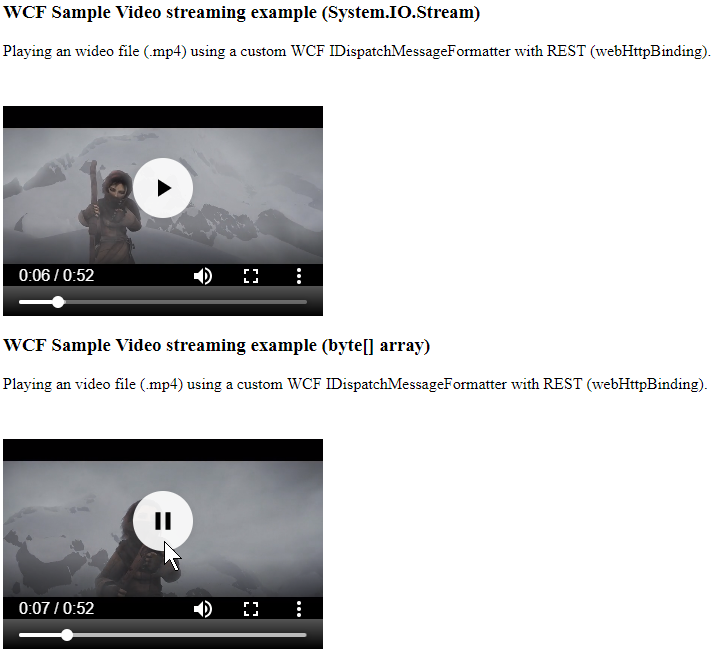
        <h3>WCF Sample Audio streaming example (<strong>System.IO.Stream</strong>)</h3>
        
        <p>Playing an audio file (.wav) using a custom WCF IDispatchMessageFormatter with REST (webHttpBinding).</p>
        
        <audio controls>
            <source src="http://myserver/WcfStreamAudioDemo.Host/AudioService.svc/media/Example" type="audio/ogg" />
            <p>Your browser doesn't support HTML5 audio. Here is a <a href="http://myserver/WcfStreamAudioDemo.Host/AudioService.svc/media/Example">link to the audio</a> instead.</p> 
        </audio>
        
        <h3>WCF Sample Audio streaming example (<strong>byte[] array</strong>)</h3>
        
        <p>Playing an audio file (.wav) using a custom WCF IDispatchMessageFormatter with REST (webHttpBinding).</p>
        
        <audio id="audioCtrlFedByByteArray" controls>         
            <p>Your browser doesn't support HTML5 audio. Here is a <a href="http://myserver/WcfStreamAudioDemo.Host/AudioService.svc/mediabytes/ACDC_-_Back_In_Black-sample">link to the audio</a> instead.</p> 
        </audio>
        
    </div>
    
Make note that my sample page also includes the library FileSaver to download the ogg sample file. This library is quite handy and is available in Nuget (package id: filesaver). We finally have a way to load data from WCF into a HTML 5 Audio control in memory! This means we could for example have audio tracks saved into a database and fetch them into memory and return them to our clients. An alternative is of course to just return a FileStream and have a server backend written in ASP.NET MVC Core, but then you will also be missing a lot of the nice features of WCF! All in all, it is always nice to know alternatives before sticking to the mainstream solutions. I hope you found this article interesting.

Thursday 2 August 2018

Streaming audio with WCF

This article will present a way to stream audio with WCF. In my example, I will play a Waveform Audio File Format file (.wav), but my sample should support any well-known audio formats. Note that WCF is not automatically the best streaming service to provide to your clients. Other protocols such as RTSP have better handling of graceful degradation, random seek and so on. This article will only show how you can provide a simple one-direction playback of audio files by using WCF. You can start by cloning the repository I have made public from here:

git@bitbucket.org:toreaurstad/wcfaudiostreamdemo.git

First off, we need to specify a content type of the method that returns a Stream with the audio. This can be achieved by implementing a class that inherits from System.Attribute and implementing IOperationBehavior. The class below sets a content type in its constructor and sets a Formatter of the DispatcherOperation in ApplyDispatchBehavior to the class ContentTypeMessageFormatter.


using System;
using System.ServiceModel.Channels;
using System.ServiceModel.Description;
using System.ServiceModel.Dispatcher;


namespace WcfStreamAudioDemo.Common
{
    public class ContentTypeAttribute : Attribute, IOperationBehavior
    {
        public ContentTypeAttribute(string contentType)
        {
            ContentType = contentType;
        }

        public string ContentType { get; } //readonly auto property

        public void AddBindingParameters(OperationDescription operationDescription, BindingParameterCollection bindingParameters)
        {
          
        }

        public void ApplyClientBehavior(OperationDescription operationDescription, ClientOperation clientOperation)
        {
            
        }

        public void ApplyDispatchBehavior(OperationDescription operationDescription, DispatchOperation dispatchOperation)
        {
            // ReSharper disable once ArrangeThisQualifier
            dispatchOperation.Formatter = new ContentTypeMessageFormatter(dispatchOperation.Formatter, this.ContentType);
        }

        public void Validate(OperationDescription operationDescription)
        {
            
        }

      }
}

The ContentTypeMessageFormatter class is shown below:

using System.ServiceModel.Channels;
using System.ServiceModel.Dispatcher;
using System.ServiceModel.Web;
namespace WcfStreamAudioDemo.Common
{
    public class ContentTypeMessageFormatter : IDispatchMessageFormatter
    {

        private readonly IDispatchMessageFormatter _formatter;
        private readonly string _contentType;

        public ContentTypeMessageFormatter(IDispatchMessageFormatter formatter, string contentType)
        {
            _formatter = formatter;
            _contentType = contentType; 
        }

        public void DeserializeRequest(Message message, object[] parameters)
        {
            _formatter.DeserializeRequest(message, parameters);
        }

        public Message SerializeReply(MessageVersion messageVersion, object[] parameters, object result)
        {
            if (!string.IsNullOrEmpty(_contentType))
                WebOperationContext.Current.OutgoingResponse.ContentType = _contentType;
            return _formatter.SerializeReply(messageVersion, parameters, result);
        }

    }
}

Next step is to define a Service Contract in WCF to test this out:

using System.IO;
using System.ServiceModel;
using System.ServiceModel.Web;

namespace WcfStreamAudioDemo.Common
{

    [ServiceContract]
    public interface IAudioServiceContract
    {

        [OperationContract]
        [ContentType("audio/wav")]
        [WebGet(UriTemplate = "media/{trackName}")]
        Stream GetAudio(string trackName);
    }
}

The configuration of the WCF service in web.config sets up streaming by using transferMode set to Streamed on a webHttpBinding.

  <system.serviceModel>

    <services>
      
      <service name="WcfStreamAudioDemo.Host.AudioService">
        <endpoint behaviorConfiguration="RestBehaviorConfig" binding="webHttpBinding" bindingConfiguration="HttpStreaming" contract="WcfStreamAudioDemo.Common.IAudioServiceContract" />
      </service>
    </services>

    <bindings>
      <webHttpBinding>
        <binding name="HttpStreaming" transferMode="Streamed" maxReceivedMessageSize="1000000000" />
      </webHttpBinding>
    </bindings>
    
    <behaviors>

      <serviceBehaviors>
        <behavior>
          <!-- To avoid disclosing metadata information, set the values below to false before deployment -->
          <serviceMetadata httpGetEnabled="true" httpsGetEnabled="true"/>
          <!-- To receive exception details in faults for debugging purposes, set the value below to true.  Set to false before deployment to avoid disclosing exception information -->
          <serviceDebug includeExceptionDetailInFaults="false"/>
        </behavior>
      </serviceBehaviors>
     
      <endpointBehaviors>
        <behavior name="RestBehaviorConfig">
          <webHttp />
        </behavior>
      </endpointBehaviors>

    </behaviors>
    <protocolMapping>
        <add binding="basicHttpsBinding" scheme="https" />
    </protocolMapping>    
    <serviceHostingEnvironment aspNetCompatibilityEnabled="true" multipleSiteBindingsEnabled="true" />
  </system.serviceModel>


Finally, to test out this Audio Service you can either enter the url of an audio file the WCF service recognizes into a browser to download the .WAV file or for example use an HTML 5 <audio> element. Here is a sample page I created to test out the Audio service (a simple ASP.NET Web form)!

<%@ Page Language="C#" %>

<script runat="server">

</script>

<html xmlns="http://www.w3.org/1999/xhtml">
<head runat="server">
    <title>Demo Audio Stream wcf</title>
</head>
<body>
<form id="HtmlForm" runat="server">
    <div>
        
        <h3>WCF Sample Audio streaming example</h3>
        
        <p>Playing an audio file (.wav) using a custom WCF IDispatchMessageFormatter with REST (webHttpBinding).</p>
        
        <audio controls>
            <source src="http://localhost/WcfStreamAudioDemo.Host/AudioService.svc/media/Sample" type="audio/wav" />
            <p>Your browser doesn't support HTML5 audio. Here is a <a href="http://localhost/WcfStreamAudioDemo.Host/AudioService.svc/media/Sample.wav">link to the audio</a> instead.</p> 
        </audio>

    </div>
</form>
</body>
</html>


Wednesday 1 August 2018

Controlling WCF serialization and deserialization with IXmlSerializable

It is possible to customize how WCF serializes and deserializes objects to be sent over the wire. The default way to serialize and deserialize objects with WCF is using DataContractSerializer. There are many scenarios where you instead want to control this more in your WCF services. For interoperability scenarios with other platforms or perhaps you want to change the way WCF serializes objects. Perhaps using attributes more than child elements, so the XML can be condensed more. Either way, you can end up in situations where you must handle the serialization and deserialization in WCF in more detail, then IXmlSerializable is one option. Read on for a simple demo. Another, more fine-grained way of actually customizing the way WCF serializes objects and deserialize them is using IXmlSerializable interface. I have added a solution on Bitbucket, which allows you to see how this is done here:

git clone https://toreaurstad@bitbucket.org/toreaurstad/wcfixmlserializabledemo.git The source code is here: WcfIXmlSerializableDemo
The core of the serialization is done implementing the interface IXmlSerializable. The following class serves as a demonstration:
 using System.Xml;
using System.Xml.Schema;
using System.Xml.Serialization;

namespace CustomWcfSerialization.Common
{
  
    // Use a data contract as illustrated in the sample below to add composite types to service operations.
    [XmlRoot("Animal", Namespace ="http://schemas.toreaurstad.no/2018/08")]
    public class Animal : IXmlSerializable
    {
       
        public Animal()
        {

        }

        bool _isBipedal;
        public bool IsBipedal
        {
            get { return _isBipedal; }
            set { _isBipedal = value; }
        }

        string _name;
        public string Name
        {
            get { return _name; }
            set { _name = value; }
        }

        public XmlSchema GetSchema()
        {
            return null;
        }

        public void ReadXml(XmlReader reader)
        {
            reader.MoveToContent();
   
            Name = reader.GetAttribute("Name");
            reader.ReadStartElement(); 

            IsBipedal = bool.Parse(reader.ReadElementString("IsBipedal") == "Yes" ? "true" : "false");
            reader.ReadEndElement(); 
        }

        public void WriteXml(XmlWriter writer)
        {
            writer.WriteAttributeString("Name", Name);
            writer.WriteElementString("IsBipedal", IsBipedal ? "Yes" : "No");
        }

    }
}

The serialized request and response from WCF now is changed from the default serialization of DataContractSerializer, to not only support XML attributes - but also represent booleans as a custom boolean where true and false is exchanged with "Yes" and "No".

<s:Envelope xmlns:s="http://schemas.xmlsoap.org/soap/envelope/"><s:Body>

<GetAnimalsResponse xmlns="http://tempuri.org/">
<GetAnimalsResult xmlns:a="http://schemas.datacontract.org/2004/07/CustomWcfSerialization.Common" xmlns:i="http://www.w3.org/2001/XMLSchema-instance">
<a:Animal Name="Rex"><IsBipedal>No</IsBipedal></a:Animal>
<a:Animal Name="Bubbles"><IsBipedal>Yes</IsBipedal>
</a:Animal>
</GetAnimalsResult> </GetAnimalsResponse></s:Body></s:Envelope>

Note though, that even we used special values for boolean values in our sample ("Yes" and "No"), it was possible to deserialize this by implementing the deserialization in the ReadXml method of our WCF service entity class Animal. This image shows that Visual Studio is able to deserialize the data into objects properly even that the XML presents data that is not directly compatible by .NET:


This is done by manually parsing the data retrieved from WCF like this:

IsBipedal = bool.Parse(reader.ReadElementString("IsBipedal") == "Yes" ? "true" : "false");

You can quickly end up with much code if there is much code you want to serialize in a specific manner. It is possible use .NET reflection, generics and the [KnownType] argument for this in case you want to support this is a more generic manner. I will look into this in a future article.