Friday, 27 December 2024

Terminating a process running on local port using Powershell

Developers who work with frontend and backend often switching between tools get a message that a certain process is holding a port. For example, using the dotnet command, you can get a message that the address is already in use. Note - you usually must decide if you really want to terminate the process running on a certain port, but if you are sure that you just want to close the process and free up the local port for its use, it would be nice to have a way of
just closing the process running on that local port. A typical output would be:

 System.IO.IOException: Failed to bind to address http://127.0.0.1:5000: address already in use.

We can locate which process is using te port, that is, the local port, and then terminate the process. This will free up the local port so we can use it. Here is a Powershell function that will find the process running at a local port, if any, given by a specied port number.


<#
.SYNOPSIS
Stops the process using the specified local port 

.DESCRIPTION
This function finds the process, if any, using the specified port and stops it.
In case there are no process, the function exits.

.PARAMETER portId
The port number to check for the process

.RETURNS int
If successful, returns 0. If not, returns -1.

.EXAMPLE
Terminate-Port -portId 5000
#>
function Terminate-Port {
    param (
        [Parameter(Mandatory = $true)]
        [int]$portId
    )

    # Get the process ID (PID) using the specified port 
    try {
        Write-Host "Looking for processing running using local port: $portId"
        $connection = Get-NetTCPConnection -LocalPort $portId -ErrorAction Stop
        if ($connection) {
            Write-Output "Port $portId is in use by process ID $($connection.OwningProcess | Select-Object -Unique)."
        } else {
            Write-Output "Port $portId is not in use."
            return 0 | Out-Null
        }
    } catch {
        Write-Output "An error occurred: $_"
        return -1 | Out-Null
    }

    $processId = $connection.OwningProcess

    if ($processId -and $processId -gt 0) {
        $process = Get-Process -Id $processId
        if ($process) {
            # Stop the process
            try {
                Stop-Process -Id $processId -Force
                Write-Host "Process running at port $portId was terminated."
                return 0 | Out-Null
            } catch {
                Write-Host "Could not stop process. Reason: $error"
            }
        }
    }

    Write-Host "No process found using port $portId."
    return -1 | Out-Null
}


To terminate , we just run the command

 Terminate-Port -portId 5000


Screenshots of the function being run: BEFORE the command Terminate-Port is run and AFTER. Note that the process running at the given portId was terminated and then the local port is freed up again.
AFTER

Monday, 23 December 2024

Custom spans in C#

This article will look more into Spans in C# and demonstrate how you can create a custom Span yourself.

Span<T> and ReadOnlySpan<T> were introduced in 2018 with C# 7.2 and .NET Core 2.1.

These types provide a way to work with contiguous regions of memory safely and efficiently, without copying data.

They are particularly useful for performance-critical applications, as they allow for slicing and accessing memory without the overhead of array bounds checking.

The introduction of spans marked a significant improvement in how .NET handles memory, offering developers more control and flexibility.

I have added a Github repo for the code shown in this article here:
https://github.com/toreaurstadboss/CustomSpan

ref struct and provide methods for supplying either a reference to an object or in more usual case, an arry. Inside the ref struct, with two fields :

    private readonly ref T _reference;
    private readonly int _length;

To provide support for passing in an array and a start index and length in the constructor of the ref struct


public CustomSpan(T[] array, int start, int length)
{
    ArgumentNullException.ThrowIfNull(array);
    if (!typeof(T).IsValueType && array.GetType() != typeof(T[]))
    {
        // Covariance guard
        throw new ArgumentException($"Covariance between types {typeof(T).FullName} and {array.GetType().FullName} is not supported in CustomSpan");
    }

#if TARGET_64BIT
    if ((ulong)(uint)start + (ulong)(uint)length > (ulong)(uint)array.Length)
    {
        throw new IndexOutOfRangeException("The index was out of bounds for the array");
    }
#else
    if ((uint)start + (uint)length > (uint)array.Length)
    {
        throw new IndexOutOfRangeException("The index was out of bounds for the array");
    }
#endif

    _reference = ref Unsafe.Add(ref MemoryMarshal.GetArrayDataReference(array), (nint)(uint)start); //nint - native integer
    _length = length;
}


MemoryMarshal class inside System.Runtime.InteropServices contains helper methods such as GetArrayDataReference, which returns a reference to the 0-th element of an array. As we can see, array variance checks are done in the method. The Unsafe class inside System.Runtime.CompilerServices provides a method Add which is used to add an element offset to a reference, handy for getting the offset. As we see, there are no copying of memory blocks, only a reference to the first element of the array and start, the offset. The length variable specified here just defines the length to use for bounds checking. Note that we must handle also if the code executes inside 32-bits and 64-bits environments. We finally return a reference to the array given by an offset provided the value start. The (nint) used here is native integer. We also want to provide an indexer, so we can retrieve a value directly. We also provide a writable indexer too, in the method GetWritable. This is not considered good practice regarding encapsulation, just to demonstrate how you could do it.


// Read-only indexer
public ref readonly T this[int index]
{
    get
    {
        if ((uint)index >= (uint)_length)
        {
            throw new IndexOutOfRangeException();
        }
        return ref Unsafe.Add(ref _reference, index);
    }
}

// Read-write indexer
public ref T GetWritable(int index)
{
    if ((uint)index >= (uint)_length)
    {
        throw new IndexOutOfRangeException();
    }
    return ref Unsafe.Add(ref _reference, index);
}


We also provide a method that returns a readonly span from the custom span.


    public ReadOnlySpan<T> AsReadOnlySpan()
    {
        return MemoryMarshal.CreateReadOnlySpan(ref _reference, _length);
    }

To use this CustomSpan, demo code is shown below:


void Main(){

    var nums = Enumerable.Range(0, 1000).ToArray(); 
    var spanOfNums = new CustomSpan<int>(nums, 500, 500); 
    var twentyToFifty = spanOfNums.Slice(20, 5);
    
    Console.WriteLine("Output of the twentytoFifty span:");
    twentyToFifty.PrintArrayContents(); //prints 520..525


    for (int i = 0; i < twentyToFifty.Length; i++)
    {
        twentyToFifty.GetWritable(i) = (int) Math.Pow((double)twentyToFifty[i], 2); //mutates the Span contents - squares the elements , using GetWritable
    }
    
    Console.WriteLine("\nOutput of the mutated twentytoFifty span:");
    twentyToFifty.PrintArrayContents();
}


The output looks like this:


Output of the twentytoFifty span:
520
521
522
523
524

Output of the mutated twentytoFifty span:
270400
271441
272484
273529
274576


Usually, you would use the built-in spans in C#, as they contain the necessary functionality you need. This article was just a dive into how Spans are implemented, the code for Spans are available on the .NET source code web site :

https://source.dot.net https://source.dot.net/#System.Private.CoreLib/src/libraries/System.Private.CoreLib/src/System/Span.cs,d2517139cac388e8

Monday, 16 December 2024

SpeechService in Azure AI Text to Speech

This article will present Azure AI Text To Speech service. The code for this article is available to clone from Github repo here:

https://github.com/toreaurstadboss/SpeechSynthesis.git

The speech service uses AI trained speech to provide natural speech and ease of use. You can just provide text and get it read out aloud. An overview of supported languages in the Speech service is shown here:

https://learn.microsoft.com/en-us/azure/ai-services/speech-service/language-support?tabs=stt

Azure AI Speech Synthesis DEMO

You can create a TTS - Text To Speech service using Azure AI service for this. This Speech service in this demo uses the library Nuget Microsoft.CognitiveServices.Speech.

This repo contains a simple demo using Azure AI Speech synthesis using Azure.CognitiveServices.SpeechSynthesis.
It provides a simple way of synthesizing text to speech using Azure AI services. Its usage is shown here:

The code provides a simple builder for creating a SpeechSynthesizer instance.

using Microsoft.CognitiveServices.Speech;

namespace ToreAurstadIT.AzureAIDemo.SpeechSynthesis;

public class Program
{
    private static async Task Main(string[] args)
    {
        Console.WriteLine("Your text to speech input");
        string? text = Console.ReadLine();

        using (var synthesizer = SpeechSynthesizerBuilder.Instance.WithSubscription().Build())
        {
            using (var result = await synthesizer.SpeakTextAsync(text))
            {
                string reasonResult = result.Reason switch
                {
                    ResultReason.SynthesizingAudioCompleted => $"The following text succeeded successfully: {text}",
                    _ => $"Result of speeech synthesis: {result.Reason}"
                };
                Console.WriteLine(reasonResult);
            }
        }

    }

}

The builder looks like this:
using Microsoft.CognitiveServices.Speech;

namespace ToreAurstadIT.AzureAIDemo.SpeechSynthesis;

public class SpeechSynthesizerBuilder
{

    private string? _subscriptionKey = null;
    private string? _subscriptionRegion = null;

    public static SpeechSynthesizerBuilder Instance => new SpeechSynthesizerBuilder();

    public SpeechSynthesizerBuilder WithSubscription(string? subscriptionKey = null, string? region = null)
    {
        _subscriptionKey = subscriptionKey ?? Environment.GetEnvironmentVariable("AZURE_AI_SERVICES_SPEECH_KEY", EnvironmentVariableTarget.User);
        _subscriptionRegion = region ?? Environment.GetEnvironmentVariable("AZURE_AI_SERVICES_SPEECH_REGION", EnvironmentVariableTarget.User);
        return this;
    }

    public SpeechSynthesizer Build()
    {
        var config = SpeechConfig.FromSubscription(_subscriptionKey, _subscriptionRegion);
        var speechSynthesizer = new SpeechSynthesizer(config);
        return speechSynthesizer;
    }
}

Note that I observed that the audio could get chopped off in the very end. It might be a temporary issue, but if you encounter it too, you can add an initial pause to avoid this:

   string? intialPause = "     ....     "; //this is added to avoid the text being cut in the start

Sunday, 8 December 2024

Extending Azure AI Search with data sources

This article will present both code and tips around getting Azure AI Search to utilize additional data sources. The article builds upon the previous article in the blog:

https://toreaurstad.blogspot.com/2024/12/azure-ai-openai-chat-gpt-4-client.html

This code will use Open AI Chat GPT-4 together with additional data source. I have tested this using Storage account in Azure which contains blobs with documents. First off, create Azure AI services if you do not have this yet.


Then create an Azure AI Search


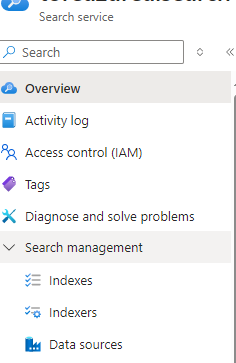
Choose the location and the Pricing Tier. You can choose the Free (F) pricing tier to test out the Azure AI Search. The standard pricing tier comes in at about 250 USD per month, so a word of caution here as billing might incur if you do not choose the Free tier. Head over to the Azure AI Search service after it is crated and note inside the Overview the Url. Expand the Search management and choose the folowing menu options and fill out them in this order:
  • Data sources
  • Indexes
  • Indexers


There are several types of data sources you can add.
  • Azure Blog Storage
  • Azure Data Lake Storage Gen2
  • Azure Cosmos DB
  • Azure SQL Database
  • Azure Table Storage
  • Fabric OneLake files

Upload files to the blob container

  • I have tested out adding a data source using Azure Blob Storage. I had to create a new storage account and I believe Azure might have changed it over the years, so for best compability, add a brand new storage account. Then choose a blob container inside the Blob storage, then hit the Create button.
  • Head over to your Storage browser inside your storage account, then choose Blob container. You can add a Blob container and then after it is created, click the Upload button.
  • You can then upload multiple files into the blob container (it is like a folder, which saves your files as blobs).

Setting up the index

  • After the Blob storage (storage account) is added to the data source, choose the Indexes menu button inside Azure AI search. Click Add index.
  • After the index is added, choose the button Add field
  • Add a field name called : Edit.String of type Edm.String.
  • Click the checkbox for Retrievable and Searchable. Click the button Save

Setting up the indexer

  • Choose to add an Indexer via button Add indexer
  • Choose the Index you added
  • Choose the Data source you added
  • Select the indexed extensions and specify which file types to index. Probably you should select text based files here, such as .md and .markdown files and even some binary file type such as .pdf and .docx can be selected here
  • Data to extract: Choose Content and metadata


Source code for this article

The source code can be cloned from this Github repo:
br /> https://github.com/toreaurstadboss/OpenAIDemo.git

The code for this article is available in the branch:
feature/openai-search-documentsources To add the data source to our ChatClient instance, we do the following. Please note that this method will be changed in the Azure AI SDK in the future :


            ChatCompletionOptions? chatCompletionOptions = null;
            if (dataSources?.Any() == true)
            {
                chatCompletionOptions = new ChatCompletionOptions();

                foreach (var dataSource in dataSources!)
                {
#pragma warning disable AOAI001 // Type is for evaluation purposes only and is subject to change or removal in future updates. Suppress this diagnostic to proceed.
                    chatCompletionOptions.AddDataSource(new AzureSearchChatDataSource()
                    {
                        Endpoint = new Uri(dataSource.endpoint),
                        IndexName = dataSource.indexname,
                        Authentication = DataSourceAuthentication.FromApiKey(dataSource.authentication)
                    });
#pragma warning restore AOAI001 // Type is for evaluation purposes only and is subject to change or removal in future updates. Suppress this diagnostic to proceed.
                }

            }


The updated version of the extension class of OpenAI.Chat.ChatClient then looks like this: ChatClientExtensions.cs


using Azure.AI.OpenAI.Chat;
using OpenAI.Chat;
using System.ClientModel;
using System.Text;

namespace ToreAurstadIT.OpenAIDemo
{
    public static class ChatclientExtensions
    {

        /// <summary>
        /// Provides a stream result from the Chatclient service using AzureAI services.
        /// </summary>
        /// <param name="chatClient">ChatClient instance</param>
        /// <param name="message">The message to send and communicate to the ai-model</param>
        /// <returns>Streamed chat reply / result. Consume using 'await foreach'</returns>
        public static AsyncCollectionResult<StreamingChatCompletionUpdate> GetStreamedReplyAsync(this ChatClient chatClient, string message,
            (string endpoint, string indexname, string authentication)[]? dataSources = null)
        {
            ChatCompletionOptions? chatCompletionOptions = null;
            if (dataSources?.Any() == true)
            {
                chatCompletionOptions = new ChatCompletionOptions();

                foreach (var dataSource in dataSources!)
                {
#pragma warning disable AOAI001 // Type is for evaluation purposes only and is subject to change or removal in future updates. Suppress this diagnostic to proceed.
                    chatCompletionOptions.AddDataSource(new AzureSearchChatDataSource()
                    {
                        Endpoint = new Uri(dataSource.endpoint),
                        IndexName = dataSource.indexname,
                        Authentication = DataSourceAuthentication.FromApiKey(dataSource.authentication)
                    });
#pragma warning restore AOAI001 // Type is for evaluation purposes only and is subject to change or removal in future updates. Suppress this diagnostic to proceed.
                }

            }

            return chatClient.CompleteChatStreamingAsync(
                [new SystemChatMessage("You are an helpful, wonderful AI assistant"), new UserChatMessage(message)], chatCompletionOptions);
        }

        public static async Task<string> GetStreamedReplyStringAsync(this ChatClient chatClient, string message, (string endpoint, string indexname, string authentication)[]? dataSources = null, bool outputToConsole = false)
        {
            var sb = new StringBuilder();
            await foreach (var update in GetStreamedReplyAsync(chatClient, message, dataSources))
            {
                foreach (var textReply in update.ContentUpdate.Select(cu => cu.Text))
                {
                    sb.Append(textReply);
                    if (outputToConsole)
                    {
                        Console.Write(textReply);
                    }
                }
            }
            return sb.ToString();
        }

    }
}


The updated code for the demo app then looks like this, I chose to just use tuples here for the endpoint, index name and api key:

ChatpGptDemo.cs


using OpenAI.Chat;
using OpenAIDemo;
using System.Diagnostics;

namespace ToreAurstadIT.OpenAIDemo
{
    public class ChatGptDemo
    {

        public async Task<string?> RunChatGptQuery(ChatClient? chatClient, string msg)
        {
            if (chatClient == null)
            {
                Console.WriteLine("Sorry, the demo failed. The chatClient did not initialize propertly.");
                return null;
            }

            Console.WriteLine("Searching ... Please wait..");

            var stopWatch = Stopwatch.StartNew();

            var chatDataSources = new[]{
                (
                    SearchEndPoint: Environment.GetEnvironmentVariable("AZURE_SEARCH_AI_ENDPOINT", EnvironmentVariableTarget.User) ?? "N/A",
                    SearchIndexName: Environment.GetEnvironmentVariable("AZURE_SEARCH_AI_INDEXNAME", EnvironmentVariableTarget.User) ?? "N/A",
                    SearchApiKey: Environment.GetEnvironmentVariable("AZURE_SEARCH_AI_APIKEY", EnvironmentVariableTarget.User) ?? "N/A"
                )
            };

            string reply = "";

            try
            {

                reply = await chatClient.GetStreamedReplyStringAsync(msg, dataSources: chatDataSources, outputToConsole: true);
            }
            catch (Exception ex)
            {
                Console.WriteLine(ex.Message);
            }

            Console.WriteLine($"The operation took: {stopWatch.ElapsedMilliseconds} ms");


            Console.WriteLine();

            return reply;
        }

    }
}


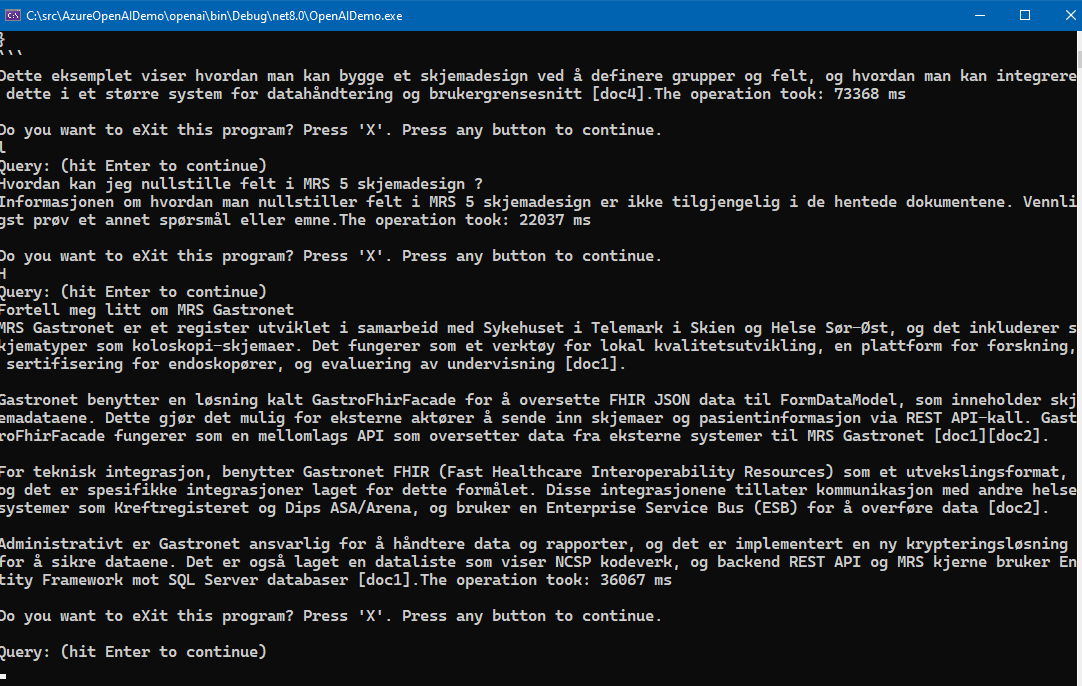
The code here expects that three user-specific environment variables exists. Please note that the API key can be found under the menu item Keys in Azure AI Search. There are two admin keys and multiple query keys. To distribute keys to other users, you of course share the API query key, not the admin key(s). The screenshot below shows the demo. It is a console application, it could be web application or other client : Please note that the Free tier of Azure AI Search is rather slow and seems to only allow queryes at a certain interval, it will suffice to just test it out. To really test it out in for example an Intranet scenario, the standard tier Azure AI search service is recommended, at about 250 USD per month as noted.

Conclusions

Getting an Azure AI Chat service to work in intranet scenarios using a combination of Open AI Chat GPT-4 together with a custom collection of files that are indexed offers a nice combination of building up a knowledge base which you can query against. It is rather convenient way of building an on-premise solution for intranet AI chat service using Azure cloud services.

Monday, 2 December 2024

Azure AI OpenAI chat GPT-4 client connection

This article presents code that shows how you can connect to OpenAI Chat GPT-4 client connection. The repository for the code presented is the following GitHub repo:

https://github.com/toreaurstadboss/OpenAIDemo

The repo contains useful helper methods to use Azure AI Service and create AzureOpenAIClient or the more generic ChatClient which is a specified chat client for the AzureOpenAIClient that uses a specific ai model, default ai model to use is 'gpt-4'. The creation of chat client is done using a class with a builder pattern. To create a chat client you can simply create it like this :

Program.cs

         const string modelName = "gpt-4";

            var chatClient = AzureOpenAIClientBuilder
                .Instance
                .WithDefaultEndpointFromEnvironmentVariable()
                .WithDefaultKeyFromEnvironmentVariable()
                .BuildChatClient(aiModel: modelName);
                

The builder looks like this:

AzureOpenAIClientBuilder.cs


using Azure.AI.OpenAI;
using OpenAI.Chat;
using System.ClientModel;

namespace ToreAurstadIT.OpenAIDemo
{

    /// <summary>
    /// Creates AzureOpenAIClient or ChatClient (default model is "gpt-4")
    /// Suggestion:
    /// Create user-specific Environment variables for : AZURE_AI_SERVICES_KEY and AZURE_AI_SERVICES_ENDPOINT to avoid exposing endpoint and key in source code.
    /// Then us the 'WithDefault' methods to use the two user-specific environment variables, which must be set.
    /// </summary>
    public class AzureOpenAIClientBuilder
    {

        private const string AZURE_AI_SERVICES_KEY = nameof(AZURE_AI_SERVICES_KEY);
        private const string AZURE_AI_SERVICES_ENDPOINT = nameof(AZURE_AI_SERVICES_ENDPOINT);

        private string? _endpoint = null;
        private ApiKeyCredential? _key = null;

        public AzureOpenAIClientBuilder WithEndpoint(string endpoint) { _endpoint = endpoint; return this; }

        /// <summary>
        /// Usage: Provide user-specific enviornment variable called : 'AZURE_AI_SERVICES_ENDPOINT'
        /// </summary>
        /// <returns></returns>
        public AzureOpenAIClientBuilder WithDefaultEndpointFromEnvironmentVariable() { _endpoint = Environment.GetEnvironmentVariable(AZURE_AI_SERVICES_ENDPOINT, EnvironmentVariableTarget.User); return this; }
       
        
        public AzureOpenAIClientBuilder WithKey(string key) { _key = new ApiKeyCredential(key); return this; }       
        public AzureOpenAIClientBuilder WithKeyFromEnvironmentVariable(string key) { _key = new ApiKeyCredential(Environment.GetEnvironmentVariable(key) ?? "N/A"); return this; }

        /// <summary>
        /// Usage : Provide user-specific environment variable called : 'AZURE_AI_SERVICES_KEY'
        /// </summary>
        /// <returns></returns>
        public AzureOpenAIClientBuilder WithDefaultKeyFromEnvironmentVariable() { _key = new ApiKeyCredential(Environment.GetEnvironmentVariable(AZURE_AI_SERVICES_KEY, EnvironmentVariableTarget.User) ?? "N/A"); return this; }

        public AzureOpenAIClient? Build() => !string.IsNullOrWhiteSpace(_endpoint) && _key != null ? new AzureOpenAIClient(new Uri(_endpoint), _key) : null;

        /// <summary>
        /// Default model will be set 'gpt-4'
        /// </summary>
        /// <returns></returns>
        public ChatClient? BuildChatClient(string aiModel = "gpt-4") => Build()?.GetChatClient(aiModel);

        public static AzureOpenAIClientBuilder Instance => new AzureOpenAIClientBuilder();

    }
}


It is highly recommended to store your endpoint and key to the Azure AI service of course not in the source code repository, but another place, for example on your user-specific environment variable or Azure key vault or similar place hard to obtain for malicious use, for example using your account to route much traffic to Chat GPT-4 only to end up being billed for this traffic. The code provided some 'default methods' which will look for environment variables. Add the key and endpoint to your Azure AI to these user specific environment variables.
  • AZURE_AI_SERVICES_KEY
  • AZURE_AI_SERVICES_ENDPOINT

To use the chat client the following code shows how to do this:

ChatGptDemo.cs


    public async Task<string?> RunChatGptQuery(ChatClient? chatClient, string msg)
        {
            if (chatClient == null)
            {
                Console.WriteLine("Sorry, the demo failed. The chatClient did not initialize propertly.");
                return null;
            }

            var stopWatch = Stopwatch.StartNew();

            string reply = await chatClient.GetStreamedReplyStringAsync(msg, outputToConsole: true);

            Console.WriteLine($"The operation took: {stopWatch.ElapsedMilliseconds} ms");


            Console.WriteLine();

            return reply;
        }
        
        
The communication against Azure AI service with Open AI Chat-GPT service is this line:

ChatGptDemo.cs


    string reply = await chatClient.GetStreamedReplyStringAsync(msg, outputToConsole: true);

The Chat GPT-4 service will return the data streamed so you can output the result as quickly as possible. I have tested it out using Standard Service S0 tier, it is a bit slower than the default speed you get inside the browser using Copilot, but it works and if you output to the console, you get a similar experience. The code here can be used in different environments, the repo contains a console app with .NET 8.0 Framework, written in C# as shown in the code. Here is the helper methods for the ChatClient, provided as extension methods.

ChatclientExtensions.cs


using OpenAI.Chat;
using System.ClientModel;
using System.Text;

namespace OpenAIDemo
{
    public static class ChatclientExtensions
    {

        /// <summary>
        /// Provides a stream result from the Chatclient service using AzureAI services.
        /// </summary>
        /// <param name="chatClient">ChatClient instance</param>
        /// <param name="message">The message to send and communicate to the ai-model</param>
        /// <returns>Streamed chat reply / result. Consume using 'await foreach'</returns>
        public static AsyncCollectionResult<StreamingChatCompletionUpdate> GetStreamedReplyAsync(this ChatClient chatClient, string message) =>
            chatClient.CompleteChatStreamingAsync(
                [new SystemChatMessage("You are an helpful, wonderful AI assistant"), new UserChatMessage(message)]);

        public static async Task<string> GetStreamedReplyStringAsync(this ChatClient chatClient, string message, bool outputToConsole = false)
        {
            var sb = new StringBuilder();
            await foreach (var update in GetStreamedReplyAsync(chatClient, message))
            {
                foreach (var textReply in update.ContentUpdate.Select(cu => cu.Text))
                {
                    sb.Append(textReply);
                    if (outputToConsole)
                    {
                        Console.Write(textReply);
                    }
                }
            }
            return sb.ToString();
        }

    }
}


The code presented here should make it a bit easier to communicate with the Azure AI Open AI Chat GPT-4 service. See the repository to test out the code. Screenshot below shows the demo in use in a console running against the Azure AI Chat GPT-4 service :

Saturday, 16 November 2024

Url encoding base 64 strings in .NET 9

This article shows new functionality how to url encode base 64 strings in .NET 9. In .NET 8 you would do multiple steps to url encode base 64 strings like this: Program.cs


using System.Buffers.Text;
using System.Net;
using System.Text;
using System.Text.Encodings.Web;

byte[] data = Encoding.UTF8.GetBytes("Hello there, how yall doin");
var base64 = Convert.ToBase64String(data);
var base64UrlEncoded = WebUtility.UrlEncode(base64);

Console.WriteLine(base64UrlEncoded);


We here first convert the string to a bytes in a byte array and then we base 64 encode the byte array into a Base64 string. Finally we url encode the string into a URL safe string. Let's see how simple this is in .NET 9 : Program.cs (v2)


using System.Buffers.Text;
using System.Net;
using System.Text;
using System.Text.Encodings.Web;

byte[] data = Encoding.UTF8.GetBytes("Hello there, how yall doin");
var base64UrlEncodedInNet9 = Base64Url.EncodeToString(data);

Console.WriteLine(base64UrlEncodedInNet9);


If we use ImplicitUsings here in the .csproj file the code above just becomes :

byte[] data = Encoding.UTF8.GetBytes("Hello there, how yall doin");
var base64UrlEncodedInNet9 = Base64Url.EncodeToString(data);
Console.WriteLine(base64UrlEncodedInNet9);

This shows we can skip the intermediate step where we first convert the bytes into a base64-string and then into a Url safe string and instead do a base-64 encoding and then an url encoding in one go. This way is more optimized, it is also possible here to use ReadOnlySpan (that works for both .NET 8 and .NET 9). Putting together we get:

using System.Buffers.Text;
using System.Net;
using System.Text;
using System.Text.Encodings.Web;

ReadOnlySpan data = Encoding.UTF8.GetBytes("Hello there, how yall doin");
var base64 = Convert.ToBase64String(data);
var base64UrlEncoded = WebUtility.UrlEncode(base64);

var base64UrlEncodedInNet9 = Base64Url.EncodeToString(data);

Console.WriteLine(base64UrlEncoded);
Console.WriteLine(base64UrlEncodedInNet9);

The output is the following :

SGVsbG8gdGhlcmUsIGhvdyB5YWxsIGRvaW4%3D
SGVsbG8gdGhlcmUsIGhvdyB5YWxsIGRvaW4

As we can see, the .NET 9 Base64.UrlEncode skips the the padding characters, so beware of that.


Note that by omitting the padding, it is necessary to pad the base 64 url encoded string if you want to decode it. Consider this helpful extension method to add the necessary padding:


/// <summary>
/// Provides extension methods for Base64 encoding operations.
/// </summary>
public static class Base64Extensions
{
    /// <summary>
    /// Adds padding to a Base64 encoded string to ensure its length is a multiple of 4.
    /// </summary>
    /// <param name="base64">The Base64 encoded string without padding.</param>
    /// <param name="isUrlEncode">Set to true if this is URL encode, will add instead '%3D%' as padding at the end (0-2 such padding chars, same for '=').</param>
    /// <returns>The Base64 encoded string with padding added, or the original string if it is null or whitespace.</returns>
    public static string? AddPadding(this string base64, bool isUrlEncode = false)
    {
        string paddedBase64 = !string.IsNullOrWhiteSpace(base64) ? base64.PadRight(base64.Length + (4 - (base64.Length % 4)) % 4, '=') : base64;
        return !isUrlEncode ? paddedBase64 : paddedBase64?.Replace("=", "%3D");
    }    
}


We can now achieve the same output with this extension method :


using System.Buffers.Text;
using System.Net;
using System.Text;
using System.Text.Encodings.Web;

ReadOnlySpan data = Encoding.UTF8.GetBytes("Hello there, how yall doin");
var base64 = Convert.ToBase64String(data);
var base64UrlEncoded = WebUtility.UrlEncode(base64);

var base64UrlEncodedInNet9 = Base64Url.EncodeToString(data);

// Using the extension method to add padding
base64UrlEncodedInNet9 = base64UrlEncodedInNet9.AddPadding(isUrlEncode: true);

Console.WriteLine(base64UrlEncoded);
Console.WriteLine(base64UrlEncodedInNet9);


Finally, the output using the two different approaching pre .NET 9 and .NET 9 gives the same results:

SGVsbG8gdGhlcmUsIGhvdyB5YWxsIGRvaW4%3D

Monday, 28 October 2024

Enumerating concurrent collections with snapshots in C#

In standard collections in C#, it is not allowed to alter collections you iterate upon using foreach for example, since it throws InvalidOperationException - Collection was modified; enumeration operation may not execute. Concurrent collections can be altered while being iterated. This is the default behavior, allow concurrent behavior while iterating - as locking the entire concurrent collection is costly. You can however enforce a consistent way of iterating the concurrent collection by making a snapshot of it. For concurrent dictionaries, we use the ToArray method.


	var capitals = new ConcurrentDictionary<string, string>{
		["Norway"] = "Oslo",
		["Denmark"] = "Copenhagen",
		["Sweden"] = "Stockholm",
		["Faroe Islands"] = "Torshamn",
		["Finland"] = "Helsinki",
		["Iceland"] = "Reykjavik"
	};

	//make a snapshot of the concurrent dictionary first 
	
	var capitalsSnapshot = capitals.ToArray();
	
	//do some modifications
	
	foreach (var capital in capitals){
		capitals[capital.Key] = capital.Value.ToUpper();
	}

	foreach (var capital in capitalsSnapshot)
	{
		Console.WriteLine($"The capital in {capital.Key} is {capital.Value}");
	}

This outputs:


The capital in Denmark is Copenhagen
The capital in Sweden is Stockholm
The capital in Faroe Islands is Torshamn
The capital in Norway is Oslo
The capital in Finland is Helsinki
The capital in Iceland is Reykjavik  


The snapshot of the concurrent collection was not modified by the modifications done. Let's look at the concurrent collection again and iterate upon it.


	foreach (var capital in capitals)
	{
		Console.WriteLine($"The capital in {capital.Key} is {capital.Value}");
	}

This outputs:


Enumerate capitals in concurrent array - just enumerating with ToArray() - elements can be changed while enumerating. Faster, but more unpredictable
The capital in Denmark is COPENHAGEN
The capital in Sweden is STOCKHOLM
The capital in Faroe Islands is TORSHAMN
The capital in Norway is OSLO
The capital in Finland is HELSINKI
The capital in Iceland is REYKJAVIK


As we can see, the concurrent dictionary has modified its contents and this shows that we can get modifications upon iterating collections. If you do want to get consistent results, using a snapshot should be desired. But note that this will lock the entire collection and involve costly operations of copying the contents. If you do do concurrent collection snapshots, keep the number of snapshots to a minimum and iterate upon these snapshots, preferable only doing one snapshot in one single place in the method for the specific concurrent dictionary.

Monday, 7 October 2024

Partition methods for collections in C#

This article will look at some partition methods for collections in C#, specifically List<T>, ConcurrentDictionary<TKey, TValue> and Dictionary<TKey, TValue>

Definition of partitioning: Partitioning consists of splitting up a collection {n1, n2, .. nk } into partitions of size P = C , where C is a positive constant integer. The last partition will consist of [0, C], the last C elements.

Example: A list of 100 elements will be partition by size 30, giving four partitions : 1: 0-29 2: 30-59 3: 60-89 4: 90-99

Note that partition 4 only got 9 elements.

Let's head over to some code.

The partition methods are the following :


using System;
using System.Collections.Concurrent;
using System.Collections.Generic;
using System.Linq;

public static class CollectionExtensions
{

    public static IEnumerable<IList<T&t;> Partition<T>(this IList<T> source, int size)
    {
        for (int i = 0; i < Math.Ceiling(source.Count / (double)size); i++)
        {
            yield return new List<T>(source.Skip(i * size).Take(size));
        }
    }

    public static IEnumerable<Dictionary<TKey, TValue&t;> Partition<TKey, TValue>(this IDictionary<TKey, TValue> source, int size)
    {
        for (int i = 0; i < Math.Ceiling(source.Keys.Count / (double)size); i++)
        {
            yield return new Dictionary<TKey, TValue>(source.Skip(i * size).Take(size));
        }
    }

    public static IEnumerable<ConcurrentDictionary<TKey, TValue> Partition<TKey, TValue>(this ConcurrentDictionary<TKey, TValue> source, int size)
    {
        for (int i = 0; i < Math.Ceiling(source.Keys.Count / (double)size); i++)
        {
            yield return new ConcurrentDictionary<TKey, TValue>(source.Skip(i * size).Take(size));
        }
    }

}


These three methods are very similar. An example usage is shown below. We partition a ConcurrentDictionary, for example one consisting of 200,000 key value pairs into partitions by size 50,000. This will produce a total of four partitions which are then processed at parallell.

Make note that even though you can partition a ConcurrentDictionary into multiple concurrent dictionaries consist after partitioning, the simpler approach code at the bottom of the method was quicker when I tested it out. There are a lot of pitfalls when it comes to concurrent programming.

The key takeaway from this article was how you can partition a collection into multiple partitions, this will enable you to do "Divide and Conquer" strategy when it comes to collections to partition labor among several threads in parallell.


	static int Enumerate(ConcurrentDictionary<int, int> dict)
	{
		//var stopWatch = Stopwatch.StartNew();

		var dicts = dict.Partition(dict.Count / 4).ToList();

		//Console.WriteLine(dicts.ElementAt(0).Count());
		//Console.WriteLine($"Partitioning took: {stopWatch.ElapsedMilliseconds} ms");

		int total = 0;

		Parallel.For(0, 4, (i) =>
		{
			int subTotal = 0;
			var curDict = dicts.ElementAt(i);
			//int count = curDict.Count;
			//Console.WriteLine($"Number in curDict : {count}");
			foreach (var item in curDict)
			{
				Interlocked.Add(ref subTotal, item.Value);
			}
			Interlocked.Add(ref total, subTotal);
		});

		return total;
        
        //Simpler approach :

		//int expectedTotal = dict.Count;

		//int total = 0;
		//Parallel.ForEach(dict, keyValPair =>
		//	 {
		//		 //int count = dict.Count;
		//		 Interlocked.Add(ref total, keyValPair.Value);
		//	 });
		//return total;
	}


Monday, 30 September 2024

Generic alternate lookup for Dictionary in .NET 9

Alternate lookup for Dictionary in .NET 9 demo

This repo contains code that shows how an alternate lookup of dictionaries can be implemented in .NET 9. A generic alternate equality comparer is also included. Alternate lookups of dictionaries allows you to take control how you can look up values in a dictionaries in a custom manner. Usually, we use a simple key for a dictionary, such as an int. In case you instead have keys that are complex objects such as class instances, having a custom way of defining alternate lookup gives more flexibility. In the generic equality comparer, a key expression is provided, where a member expression is expected. You can for example have a class Person where you could use a property Id of type Guid and use that key to look up values in a dictionary that uses Person as a key. The code below and sample code demonstrates how it can be used.

Now, would you use this in .NET ? You can utilize usage of Spans, allowing increased performance for dictionary lookups. Also you can use this technique to more collections, such as HashSet, ConcurrentDictionary, FrozenDictionary and FrozenSet. The generic alternate equality comparer looks like this :


using System.Linq.Expressions;
using LookupDictionaryOptimized;


namespace LookupDictionaryOptimized
{
    public class AlternateEqualityComparer<T, TKey> : IEqualityComparer<T>, IAlternateEqualityComparer<TKey, T>
        where T : new()
    {
        private readonly Expression<Func<T, TKey>> _keyAccessor;

        private TKey GetKey(T obj) => _keyAccessor.Compile().Invoke(obj);

        public AlternateEqualityComparer(Expression<Func<T, TKey>> keyAccessor)
        {
            _keyAccessor = keyAccessor;
        }

        public AlternateEqualityComparer<T, TKey> Instance
        {
            get
            {
                return new AlternateEqualityComparer<T, TKey>(_keyAccessor);
            }
        }

        T IAlternateEqualityComparer<TKey, T>.Create(TKey alternate)
        {
            //create a dummy default instance if the requested key is not contained in the dictionary
            return Activator.CreateInstance<T>();
        }

        public bool Equals(T? x, T? y)
        {
            if (x == null && y == null)
            {
                return true;
            }
            if ((x == null && y != null) || (x != null && y == null))
            {
                return false;
            }
            TKey xKey = GetKey(x!);
            TKey yKey = GetKey(y!);
            return xKey!.Equals(yKey);
        }

        public int GetHashCode(T obj) => GetKey(obj)?.GetHashCode() ?? default;

        public int GetHashCode(TKey alternate) => alternate?.GetHashCode() ?? default;

        public bool Equals(TKey alternate, T other)
        {
            if (alternate == null && other == null)
            {
                return true;
            }
            if ((alternate == null && other != null) || (alternate != null && other == null))
            {
                return false;
            }
            TKey otherKey = GetKey(other);
            return alternate!.Equals(otherKey);
        }
    }

}

The demo below shows how to use this. When instantiating the dictionary, it is possibe to set the IEqualityComparer. You can at the same time implement IAlternateEqualityComparer. The generic class above does this for you, and an instance of this comparer is passed into the dictionary as an argument upon creation. A lookup can then be stored into a variable
using the GetAlternateLookup method.

Note about this demo code below. We could expand and allow multiple members or any custom logic when defining alternate equality lookup. But the code below only expects one key property. To get more control of the alterate lookup, you must write an equality and alternate equality comparer manually, but much of the plumbing code could be defined in a generic manner.

For example, we could define a compound key such as a ReadonlySpan of char or a string where we combine the key properties we want to use. Such a generic alternate equality comparer could expect a params of key properties and then build a compound key. It is possible here to to use HashCode.Combine method for example. I might look in to such an implementation later on, for example demo how to use TWO properties for a lookup or even consider a Func<bool> method to define as the equality comparison method. But quickly , the gains of a such a generic mechanism might become counteractive opposed to just writing an equality comparer and alternate comparer manually.

The primary motivation of alternate dictionary lookup is actually performance, as the alternate lookup allows to make more use of Spans and avoid a lot of allocations and give improved performance.


    /// <summary>
    /// Based from inspiration of nDepend blog article : https://blog.ndepend.com/alternate-lookup-for-dictionary-and-hashset-in-net-9/
    /// </summary>
    public static class DemoAlternateLookupV2
    {
        public static void RunGenericDemo()
        {
            var paul = new Person("Paul", "Jones");
            var joey = new Person("Joey", "Green");
            var laura = new Person("Laura", "Bridges");

            var mrX = new Person("Mr", "X"); //this object is not added to the dictionary

            AlternateEqualityComparer<Person, Guid> personComparer = new AlternateEqualityComparer<Person, Guid>(m => m.Id);

            var dict = new Dictionary<Person, int>(personComparer.Instance)
            {
                { paul, 11 },
                { joey, 22 },
                { laura, 33 }
            };

            var lauraId = laura.Id;
            //Dictionary<Person, int>.AlternateLookup<Guid> lookup = dict.GetAlternateLookup<Guid>();  Easier : just use var on left hand side

            var lookup = dict.GetAlternateLookup<Guid>();
            int lookedUpPersonId = lookup[lauraId];

            Console.WriteLine($"Retrieved a Dictionary<Person,Guid> value via alternate lookup key: {lauraId}.\nThe looked up value is: {lookedUpPersonId}");
            lookedUpPersonId.Should().Be(33);
            Console.WriteLine($"Expected value retrieved. OK.");

            Console.WriteLine("Testing also to look for a person not contained in the dictionary");

            bool lookedUpNonExistingPersonFound = lookup.ContainsKey(mrX.Id);
            Console.WriteLine($"Retrieved a Dictionary<Person,Guid> value via alternate lookup key: {mrX.Id}.\nThe looked up value found : {lookedUpNonExistingPersonFound}");

        }

    }

The generic alternate equality comparer requires a public parameterless constructor. Also, the provided keyExpression for the key - the property of the class which will serve as the alternate lookup. The Person class looks like this :


 namespace LookupDictionaryOptimized
{
    public class Person
    {

        public Person(string firstName, string lastName)
        {
            FirstName = firstName;
            LastName = lastName;
        }

        public Person()
        {
            FirstName = string.Empty;
            LastName = string.Empty;
            Id = Guid.Empty;
        }

        public string FirstName { get; set; }
        public string LastName { get; set; }
        public Guid Id { get; set; } = Guid.NewGuid();
    }
}

Output below:


Retrieved a Dictionary<Person,Guid> value via alternate lookup key: 5b2b1d28-c024-4b76-8cdd-2717c42dc7f8.
The looked up value is: 33
Expected value retrieved. OK.
Testing also to look for a person not contained in the dictionary
Retrieved a Dictionary<Person,Guid> value via alternate lookup key: 6ae6f259-14a6-4960-889b-15f33aab4ec0.
The looked up value found : False
Hit the any key to continue..

More about alternate lookups can be read in this nDepend blog article: https://blog.ndepend.com/alternate-lookup-for-dictionary-and-hashset-in-net-9/

Monday, 23 September 2024

Looking up gMSA accounts in Active Directory

A short article with tips how you can find gMSA accounts in Active Directory or AD. First off, import the module ActiveDirectory. Then you can run the following snippet to find some gMsa accounts of which you know part of the name of.


Import-Module ActiveDirectory
Get-ADObject -Filter {ObjectClass -eq "msDS-GroupManagedServiceAccount"  -and Name -Like '*SomeGmsa*' }  -Properties DistinguishedName,  SamAccountName | Select DistinguishedName, SamAccountName 


This yields the results:


DistinguishedName                                                   SamAccountName  
-----------------                                                   --------------  
CN=gMSA1DVSomeGmsa,CN=Managed Service Accounts,DC=someacme,DC=org        MSA1DVSomeAcmeP$    
CN=gMSA1_gMSA1DGmsaPT,CN=Managed Service Accounts,DC=someacme,DC=org     MSA1gMSA1DVSomeAcme$
CN=gMSA1_DVSomeGmsaPT,CN=Managed Service Accounts,DC=someacme,DC=org     MSA1DVSomeAcmePT$   

You can search for gMSA users in AD like this:


Import-Module ActiveDirectory 

Get-ADServiceAccount -Filter "Name -like '*SomeGmsa*'"


This should yield a list of matching gMSA users with given name :

You can also ask for all properties of Gmsa users using -Properties with * :


Import-Module ActiveDirectory
Get-ADObject -Filter {ObjectClass -eq "msDS-GroupManagedServiceAccount"  -and Name -Like '*SomeGmsa*' }  -Properties *


Please note that your server should also install the gMsa account where it shall be used ! And to use the module ActiveDirectory, the Windows feature must be installed. From Powershell admin console you can run:


# Remember to install the RSAT-AD-Powershell module 

Add-WindowsFeature RSAT-AD-PowerShell

Install-ADServiceAccount SomeGmsa$


Import-Module ActiveDirectory
Get-ADObject -Filter {ObjectClass -eq "msDS-GroupManagedServiceAccount"  -and Name -Like '*SomeGmsa*' }  -Properties DistinguishedName,  SamAccountName | Select DistinguishedName, SamAccountName 

Note that you gMsa user has a SamAccountName which is suffixed by '$'. This can be set up in IIS for you application as the app pool identity. The username will be in this example:


MYDOMAIN\SomeGmsa$

The password of the gMSa service account will actually be empty ! Instead, the service account is installed as shown above using the cmd-let Install-AdServiceAccount.

Sunday, 8 September 2024

Using lazy loading in Entity Framework Core 8

This article will show some code how you can opt in something called lazy loading in EF. This means you do not load in all the related data for an entity until you need the data. Lets look at a simple entity called Customer. We will add to navigational properties, that is related entities. Without eager loading enabled automatically or lazy loading enabled automatically, EF Core 8 will not populated these navigational properties, which is pointing to the related entities. The fields will be null without active measure on the loading part. Let's inspect how to lazy load such navigational properties.

Customer.cs


 public class Customer {
 
  // more code.. 
 
  public Customer()
  {
      AddressCustomers = new HashSet<AddressCustomer>();
  }
  
  // more code .. 
 
  private Customer(ILazyLoader lazyLoader)
  {
    LazyLoader = lazyLoader;
  }

  public CustomerRank CustomerRank { get; set; }

  public virtual ICollection<AddressCustomer> AddressCustomers { get; set; }
  
 }


First off, the ILazyLoader service is from Microsoft.EntityFrameworkCore.Infrastructure. It is injected inside the entity, preferably using a private constructor of the entity. Now you can set up lazy loading a for a navigational property like this :


 public CustomerRank CustomerRank
 {
     get => LazyLoader.Load(this, ref _customerRank);
     set => _customerRank = value;
 }


If it feels a bit unclean to mix entity code with behavioral code since we inject a service into our domain models or entities, you can use the Fluent api instead while setting up the DbContext.


  modelBuilder.Entity<Customer>()
      .Navigation(e => e.AddressCustomers)
     .AutoInclude();

  modelBuilder.Entity<Customer>(entity =>
  {
      entity.HasKey(e => e.Id);
     entity.Navigation(e => e.CustomerRank).AutoInclude();
  });


If automatically lazy loading the data (the data will be loaded upon access of the navigational property) seems a bit little flexible, one can also set up loading manually wherever in the application code using the methods Entry and either Reference or Collection and then the Load method.


var customer = _dbContext.Customers.First();

_dbContext
    .Entry(customer)
    .Reference(c => c.CustomerRank)
    .Load();


_dbContext
    .Entry(customer)
    .Collection(c => c.AddressCustomers)
    .Load();


Once more, note that the data is still lazy loaded, their content will only be loaded when you access the particular navigational property pointing to the related data. Also note that if you debug in say VS 2022, data might look like they are automatically loaded, but this is because the debugger loads the contents if it can and will even do so for lazy loaded navigational fields. If you instead make in your application code a programmatic access to this navigational property and output the data you will see the data also being loaded, but this happens once it is programatic access. For example if we made the private field _customerRank public (as we should not do to protect our domain model's data) you can see this while debugging :


//changed a field in Customer.cs to become public for external access :
//  public CustomerRank _customerRank;

Console.WriteLine(customer._customerRank);
Console.WriteLine(customer.CustomerRank);

// considering this set up 

  public CustomerRank CustomerRank
  {
      get => LazyLoader.Load(this, ref _customerRank);
      set => _customerRank = value;
  }


The field _customerRank is initially null, it is when we access the property CustomerRank which I set to be AutoInclude i.e. lazy loaded I see that data is loaded.

Saturday, 7 September 2024

Using implicit index access in object initializers using the hat operator in C# 13

This article presents a small sample how to use implicit index access in object initializers in C# 13, using the 'hat' operator. This is a very specialized functionality, but it can become handing when you intialize objects and their collection fields and properties. For example, creating an object with an array and just doing some few adjustments on the collection becomes a bit more accessible. Let's see some code what this new feature in C# 13 is :


var nums = new[] { 6, 9, 4, 20 };

var lastElement = nums[^1]; //last element via index 

Console.WriteLine(lastElement);

var greeter = new Greeter { 
    Message = { 
        [^1] = '!'
    },
     SomeNums = 
     {
         [^1] = 5,
         [^2] = 4,
         [^3] = 3,
         [^4] = 2,
         [^5] = 1
     }
};

Console.WriteLine(greeter);

Console.ReadKey();

class Greeter
{
    public char[] Message { get; set; } = "Hello?".ToCharArray();

    public int[] SomeNums = new int[5];

    public override string ToString()
    {
        return $"Message = {string.Join(',', Message)}, SomeNums = {string.Join(',', SomeNums)}";
    }
}


This outputs the following :


20
Message = H,e,l,l,o,!, SomeNums = 1,2,3,4,5


We initialize an instance of the class Greeter into the variable greeter and set the fields / properties in the initializer. We already inited the property Message to "Hello?" and at the same type, in the object initalizer, alter the last letter where we use the hat operator using : [^1] = '!' , which results into the string "Hello!". Here we initalized an object in an easy way and at the same time was able to alter the contents of collections of the object, altering in the example the last char of a char array. We also set the int array one element at a time using again the hat operator here. We could of course not use the hat operator here, which will access the nth last element in a collection. Make note that the hat operator is 1-based, so the last element is ^1, the second last element is [^2]. Note that to use C#, you have to download the .NET 9 SDK preview from this url : https://dotnet.microsoft.com/en-us/download/dotnet/9.0 Make note that you select the .NET 9 SDK for the platform you are using. Most .NET developers on Windows can download x64 SDK for example. After installing the SDK , go to Tools => Options in VS 2022 and choose Environment : Preview features. Check the option : 'Use previews of .NET SDK'. Restart VS 2022 after doing this. You can now test out C# 13 and .NET 9 and for example create a console application for .NET projects (not .NET Framework). The .csproj in my sample code looks like this, make note of the TargetFramework, set it to net9.0. Also set the LangVersion to Preview.


<Project Sdk="Microsoft.NET.Sdk">

  <PropertyGroup>
    <OutputType>Exe</OutputType>
    <TargetFramework>net9.0</TargetFramework>
	 <LangVersion>Preview</LangVersion>
    <ImplicitUsings>enable</ImplicitUsings>
    <Nullable>enable</Nullable>
  </PropertyGroup>

</Project>


Saturday, 10 August 2024

Calculating DateTime in .NET from Unix timestamp

This article will describe how to calculate datetime in .NET . A Unix timestamp is defined as : - The number of SECONDS that has passed SINCE Unix Epoch, a defined date set to January 1st, 1970 at UTC (Universal Time Coordinated). We can calculate a Unix timestamp for now time if we call the following method:

	DateTimeOffset.UtcNow.ToUnixTimeSeconds()

For example, as of 10th August 2024 at 21:41 this method gives: 1723318757 To calculate the DateTime value from a Unix Timestamp we can define the following extension method, since we will have an interesting issue in 2038 on 19th January 2038 at 03:14:08 UTC. At that time, an overflow will occur for systems using 32-bits integers, which is actually quite a lot of systems included 32-bits time stamps in database systems. A solution of this is to switch to 64-bits long, but this is as stated not an issue until 2038, which is still about 14 years into the future as of 2024.. We will create extension methods for both seconds and milliseconds because sometimes Unix timestamps are given in milliseconds, and we should also support both int and long. In the future, that is 2038, int cannot be used, long must be used. In addition, extension method on string is also added for convenience.


public static class DateTimeExtensions {

	public static DateTime? FromUnixTimeSeconds(this string unixTimestamp) =>
		long.TryParse(unixTimestamp, out long unixTimestampCasted) ? 
			(DateTime?) CalculateDateTimeFromUnixTimeStamp(unixTimestampCasted) : null;

	public static DateTime FromUnixTimeSeconds(this int unixTimestamp) =>
		CalculateDateTimeFromUnixTimeStamp(unixTimestamp);

	public static DateTime FromUnixTimeSeconds(this long unixTimestamp) =>
		CalculateDateTimeFromUnixTimeStamp(unixTimestamp);
		
	private static DateTime CalculateDateTimeFromUnixTimeStamp(long unixTimeStamp) =>
		new DateTime(1970, 1, 1, 0, 0, 0, 0, DateTimeKind.Utc).AddSeconds(unixTimeStamp);

}


Here is how the method could be used in some examples:


    DateTime? dt = "1723318757".FromUnixTimeSeconds();
    DateTime? dt2 = DateTimeOffset.UtcNow.ToUnixTimeSeconds().ToString().FromUnixTimeSeconds();
	
	Console.WriteLine(dt.Value);
	Console.WriteLine(dt.Value.Kind);
	Console.WriteLine(dt2);
    

The screenshot below shows how it can be calculated.


Let's next look at an extension method that converts a DateTime to Unix time stamp.


    public static long ToUnixTimeSeconds(this DateTime dt) =>
		CalculateUnixTimeSeconds(dt);

	public static long? ToUnixTimeSeconds(this DateTime? dt) =>
		dt.HasValue ? CalculateUnixTimeSeconds(dt.Value) : null;

	private static long CalculateUnixTimeSeconds(this DateTime dt) =>
		(long) dt.ToUniversalTime().Subtract(DateTime.UnixEpoch).TotalSeconds;


Usage example:

DateTime? dt4 = DateTime.UtcNow;
Console.WriteLine(dt4.ToUnixTimeSeconds());    

This gives the unix time stamp from current time. Please note that it also possible to cast a DateTime into a DateTimeOffset and then just use built in method ToUnitTimeSeconds


long unixTimestamp5 = ((DateTimeOffset)(dt4)).ToUnixTimeSeconds();
Console.WriteLine(unixTimestamp5);
    

In addition to the methods above, adding support for milliseconds should be fairly straightforward. Officially, Unix time stamps are measured in seconds. And when you convert from a Unix timestamp to a datetime, you will get UTC time. To get the local time you can do this:

DateTime? dt = "1723325214".FromUnixTimeSeconds();
Console.WriteLine(dt.Value.ToLocalTime()); 
    

Use the method ToLocalTime() on the datetime of Kind Utc, i.e. convert from UTC datetime to local datetime, taking your time zone into account. The entire extension method class then looks like this:

DateTimeExtensions.cs


public static class DateTimeExtensions {

	public static long ToUnixTimeSeconds(this DateTime dt) => 
		CalculateUnixTimeSeconds(dt);

	public static long? ToUnixTimeSeconds(this DateTime? dt) =>
		dt.HasValue ? CalculateUnixTimeSeconds(dt.Value) : null;

	private static long CalculateUnixTimeSeconds(this DateTime dt) =>
		(long) dt.ToUniversalTime().Subtract(DateTime.UnixEpoch).TotalSeconds;

	public static DateTime? FromUnixTimeSeconds(this string unixTimestamp) =>
		long.TryParse(unixTimestamp, out long unixTimestampCasted) ? 
			(DateTime?) CalculateDateTimeFromUnixTimeStamp(unixTimestampCasted) : null;

	public static DateTime FromUnixTimeSeconds(this int unixTimestamp) =>
		CalculateDateTimeFromUnixTimeStamp(unixTimestamp);

	public static DateTime FromUnixTimeSeconds(this long unixTimestamp) =>
		CalculateDateTimeFromUnixTimeStamp(unixTimestamp);
		
	private static DateTime CalculateDateTimeFromUnixTimeStamp(long unixTimeStamp) =>
		new DateTime(1970, 1, 1, 0, 0, 0, 0, DateTimeKind.Utc).AddSeconds(unixTimeStamp);

}


Friday, 9 August 2024

Converting an UTC datetime into a datetime in an arbitrary time zone

This article will show a method how to convert an UTC datetime into an arbitrary time zone. Here is the extension method for that shown below. The method checks that the specified datetime object has Kind set to Utc, we can't correctly recalculate non UTC date times that might be Local or Unspecified. We can specify the Kind of a DateTime when we specify it for example :

    var someUtcDate = new DateTime(2024, 6, 4, 6, 30, 0, DateTimeKind.Utc); 

We can also use the DateTime.SpecifyKind method:


  var someUtcDate = DateTime.SpecifyKind(someotherDate, DateTimeKind.Utc); 

Please note however, loading datetimes that are not Utc will quickly run into issues when trying to transform a not specified Utc date into another time zone.

DateTimeExtensions.cs


public static class DatetimeExtensions {
    
    /// Returns the DateTime in a specified time zone
    /// 
    ///  must be a recognized time zone id, check with System.TimeZoneInfo.GetSystemTimeZones() available time zones on the target system
    ///  must be a datetime of Kind Utc to be properly calculated into its proper value in the specified time zone id
    /// 
    public static DateTime ConvertToLocalTime(this DateTime dateTime, string timeZoneId){
    
        TimeZoneInfo timeZone = TimeZoneInfo.FindSystemTimeZoneById(timeZoneId) ?? System.TimeZoneInfo.GetSystemTimeZones().FirstOrDefault(tz => string.Equals(tz.Id, timeZoneId, StringComparison.InvariantCultureIgnoreCase));
        if (timeZone == null)
        {
            throw new ArgumentException($"The time zone with id {timeZoneId} is not recognized. (Available time zones can be retrieved using 'System.TimeZoneInfo.GetSystemTimeZones()' method)");
        }
        if (dateTime.Kind != DateTimeKind.Utc)
        {
            throw new ArgumentException($"The date time {dateTime} is not of the right Kind 'Utc'");
        }
        return TimeZoneInfo.ConvertTimeFromUtc(dateTime, timeZone);     
    }
    
}


And here is some sample code to test out this method:

Program.cs


void Main()
{
    
    var central = TimeZoneInfo.GetSystemTimeZones().Where(x => x.DisplayName.Contains("Central")).ToList(); 
    central.Dump();
    
    var someUtcDate = new DateTime(2024, 6, 4, 6, 30, 0, DateTimeKind.Utc); 
    var someUtcDateInCST = someUtcDate.ConvertToLocalTime("Central Standard Time"); 
    Console.WriteLine(someUtcDateInCST);
}


This outputs the answer:
04.06.2024 01:30:00

Note that 'Central Standard Time', which is in the Midtwest of USA, is 6 hours behind UTC. But we only are 5 hours behind UTC in the summer half year, since we got daylight saving. Please note, the example time zone used has daylight saving hours, you should use time zones that supports daylight saving to get correct results, in Norway for example we are either two hours or one hour ahead of UTC. Two hours when it is 'summer time' or 'daylight saving hour'. The following image shows the first time zones called something called 'Central' :

Here are the time zones available in Windows 11 systems per default ( I have no custom time zones added ) :

TimeZoneInfo - 141 different time zones in Windows 11 systems (example setup)
(141 items)
IdDisplayName
Dateline Standard Time(UTC-12:00) International Date Line West
UTC-11(UTC-11:00) Coordinated Universal Time-11
Aleutian Standard Time(UTC-10:00) Aleutian Islands
Hawaiian Standard Time(UTC-10:00) Hawaii
Marquesas Standard Time(UTC-09:30) Marquesas Islands
Alaskan Standard Time(UTC-09:00) Alaska
UTC-09(UTC-09:00) Coordinated Universal Time-09
Pacific Standard Time (Mexico)(UTC-08:00) Baja California
UTC-08(UTC-08:00) Coordinated Universal Time-08
Pacific Standard Time(UTC-08:00) Pacific Time (US & Canada)
US Mountain Standard Time(UTC-07:00) Arizona
Mountain Standard Time (Mexico)(UTC-07:00) La Paz, Mazatlan
Mountain Standard Time(UTC-07:00) Mountain Time (US & Canada)
Yukon Standard Time(UTC-07:00) Yukon
Central America Standard Time(UTC-06:00) Central America
Central Standard Time(UTC-06:00) Central Time (US & Canada)
Easter Island Standard Time(UTC-06:00) Easter Island
Central Standard Time (Mexico)(UTC-06:00) Guadalajara, Mexico City, Monterrey
Canada Central Standard Time(UTC-06:00) Saskatchewan
SA Pacific Standard Time(UTC-05:00) Bogota, Lima, Quito, Rio Branco
Eastern Standard Time (Mexico)(UTC-05:00) Chetumal
Eastern Standard Time(UTC-05:00) Eastern Time (US & Canada)
Haiti Standard Time(UTC-05:00) Haiti
Cuba Standard Time(UTC-05:00) Havana
US Eastern Standard Time(UTC-05:00) Indiana (East)
Turks And Caicos Standard Time(UTC-05:00) Turks and Caicos
Paraguay Standard Time(UTC-04:00) Asuncion
Atlantic Standard Time(UTC-04:00) Atlantic Time (Canada)
Venezuela Standard Time(UTC-04:00) Caracas
Central Brazilian Standard Time(UTC-04:00) Cuiaba
SA Western Standard Time(UTC-04:00) Georgetown, La Paz, Manaus, San Juan
Pacific SA Standard Time(UTC-04:00) Santiago
Newfoundland Standard Time(UTC-03:30) Newfoundland
Tocantins Standard Time(UTC-03:00) Araguaina
E. South America Standard Time(UTC-03:00) Brasilia
SA Eastern Standard Time(UTC-03:00) Cayenne, Fortaleza
Argentina Standard Time(UTC-03:00) City of Buenos Aires
Montevideo Standard Time(UTC-03:00) Montevideo
Magallanes Standard Time(UTC-03:00) Punta Arenas
Saint Pierre Standard Time(UTC-03:00) Saint Pierre and Miquelon
Bahia Standard Time(UTC-03:00) Salvador
UTC-02(UTC-02:00) Coordinated Universal Time-02
Greenland Standard Time(UTC-02:00) Greenland
Mid-Atlantic Standard Time(UTC-02:00) Mid-Atlantic - Old
Azores Standard Time(UTC-01:00) Azores
Cape Verde Standard Time(UTC-01:00) Cabo Verde Is.
UTC(UTC) Coordinated Universal Time
GMT Standard Time(UTC+00:00) Dublin, Edinburgh, Lisbon, London
Greenwich Standard Time(UTC+00:00) Monrovia, Reykjavik
Sao Tome Standard Time(UTC+00:00) Sao Tome
Morocco Standard Time(UTC+01:00) Casablanca
W. Europe Standard Time(UTC+01:00) Amsterdam, Berlin, Bern, Rome, Stockholm, Vienna
Central Europe Standard Time(UTC+01:00) Belgrade, Bratislava, Budapest, Ljubljana, Prague
Romance Standard Time(UTC+01:00) Brussels, Copenhagen, Madrid, Paris
Central European Standard Time(UTC+01:00) Sarajevo, Skopje, Warsaw, Zagreb
W. Central Africa Standard Time(UTC+01:00) West Central Africa
GTB Standard Time(UTC+02:00) Athens, Bucharest
Middle East Standard Time(UTC+02:00) Beirut
Egypt Standard Time(UTC+02:00) Cairo
E. Europe Standard Time(UTC+02:00) Chisinau
West Bank Standard Time(UTC+02:00) Gaza, Hebron
South Africa Standard Time(UTC+02:00) Harare, Pretoria
FLE Standard Time(UTC+02:00) Helsinki, Kyiv, Riga, Sofia, Tallinn, Vilnius
Israel Standard Time(UTC+02:00) Jerusalem
South Sudan Standard Time(UTC+02:00) Juba
Kaliningrad Standard Time(UTC+02:00) Kaliningrad
Sudan Standard Time(UTC+02:00) Khartoum
Libya Standard Time(UTC+02:00) Tripoli
Namibia Standard Time(UTC+02:00) Windhoek
Jordan Standard Time(UTC+03:00) Amman
Arabic Standard Time(UTC+03:00) Baghdad
Syria Standard Time(UTC+03:00) Damascus
Turkey Standard Time(UTC+03:00) Istanbul
Arab Standard Time(UTC+03:00) Kuwait, Riyadh
Belarus Standard Time(UTC+03:00) Minsk
Russian Standard Time(UTC+03:00) Moscow, St. Petersburg
E. Africa Standard Time(UTC+03:00) Nairobi
Volgograd Standard Time(UTC+03:00) Volgograd
Iran Standard Time(UTC+03:30) Tehran
Arabian Standard Time(UTC+04:00) Abu Dhabi, Muscat
Astrakhan Standard Time(UTC+04:00) Astrakhan, Ulyanovsk
Azerbaijan Standard Time(UTC+04:00) Baku
Russia Time Zone 3(UTC+04:00) Izhevsk, Samara
Mauritius Standard Time(UTC+04:00) Port Louis
Saratov Standard Time(UTC+04:00) Saratov
Georgian Standard Time(UTC+04:00) Tbilisi
Caucasus Standard Time(UTC+04:00) Yerevan
Afghanistan Standard Time(UTC+04:30) Kabul
West Asia Standard Time(UTC+05:00) Ashgabat, Tashkent
Qyzylorda Standard Time(UTC+05:00) Astana
Ekaterinburg Standard Time(UTC+05:00) Ekaterinburg
Pakistan Standard Time(UTC+05:00) Islamabad, Karachi
India Standard Time(UTC+05:30) Chennai, Kolkata, Mumbai, New Delhi
Sri Lanka Standard Time(UTC+05:30) Sri Jayawardenepura
Nepal Standard Time(UTC+05:45) Kathmandu
Central Asia Standard Time(UTC+06:00) Bishkek
Bangladesh Standard Time(UTC+06:00) Dhaka
Omsk Standard Time(UTC+06:00) Omsk
Myanmar Standard Time(UTC+06:30) Yangon (Rangoon)
SE Asia Standard Time(UTC+07:00) Bangkok, Hanoi, Jakarta
Altai Standard Time(UTC+07:00) Barnaul, Gorno-Altaysk
W. Mongolia Standard Time(UTC+07:00) Hovd
North Asia Standard Time(UTC+07:00) Krasnoyarsk
N. Central Asia Standard Time(UTC+07:00) Novosibirsk
Tomsk Standard Time(UTC+07:00) Tomsk
China Standard Time(UTC+08:00) Beijing, Chongqing, Hong Kong, Urumqi
North Asia East Standard Time(UTC+08:00) Irkutsk
Singapore Standard Time(UTC+08:00) Kuala Lumpur, Singapore
W. Australia Standard Time(UTC+08:00) Perth
Taipei Standard Time(UTC+08:00) Taipei
Ulaanbaatar Standard Time(UTC+08:00) Ulaanbaatar
Aus Central W. Standard Time(UTC+08:45) Eucla
Transbaikal Standard Time(UTC+09:00) Chita
Tokyo Standard Time(UTC+09:00) Osaka, Sapporo, Tokyo
North Korea Standard Time(UTC+09:00) Pyongyang
Korea Standard Time(UTC+09:00) Seoul
Yakutsk Standard Time(UTC+09:00) Yakutsk
Cen. Australia Standard Time(UTC+09:30) Adelaide
AUS Central Standard Time(UTC+09:30) Darwin
E. Australia Standard Time(UTC+10:00) Brisbane
AUS Eastern Standard Time(UTC+10:00) Canberra, Melbourne, Sydney
West Pacific Standard Time(UTC+10:00) Guam, Port Moresby
Tasmania Standard Time(UTC+10:00) Hobart
Vladivostok Standard Time(UTC+10:00) Vladivostok
Lord Howe Standard Time(UTC+10:30) Lord Howe Island
Bougainville Standard Time(UTC+11:00) Bougainville Island
Russia Time Zone 10(UTC+11:00) Chokurdakh
Magadan Standard Time(UTC+11:00) Magadan
Norfolk Standard Time(UTC+11:00) Norfolk Island
Sakhalin Standard Time(UTC+11:00) Sakhalin
Central Pacific Standard Time(UTC+11:00) Solomon Is., New Caledonia
Russia Time Zone 11(UTC+12:00) Anadyr, Petropavlovsk-Kamchatsky
New Zealand Standard Time(UTC+12:00) Auckland, Wellington
UTC+12(UTC+12:00) Coordinated Universal Time+12
Fiji Standard Time(UTC+12:00) Fiji
Kamchatka Standard Time(UTC+12:00) Petropavlovsk-Kamchatsky - Old
Chatham Islands Standard Time(UTC+12:45) Chatham Islands
UTC+13(UTC+13:00) Coordinated Universal Time+13
Tonga Standard Time(UTC+13:00) Nuku'alofa
Samoa Standard Time(UTC+13:00) Samoa
Line Islands Standard Time(UTC+14:00) Kiritimati Island

Tuesday, 23 July 2024

Displaying Emojis in Windows based consoles

This article will show you how you can get started with showing emojis in Windows based consoles. For an initial peek - Here is a video showing the available Emojis on Windows system I found using Nerd Font Caskaydia Cove mono font glyphs :


First off, some code showing how we can output Emojis ! We will list emojis and their code point value, a hexadecimal integer value that is used to get the correct char that represents an Emoji. Here is the console app.
Program.cs


using System.Text;

Console.OutputEncoding = System.Text.Encoding.UTF8;

var sb = new StringBuilder();
int emojisAdded = 0;
const int EMOJIS_PER_LINE = 10;
int codePoint = 0x1F300;

// Define the ranges of emojis
int[][] emojiRanges = new int[][]
{
            new int[] { 0x1F300, 0x1F5FF },
            new int[] { 0x1F600, 0x1F64F },
            new int[] { 0x1F680, 0x1F6FF },
            new int[] { 0x1F900, 0x1F9FF },
            new int[] { 0x1FA70, 0x1FAFF }
};

foreach (var emojiRange in emojiRanges)
{

    for (codePoint = emojiRange[0]; codePoint <= emojiRange[1]; codePoint++)
    {
        string emoji = char.ConvertFromUtf32(codePoint);
        sb.Append(emoji);
        emojisAdded++;
        if (emojisAdded % EMOJIS_PER_LINE == 0)
        {
            Console.WriteLine($"{sb.ToString()} {codePoint - 9:X}- {codePoint:X}");
            sb.Clear();
        }
    }

    Console.WriteLine(sb.ToString() + " " + (codePoint - 9).ToString("X") + (codePoint.ToString("X"))); //print remaining emojis

}


We use some known ranges of code points, hexadecimal valued integers where we know we in UTF-8 will find Emoji. We set up UTF-8 as the Console output encoding. We will use the method char.ConvertFromUtf32 here and the font will render the Emoji as a Glyph. Please note that not all consoles support Emojis in Windows ! We use Windows Terminal and I have set up a font that supports emojis, 'CaskaydiaCove Nerd Font Mono'. You can find the font and .ttf files to install on Github, just search for "Nerd font" and you will find it here :

https://github.com/ryanoasis/nerd-fonts/releases

If we compile the program and open it in Windows Terminal, you should get something similar to what shown below. I see there are issues on the very last emojis as they are not outputted correct, in the group "Symbols and Pictographs Extended-A". Emoticons: U+1F600 to U+1F64F Miscellaneous Symbols and Pictographs: U+1F300 to U+1F5FF Transport and Map Symbols: U+1F680 to U+1F6FF Supplemental Symbols and Pictographs: U+1F900 to U+1F9FF Symbols and Pictographs Extended-A: U+1FA70 to U+1FAFF Here are screenshots from the Emoji demo, ten Emojis are shown per row ! The "code point" integer range for each row is displayed to the right.

Monday, 15 July 2024

Caching pure functions using Memoize in C#

This article will present a technique for caching pure functions in C# using Memoize technique. This is a programmatic caching of pure method or function where we have a method that always returns the same result or equivalent result given an input. This adds scalability, maybe the method takes long time to process and we want to avoid using resources and provide a quicker answer. If your method has side effects or does not yield the same or equivalent result (cosmetic changes ignored) given a set of parameter(s), it should not be memoized. But if it does, here is how you can do this. Note that memoize is a general technique used in functional programming and is used in many languages such as Javascript, for example in the Underscore.Js lib. First off, let's define some POCOs to test the memoize function out. We will use a small sample set of movies and their actors and additional information from the fabulous year 1997.

MovieStore.cs


public class MovieStore {
    public string GetActorsByMovieTitle(string movieTitle)
    {
        Console.WriteLine($"Retrieving actors for movie with title {movieTitle} at: {DateTime.Now}");
        List<Movie> movies1997 = System.Text.Json.JsonSerializer.Deserialize<List<Movie>>(movies1997json);
        string actors = string.Join(",", movies1997
        	.FirstOrDefault(m => m.name?.ToLower() == movieTitle?.ToLower())?.actors.ToArray());
        return actors;
    }   
    
    string movies1997json = """
[
{
  "name": "The Lost World: Jurassic Park",
  "year": 1997,
  "runtime": 129,
  "categories": [
    "adventure",
    "action",
    "sci-fi"
  ],
  "releasedate": "1997-05-23",
  "director": "Steven Spielberg",
  "writer": [
    "Michael Crichton",
    "David Koepp"
  ],
  "actors": [
    "Jeff Goldblum",
    "Julianne Moore",
    "Pete Postlethwaite"
  ],
  "storyline": "Four years after the failure of Jurassic Park on Isla Nublar, John Hammond reveals to Ian Malcolm that there was another island (\"Site B\") on which dinosaurs were bred before being transported to Isla Nublar. Left alone since the disaster, the dinosaurs have flourished, and Hammond is anxious that the world see them in their \"natural\" environment before they are exploited."
},
{
  "name": "The Fifth Element",
  "year": 1997,
  "runtime": 127,
  "categories": [
    "action",
    "adventure",
    "sci-fi"
  ],
  "releasedate": "1997-05-09",
  "director": "Luc Besson",
  "writer": [
    "Luc Besson",
    "Robert Mark Kamen"
  ],
  "actors": [
    "Bruce Willis",
    "Milla Jovovich",
    "Gary Oldman",
    "Chris Tucker",
    "Ian Holm",
    "Luke Perry",
    "Brion James",
    "Tommy Lister",
    "Lee Evans",
    "Charlie Creed-Miles",
    "John Neville",
    "John Bluthal",
    "Mathieu Kassovitz",
    "Christpher Fairbank"
  ],
  "storyline": "In the colorful future, a cab driver unwittingly becomes the central figure in the search for a legendary cosmic weapon to keep Evil and Mr. Zorg at bay."
} ,
{
  "name": "Starship Troopers",
  "year": 1997,
  "runtime": 129,
  "categories": [
    "action",
    "adventure",
    "sci-fi",
    "thriller"
  ],
  "releasedate": "1997-11-07",
  "director": "Paul Verhoeven",
  "writer": [
    "Edward Neumeier",
    "Robert A. Heinlein"
  ],
  "actors": [
    "Casper Van Dien",
    "Dina Meyer",
    "Denise Richards",
    "Jake Busey",
    "Neil Patrick Harris",
    "Clancy Brown",
    "Seth Gilliam",
    "Patrick Muldoon",
    "Michael Ironside"
  ],
  "storyline": "In the distant future, the Earth is at war with a race of giant alien insects. Little is known about the Bugs except that they are intent on the eradication of all human life. But there was a time before the war... A Mobile Infantry travels to distant alien planets to take the war to the Bugs. They are a ruthless enemy with only one mission: Survival of their species no matter what the cost..."
}
]
""";
}


Movie.cs


public class Movie
{
    public string name { get; set; }
    public int year { get; set; }
    public int runtime { get; set; }
    public List<string> categories { get; set; }
    public string releasedate { get; set; }
    public string director { get; set; }
    public List<string> writer { get; set; }
    public List<string> actors { get; set; }
    public string storyline { get; set; }
}


Let's suppose the method GetActorsByMovieTitle is called many times or takes a lot of time to calculate. We want to cache it, to memoize it. It will be cached in a simple manner using memoize. This will short term cache the results, if we would like to persist the memoized results for long duration, we would use some other caching service such as database or Redis cache. The caching will function in sequential calls inside the same scope, it could be scoped as a singleton and long term cached inside memory for example. So here is how we can do the memoization shown below.

FunctionalExtensions.cs


public static Func<T1, TOut> Memoize<T1, TOut>(this Func<T1, TOut> @this, Func<T1, string> keyGenerator)
	{
		var dict = new Dictionary<string, TOut>();
		return x =>
		{
			string key = keyGenerator(x);
			if (!dict.ContainsKey(key))
			{
				dict.Add(key, @this(x));
			}
			return dict[key];
		};
	}
	public static Func<T1, T2, TOut> Memoize<T1, T2, TOut>(this Func<T1, T2, TOut> @this, Func<T1, T2, string> keyGenerator)
	{
		var dict = new Dictionary<string, TOut>();
		return (x,y) =>
		{
			string key = keyGenerator(x,y);
			if (!dict.ContainsKey(key))
			{
				dict.Add(key, @this(x,y));
			}
			return dict[key];
		};
	}
	public static Func<T1, T2, T3, TOut> Memoize<T1, T2, T3, TOut>(this Func<T1, T2, T3, TOut> @this, Func<T1, T2, T3, string> keyGenerator)
	{
		var dict = new Dictionary<string, TOut>();
		return (x, y, z) =>
		{
			string key = keyGenerator(x, y,z);
			if (!dict.ContainsKey(key))
			{
				dict.Add(key, @this(x, y, z));
			}
			return dict[key];
		};
	}
	public static Func<T1, T2, T3, T4, TOut> Memoize<T1, T2, T3, T4, TOut>(this Func<T1, T2, T3, T4, TOut> @this, Func<T1, T2, T3, T4, string> keyGenerator)
	{
		var dict = new Dictionary<string, TOut>();
		return (x, y, z, w) =>
		{
			string key = keyGenerator(x, y, z, w);
			if (!dict.ContainsKey(key))
			{
				dict.Add(key, @this(x, y, z, w));
			}
			return dict[key];
		};
	}


As we see above, we use a dictionary inside the memoize overloads and the way generics works, a dictionary will live inside each overloaded method accepting a different count of generic type parameters. We also provide a keyGenerator method that must be supplied to specify how we build up a unique key that we decide how we shall key each results from the given set of parameter(s). Note that we return here a function result, that is a func, that returns TOut and accepts the specified parameters in each overload. T1 or T1,T2 or T1,T2,T3 or T1,T2,T3,T4 and so on. Expanding the methods above to for example 16 parameters would be fairly easy, the code above shows how we can add support for more and more parameters. I believe you should avoid methods with more than 7 parameters,
but the code above should be clear. We return a func and we also accept also a func which returns TOut and same amount of parameters of same types T1,.. in each overload. Okay, next up an example how we can use this memoize function in the main method.

Program.cs


void Main()
{
    var movieStore = new MovieStore();
    
    //string actors = movieStore.GetActorsByMovieTitle("Starship troopers");
    //actors.Dump("Starship Troopers - Actors");
    //
    //Demo of memoized function
    
    var GetActorsByMovieTitle = ((string movieTitle) => movieStore.GetActorsByMovieTitle(movieTitle));
    var GetActorsByMovieTitleM = GetActorsByMovieTitle.Memoize(x => x);
    
    var starShipTroopersActors1 = GetActorsByMovieTitleM("Starship troopers");
    starShipTroopersActors1.Dump("Starship troopers - Call to method #1 time");
    var starShipTroopersActors2 = GetActorsByMovieTitleM("Starship troopers");
    starShipTroopersActors2.Dump("Starship troopers - Call to method #2 time");
    var starShipTroopersActors3 = GetActorsByMovieTitleM("Starship troopers");
    starShipTroopersActors3.Dump("Starship troopers - Call to method #3 time");
}


Note that in the test case above we send in one parameter T1 of type string, which is a movie title and we declare a func variable first using a lambda. We have to do the memoization in two declarations here and we use the convention that we suffix the memoized function with 'M' for 'Memoize'

Program.cs


void Main()
{
    var movieStore = new MovieStore();    
    var GetActorsByMovieTitle = ((string movieTitle) => movieStore.GetActorsByMovieTitle(movieTitle));
    var GetActorsByMovieTitleM = GetActorsByMovieTitle.Memoize(x => x);

The code has added a Console.WriteLine in the method which is memoized to check how many times the method is actually called or the cached result is returned instead. A run in Linqpad 7 is shown in screenshot below, showing that the output is cached correct. Note that if we wanted a thread implementation, we could instead use ConcurrentDictionary for example. The following methods show how we can do this. We exchanged Dictionary with ConcurrentDictionary and exchanged Add with TryAdd method of ConcurrentDictionary.

Program.cs


	public static Func<T1, TOut> MemoizeV2<T1, TOut>(this Func<T1, TOut> @this, Func<T1, string> keyGenerator)
	{
		var dict = new ConcurrentDictionary<string, TOut>();
		return x =>
		{
			string key = keyGenerator(x);
			if (!dict.ContainsKey(key))
			{
				dict.TryAdd(key, @this(x));
			}
			return dict[key];
		};
	}
	public static Func<T1, T2, TOut> MemoizeV2<T1, T2, TOut>(this Func<T1, T2, TOut> @this, Func<T1, T2, string> keyGenerator)
	{
		var dict = new ConcurrentDictionary<string, TOut>();
		return (x, y) =>
		{
			string key = keyGenerator(x, y);
			if (!dict.ContainsKey(key))
			{
				dict.TryAdd(key, @this(x, y));
			}
			return dict[key];
		};
	}
	public static Func<T1, T2, T3, TOut> MemoizeV2<T1, T2, T3, TOut>(this Func<T1, T2, T3, TOut> @this, Func<T1, T2, T3, string> keyGenerator)
	{
		var dict = new ConcurrentDictionary<string, TOut>();
		return (x, y, z) =>
		{
			string key = keyGenerator(x, y, z);
			if (!dict.ContainsKey(key))
			{
				dict.TryAdd(key, @this(x, y, z));
			}
			return dict[key];
		};
	}
	public static Func<T1, T2, T3, T4, TOut> MemoizeV2<T1, T2, T3, T4, TOut>(this Func<T1, T2, T3, T4, TOut> @this, Func<T1, T2, T3, T4, string> keyGenerator)
	{
		var dict = new ConcurrentDictionary<string, TOut>();
		return (x, y, z, w) =>
		{
			string key = keyGenerator(x, y, z, w);
			if (!dict.ContainsKey(key))
			{
				dict.TryAdd(key, @this(x, y, z, w));
			}
			return dict[key];
		};
	}


Hopefully, memoize or the process of memoization should be clearer now. It is a call based caching technique used preferably for pure functions / methods that has the same or equivalent result given a set of input parameter(s) and we memoize the function / method and cache the results. When used inside e.g. a singleton, we can cache longer time in memory and achieve performance boosts. You could do the same of course using a static variable, but the memoize technique is more generic purpose and is a pattern that is used in many programming languages. F# usually got way better support for functional programming than C#, but actually lacks a built in memoization functionality. Other languages do support memoization built in, such as in Python and LISP. The following screen shot shows a run of memoization above, I used ConcurrentDictionary when I tested.