Sunday 5 August 2018

Wcf byte array + HTML 5 Video + Custombinding

Again, this article looks at different ways to load byte array from WCF representing video data to web clients, this approach will return a byte array and use a CustomBinding in WCF. You can start by cloning the repository I have prepared from here:
git clone https://toreaurstad@bitbucket.org/toreaurstad/wcfaudiostreamdemo.git git fetch && git checkout VideBase64String_05082018
The following method is added to our WCF service contract, note that now we leave the webHttpBinding and use a CustomBinding.

     [OperationContract]
     byte[] GetVideoBytes(string videofile);

There is no [WebGet] attribute this time, as noted we will not use WCF REST but SOAP instead. The web.config of the host website for the WCF services exposes this CustomBinding:

<system.serviceModel>

    <services>
      
      <service name="WcfStreamAudioDemo.Host.AudioService">
        <endpoint behaviorConfiguration="RestBehaviorConfig" binding="webHttpBinding" bindingConfiguration="HttpStreaming" contract="WcfStreamAudioDemo.Common.IAudioServiceContract" />
      </service>
      
      <service name="WcfStreamAudioDemo.Host.VideoService">
        <endpoint behaviorConfiguration="RestBehaviorConfig" binding="webHttpBinding" bindingConfiguration="HttpStreaming" contract="WcfStreamAudioDemo.Common.IVideoServiceContract" />
        <endpoint address="custom" binding="customBinding" bindingConfiguration="CustomBinding" contract="WcfStreamAudioDemo.Common.IVideoServiceContract" />
      </service> 

    </services>
    

    <bindings>
      
     <customBinding>
        <binding name="CustomBinding">
          <binaryMessageEncoding>
            <readerQuotas maxArrayLength="100000000" maxStringContentLength="100000000"/>
          </binaryMessageEncoding>
          <httpTransport />
        </binding>
      </customBinding>

      <webHttpBinding>
        <binding name="HttpStreaming" transferMode="Streamed" maxReceivedMessageSize="1000000000" maxBufferPoolSize="100000000">
          <readerQuotas maxArrayLength="100000000" maxStringContentLength="100000000"/>
        </binding>
      </webHttpBinding>
    </bindings>
    
    <behaviors>

      <serviceBehaviors>
        <behavior>
          <!-- To avoid disclosing metadata information, set the values below to false before deployment -->
          <serviceMetadata httpGetEnabled="true" httpsGetEnabled="true"/>
          <!-- To receive exception details in faults for debugging purposes, set the value below to true.  Set to false before deployment to avoid disclosing exception information -->
          <serviceDebug includeExceptionDetailInFaults="true"/>
        </behavior>
      </serviceBehaviors>
     
      <endpointBehaviors>
        <behavior name="RestBehaviorConfig">
          <webHttp />
        </behavior>
      </endpointBehaviors>

    </behaviors>
    <protocolMapping>
        <add binding="basicHttpsBinding" scheme="https" />
    </protocolMapping>    
    <serviceHostingEnvironment aspNetCompatibilityEnabled="true" multipleSiteBindingsEnabled="true" />
  </system.serviceModel>

Note that the custom binding allows us to set up a binaryMessageEncoding. The next step is to go to the client project and add a service reference to the host project containing the WCF service. The app.config file is then updated, relevant parts shown here:
 <system.webServer>
    <directoryBrowse enabled="true" />
    <security>
      <requestFiltering>
        <requestLimits maxAllowedContentLength="1073741824" />
      </requestFiltering>
    </security>
        <staticContent>
            <mimeMap fileExtension=".mp4" mimeType="video/mp4" />
        </staticContent>
  </system.webServer>


  <system.serviceModel>
    <bindings>
      
      <customBinding>
        <binding name="CustomBinding">
          <binaryMessageEncoding>
            <readerQuotas maxArrayLength="100000000" maxStringContentLength="100000000" />
          </binaryMessageEncoding>
          <httpTransport maxReceivedMessageSize="100000000" />
        </binding>
      </customBinding>

    </bindings>
    <client>
      <endpoint address="http://he139920.helsemn.no/WcfStreamAudioDemo.Host/VideoService.svc/custom" contract="VideoService.IVideoServiceContract" binding="customBinding" bindingConfiguration="CustomBinding" />
    </client>
    
  </system.serviceModel>
Note the changes of setting up a MIME map for .mp4 files and setting up requestlimits. I will explain this soon. The client script now actually consists both of a server side script run in ASP.NET that sets up the video control in two ways. One way is to construct a HTML5 Data Url. This clearly was demanding for the browser to cope with and is not recommended. The video is actually embed on the page as a base64 encoded string! For a small video such as our video, it is actually possible still. It is of course fascinating that we can embed an entire video on our ASPX web page just as a Base64 encoded string, like it or not. The way to do this anyways is like this:

<script runat="server">

    private void btnInvokeWcfService_OnClick(object sender, EventArgs e)
    {

        using (var proxy = new VideoServiceContractClient())
        {
            byte[] payload = proxy.GetVideoBytes("sintel_trailer-480p");

            SetVideoSourceToHtmlDataUri(payload);

        }
    }


    private void SetVideoSourceToHtmlDataUri(byte[] payload)
    {
        //Set a base64 Html data uri

        videoCtrlFedByByteArrayThroughProxy.Attributes["type"] = "video/mp4";

        string base64String = Convert.ToBase64String(payload);

        videoCtrlFedByByteArrayThroughProxy.Attributes["src"] = "data:video/mp4;base64," + base64String;
    }

</script>

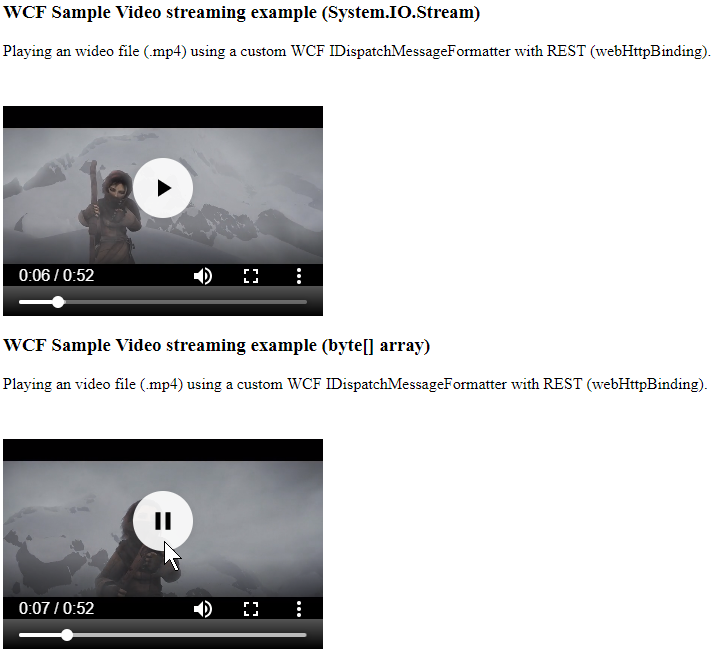
The following image shows how this actually works! Of course, this gives rendering and performance issues, as the web page now got very large content - the entire video is embedded into the page! Another way is to write the byte array to a temporary file on the server, and set the src attribute to this temporary file.

<script runat="server">

    private void btnInvokeWcfService_OnClick(object sender, EventArgs e)
    {

        using (var proxy = new VideoServiceContractClient())
        {
            byte[] payload = proxy.GetVideoBytes("sintel_trailer-480p");

            SetVideoSourceToTempFile(payload);

        }
    }

    private void SetVideoSourceToTempFile(byte[] payload)
    {
        //write to a temp file 
        string tempfile = Path.GetRandomFileName() + ".mp4";
        string tempfilePathForWebServer = HttpContext.Current.Server.MapPath("media/") + tempfile;
        File.WriteAllBytes(tempfilePathForWebServer, payload);

        videoCtrlFedByByteArrayThroughProxy.Attributes["src"] = "media/" + tempfile;
    }

</script>

Note that in these two samples, I have adjusted the HTML5 video control to be accessible to ASP.NET like this:

   <asp:Button runat="server" ID="btnInvokeWcfService" Text="Load Video" OnClick="btnInvokeWcfService_OnClick"/>
        
        <video id="videoCtrlFedByByteArrayThroughProxy" type="video/mp4"  runat="server"  controls width="320" height="240">         
            <p>Your browser doesn't support HTML5 video. Here is a <a href="http://wcfaudiodemohost.azurewebsites.net/VideoService.svc/mediabytes/sintel_trailer-480p">link to the video</a> instead.</p> 
        </video>


This method of retrieving video from WCF is the quickest way, it only fetches the original byte array data and it loads quickly. An adjusted version would not write to a file directly accessible on the web server, but use for example IsolatedStorage instead. I will look into that in the future. Hope you found this article interesting. CustomBindings in WCF gives you a lot of flexibility!

Loading video from WCF into HTML5 Video

Live demo here!

WCF demo - Loading video using Stream or byte array into HTML5 Video control
This article will look at loading up a video into a HTML5 Video. First off, you can clone the repository I have prepared here:
git clone https://toreaurstad@bitbucket.org/toreaurstad/wcfaudiostreamdemo.git
git fetch && git checkout VideoDemo_04082018


The image below shows our user interface, a simple web page displaying two HTML5 Video controls. This article builds upon code from previous articles. Defining a WCF Service Contract IVideoServiceContract is as following:

using System.IO;
using System.ServiceModel;
using System.ServiceModel.Web;

namespace WcfStreamAudioDemo.Common
{
    
    [ServiceContract]
    public interface IVideoServiceContract
    {

        [OperationContract]
        [ContentType("video/mp4")]
        [WebGet(UriTemplate = "media/{videofile}")]
        Stream GetVideo(string videofile);

        [OperationContract]
        [WebGet(UriTemplate = "mediabytes/{videofile}", ResponseFormat = WebMessageFormat.Json)]
        byte[] GetVideoBytes(string videofile);


    }
}

This servicecontract consists of two operations (methods) and they are exposed to the WCF Rest programming model through the WebGet attribute and an uri template. The method GetVideo returns a Stream of the video file requested. This will allow the user to play off the video file as a stream and has many benefits. First off, the load time is quick - as soon as enough data is collected (and the video file format supports it), the video can play back. We will be using a video/mp4 format in this demo and it supports Streaming playback. An additional benefit of streaming is that it is lightweight. It has low latency, efficient bandwidth usage and allows the client to spend little memory to fetch data. The downside is that our Stream does not support any other type of playback than uni-directional, starting from the beginning. You cannot fast forward, rewind or go to a location in the video with just a Stream like this.

I have not looked into if we could provide some offset to the Stream and skip to for example a specified time in the video. Instead I have made another method called GetVideoBytes that returns a byte array. A client can then retrieve the entire video as a byte array and then dynamically build up a Blob object and create a Blob url and dynamically set the src of the video. The WCF service implementation looks like this:
 using System.IO;
using System.Web;
using WcfStreamAudioDemo.Common;

namespace WcfStreamAudioDemo.Host
{
    public class VideoService : IVideoServiceContract
    {

        public Stream GetVideo(string videofile)
        {
            return GetVideoStream(videofile, ".mp4");
        }

        public byte[] GetVideoBytes(string videofile)
        {
            Stream videoStream = GetVideoStream(videofile, ".mp4");

            byte[] buffer = new byte[32*1024];
            int count;
            var memoryStream = new MemoryStream();

            while ((count = videoStream.Read(buffer, 0, buffer.Length)) > 0)
            {
                memoryStream.Write(buffer, 0, count);
            }

            return memoryStream.ToArray();
        }

        private Stream GetVideoStream(string videofile, string extension)
        {
            string mediaFolder = HttpContext.Current.Server.MapPath("~/media");
            string videoFileFullPath = Path.Combine(mediaFolder, videofile) + extension;
            return File.OpenRead(videoFileFullPath);
        }

    }
}

Nothing special going on here, we grab hold of a FileStream of the video file using HttpContext.Current.Server.MapPath and Path.Combine to locate it in a media folder (there is no error handling in this simple sample) and then use System.IO.File.OpenRead. The method returning a byte array loops through the Stream using a MemoryStream and then returns a byte array from this stream again. Let's look at the client side code. Sadly, using a responsetype of 'arraybuffer' in a XMLHttpRequest has given bloated data. Instead, I must pass the byte array as raw data to the client and manually mold and bake the data into a working ArrayBuffer that then is used in an Uint8Array as a view for this Buffer and instatiating a Blob in Javascript with a Blob url with URL.createBlobUrl and then setting finally the src attribute of a video control in the page. It is not very elegant and there is a performance penalty, especially for larger video files, it would be problematic. Our sample video is just 4.32 MB and can be handled. Of course, this article is just for educational purposes and shows you what CAN be achieved, optimizing this for production purposes would of course need to get this ArrayBuffer to work more elegant. So here is my manual code to fix up the dynamic loading of a byte array into data that HTML5 Video can use:

    <script type="text/javascript">

        window.onload = init;

       
        var source; //Video buffer 

        function init() {
            loadByteArray('http://wcfaudiodemohost.azurewebsites.net/VideoService.svc/mediabytes/sintel_trailer-480p');
        }

        function loadByteArray(url) {
            
            var request = new XMLHttpRequest();

            request.overrideMimeType('text\/plain; charset=x-user-defined');
            //request.responseType = 'arraybuffer';
            request.open('GET', url, true);
            //request.setRequestHeader("Content-Type", "video/mp4");


            request.onload = function() {
                //console.log(request.response);
                debugger;

                var responseData = request.response;
                if (responseData === undefined || responseData === null)
                    return;

                if (responseData.charAt(0) === '[') {
                    responseData = responseData.substring(1);
                }
                if (responseData !== null &&
                    responseData !== undefined &&
                    responseData.charAt(responseData.length - 1) === ']') {
                    responseData = responseData.slice(0, -1);
                }

                if (responseData === undefined || responseData === null)
                    return;

                var videoByteArray = responseData.split(',');
                source = new ArrayBuffer(videoByteArray.length);

                var videoByteArrayView = new Uint8Array(source);


                for (var i = 0; i < videoByteArray.length; i++) {
                    videoByteArrayView[i] = videoByteArray[i];
                }

                var blob = new Blob([videoByteArrayView], { type: "text/plain;charset=utf-8" });

                var blobUrl = URL.createObjectURL(blob);

                var videoCtrlFedByByteArray = document.getElementById("videoCtrlFedByByteArray");

                videoCtrlFedByByteArray.setAttribute("src", blobUrl);

                saveAs(blob, "SintelTrailer_VideoReceived.mp4");

            } //request.onload 

            request.send();

        }

    </script>

Take note what I am doing here:
  request.overrideMimeType('text\/plain; charset=x-user-defined');
This enforces the byte array to be sent as a raw string. Our video with about 4.37 MB actually is 15.54 MB in Fiddler. Not very efficient. I will look into if this can be fixed up in a future article. Our GUI markup looks like this:
 <div>
        
        <h3>WCF Sample Video streaming example (<strong>System.IO.Stream</strong>)</h3>
        
        <p>Playing an wideo file (.mp4) using a custom WCF IDispatchMessageFormatter with REST (webHttpBinding).</p>
        
        <video controls width="320" height="240">
            <source src="http://wcfaudiodemohost.azurewebsites.net/VideoService.svc/media/sintel_trailer-480p" type="video/mp4" />
            <p>Your browser doesn't support HTML5 video. Here is a <a href="http://wcfaudiodemohost.azurewebsites.net/VideoService.svc/media/sintel_trailer-480p">link to the video</a> instead.</p> 
        </video>
        
        <h3>WCF Sample Video streaming example (<strong>byte[] array</strong>)</h3>
        
        <p>Playing an video file (.mp4) using a custom WCF IDispatchMessageFormatter with REST (webHttpBinding).</p>
        
        <video id="videoCtrlFedByByteArray" controls width="320" height="240">         
            <p>Your browser doesn't support HTML5 video. Here is a <a href="http://wcfaudiodemohost.azurewebsites.net/VideoService.svc/mediabytes/sintel_trailer-480p">link to the video</a> instead.</p> 
        </video>
        
    </div>

As you can see, the Stream method allowed us to set the src directly. The byte[] array instead needed us to do a lot of manual molding of the data. I hope you found this article interesting and helpful.

Friday 3 August 2018

Loading HTML5 Audio from byte array in WCF

Update:

Live demo!

Wcf Audio Demo - HTML 5 and Byte array!


The previous article presented a solution where the user can retrieve data from a WCF operation that returns a Stream. This approach is great, since the user can quickly load data and progressively retrieve it. This makes an efficient use of bandwidth and avoids latency. However, there is a downside to this approach. It is not possible to skip parts of the loaded Stream, so the user can only start from the beginning of the Stream. The article presented loading a Waveform Audio Format file (audio/wav). Another approach is instead to let the user play, rewind and skip to parts of the data, be it a video or audio file for example. This article will present a solution of this and also solve it in memory by returning a byte array from WCF and load it into the WebAudio AudioContext of a webpage and then set the src of a HTML5 Audio element. First off, you can clone my repository which I have prepared from Bitbucket and switch to the branch supporting a byte array.
 git clone https://toreaurstad@bitbucket.org/toreaurstad/wcfaudiostreamdemo.git
 git checkout ByteArrayWise_03082018
Let's first return a byte array to the client in a WCF service contract. We will return a byte array of a sample ogg/vorbis (mime: audio/ogg) file. The WCF Service contract now got a new method GetAudioBytes :

    [ServiceContract]
    public interface IAudioServiceContract
    {

        [OperationContract]
        [ContentType("audio/ogg")]
        [WebGet(UriTemplate = "media/{trackName}")]
        Stream GetAudio(string trackName);

        [OperationContract]
        [WebGet(UriTemplate = "mediabytes/{trackName}", ResponseFormat = WebMessageFormat.Json)]
        byte[] GetAudioBytes(string trackName);

    }

Next off, we implement the method GetAudioBytes :

        private static Stream GetStream(string trackName, string fileExtension)
        {
            var mediaDirectory = HttpContext.Current.Server.MapPath("~/media/");
            string track = string.Format("{0}.{1}", trackName, fileExtension);
            string filePath = Path.Combine(mediaDirectory, track);
            return File.OpenRead(filePath);
        }

        public byte[] GetAudioBytes(string trackName)
        {
            Stream track = GetStream(trackName, "ogg");

            long streamLengh = track.Length;
            byte[] buffer = new byte[32*1024];
            int count;

            var memoryStream = new MemoryStream();
            while ((count = track.Read(buffer, 0, buffer.Length)) > 0)
            {
                memoryStream.Write(buffer, 0, count);
            }

            return memoryStream.ToArray();
        }


The reading of the Stream into a byte array is done via a memory stream with a buffer of size 32 kB. I wrote the method above and checked with one of Jon Skeet's advice and it was identical :) e We now have got a byte array, then the client must get this byte array. Since I decided to create a web client, it is necessary to make use of a client library. I will use HTML 5 audio and WebAudio API for this. First off, we make an XMLHttpRequest to fetch the data, we set the responseType of the request to 'arraybuffer'. I encountered trouble in Javascript sending the byte array from WCF and ended up to force Js to send the data as plain text raw format. Then I had to manually build an arraybuffer by using an Uint8Array as a view to do the actual insertion. There is a lot of manual work done here to ultimately populate the ArrayBuffer with exact same bytes as returned from the WCF service. As I said, by first trying a manual retrieval, I ended up with bloated data that I had a to bake into shape by forcing a plain retrieval of data and then molding the data into an ArrayBuffer. Not very elegant, but it works.


    <script src="Scripts/FileSaver.js" type="text/javascript"></script>
    
    <script type="text/javascript">

        window.onload = init;

        var context; //AudioContext
        var source; //Audio buffer 

        function init() {
            if (!window.AudioContext) {
                alert("Your browser does not support any Audio Context and cannot play back this audio");
                return;
            }
            window.AudioContext = window.AudioContext || window.webkitAudioContext;

            context =  typeof AudioContext !== 'undefined' ? new AudioContext() : new webkitAudioContext();;

            loadByteArray('http://myserver/WcfStreamAudioDemo.Host/AudioService.svc/mediabytes/ACDC_-_Back_In_Black-sample');
        }

        function loadByteArray(url) {
            source = context.createBufferSource();
            var request = new XMLHttpRequest();
           
            request.overrideMimeType('text\/plain; charset=x-user-defined');
            //request.responseType = 'arraybuffer';
            request.open('GET', url, true);
            //request.setRequestHeader("Content-Type", "audio/ogg");


            request.onload = function() {
                //console.log(request.response);
                debugger;

                var audioByteArray = request.response.replace('[', '').replace(']','').split(',');
                source = new ArrayBuffer(audioByteArray.length);

                var audioByteArrayView = new Uint8Array(source);


                for (var i = 0; i < audioByteArray.length; i++) {
                    audioByteArrayView[i] = audioByteArray[i];
                }

                var blob = new Blob([audioByteArrayView], { type: "text/plain;charset=utf-8" });

                var blobUrl = URL.createObjectURL(blob);

                var audioCtrlFedByByteArray = document.getElementById("audioCtrlFedByByteArray");

                audioCtrlFedByByteArray.setAttribute("src", blobUrl);


                saveAs(blob, "ExampleReceived.ogg");
             
                context.decodeAudioData(source,
                    function (buffer) {
                        //Play off the audio file automatically
                        var innersource = context.createBufferSource();
                        innersource.buffer = buffer;
                        innersource.connect(context.destination);

                        innersource.start(0);

                      
                        //Hook up the HTML 5 audio control using MediaElementSource connecting to the AudioContext
                        var audioCtrlFedByByteArray = document.getElementById("audioCtrlFedByByteArray");
  
                        var mediaSource = context.createMediaElementSource(audioCtrlFedByByteArray);
                        mediaSource.connect(context.destination);
                        audioCtrlFedByByteArray.play();

                    },
                    function(e) {
                        console.log("Error with decoding audio data" + e.err);
                    }
            );

        }

            request.send();

        }

    </script>


There are three techniques presented into the client-side script. First off I show how you automtically can play downloaded audio into a web page! I use the AudioContext first and decodeAudioData by creating a bufferSource and connect that source to the AudioContext's destination (i.e. speakers). Then i choose start(0) of the bufferSource to automatically playback! Also demonstrated in the Javascript above is how I grab hold of the audio control and then setting the src attribute to a blobUrl created by URL.createObjectUrl feeding it a Blob (Binary large object) of the created Uint8Array populated by the raw data. This will set dynamically the source of the HTML 5 Audio media element on the page and let the user finally play the audio file and rewind or skip to different parts! It is much more user friendly, but the user will have to download the entire file first and the manual process by molding the retrieved raw data into a working ArrayBuffer with correct data will be slow when dealing with large files. The web page of the client defines the audio controls like this:

rm id="HtmlForm" runat="server">
    <div>
        
        <h3>WCF Sample Audio streaming example (<strong>System.IO.Stream</strong>)</h3>
        
        <p>Playing an audio file (.wav) using a custom WCF IDispatchMessageFormatter with REST (webHttpBinding).</p>
        
        <audio controls>
            <source src="http://myserver/WcfStreamAudioDemo.Host/AudioService.svc/media/Example" type="audio/ogg" />
            <p>Your browser doesn't support HTML5 audio. Here is a <a href="http://myserver/WcfStreamAudioDemo.Host/AudioService.svc/media/Example">link to the audio</a> instead.</p> 
        </audio>
        
        <h3>WCF Sample Audio streaming example (<strong>byte[] array</strong>)</h3>
        
        <p>Playing an audio file (.wav) using a custom WCF IDispatchMessageFormatter with REST (webHttpBinding).</p>
        
        <audio id="audioCtrlFedByByteArray" controls>         
            <p>Your browser doesn't support HTML5 audio. Here is a <a href="http://myserver/WcfStreamAudioDemo.Host/AudioService.svc/mediabytes/ACDC_-_Back_In_Black-sample">link to the audio</a> instead.</p> 
        </audio>
        
    </div>
    
Make note that my sample page also includes the library FileSaver to download the ogg sample file. This library is quite handy and is available in Nuget (package id: filesaver). We finally have a way to load data from WCF into a HTML 5 Audio control in memory! This means we could for example have audio tracks saved into a database and fetch them into memory and return them to our clients. An alternative is of course to just return a FileStream and have a server backend written in ASP.NET MVC Core, but then you will also be missing a lot of the nice features of WCF! All in all, it is always nice to know alternatives before sticking to the mainstream solutions. I hope you found this article interesting.

Thursday 2 August 2018

Streaming audio with WCF

This article will present a way to stream audio with WCF. In my example, I will play a Waveform Audio File Format file (.wav), but my sample should support any well-known audio formats. Note that WCF is not automatically the best streaming service to provide to your clients. Other protocols such as RTSP have better handling of graceful degradation, random seek and so on. This article will only show how you can provide a simple one-direction playback of audio files by using WCF. You can start by cloning the repository I have made public from here:

git@bitbucket.org:toreaurstad/wcfaudiostreamdemo.git

First off, we need to specify a content type of the method that returns a Stream with the audio. This can be achieved by implementing a class that inherits from System.Attribute and implementing IOperationBehavior. The class below sets a content type in its constructor and sets a Formatter of the DispatcherOperation in ApplyDispatchBehavior to the class ContentTypeMessageFormatter.


using System;
using System.ServiceModel.Channels;
using System.ServiceModel.Description;
using System.ServiceModel.Dispatcher;


namespace WcfStreamAudioDemo.Common
{
    public class ContentTypeAttribute : Attribute, IOperationBehavior
    {
        public ContentTypeAttribute(string contentType)
        {
            ContentType = contentType;
        }

        public string ContentType { get; } //readonly auto property

        public void AddBindingParameters(OperationDescription operationDescription, BindingParameterCollection bindingParameters)
        {
          
        }

        public void ApplyClientBehavior(OperationDescription operationDescription, ClientOperation clientOperation)
        {
            
        }

        public void ApplyDispatchBehavior(OperationDescription operationDescription, DispatchOperation dispatchOperation)
        {
            // ReSharper disable once ArrangeThisQualifier
            dispatchOperation.Formatter = new ContentTypeMessageFormatter(dispatchOperation.Formatter, this.ContentType);
        }

        public void Validate(OperationDescription operationDescription)
        {
            
        }

      }
}

The ContentTypeMessageFormatter class is shown below:

using System.ServiceModel.Channels;
using System.ServiceModel.Dispatcher;
using System.ServiceModel.Web;
namespace WcfStreamAudioDemo.Common
{
    public class ContentTypeMessageFormatter : IDispatchMessageFormatter
    {

        private readonly IDispatchMessageFormatter _formatter;
        private readonly string _contentType;

        public ContentTypeMessageFormatter(IDispatchMessageFormatter formatter, string contentType)
        {
            _formatter = formatter;
            _contentType = contentType; 
        }

        public void DeserializeRequest(Message message, object[] parameters)
        {
            _formatter.DeserializeRequest(message, parameters);
        }

        public Message SerializeReply(MessageVersion messageVersion, object[] parameters, object result)
        {
            if (!string.IsNullOrEmpty(_contentType))
                WebOperationContext.Current.OutgoingResponse.ContentType = _contentType;
            return _formatter.SerializeReply(messageVersion, parameters, result);
        }

    }
}

Next step is to define a Service Contract in WCF to test this out:

using System.IO;
using System.ServiceModel;
using System.ServiceModel.Web;

namespace WcfStreamAudioDemo.Common
{

    [ServiceContract]
    public interface IAudioServiceContract
    {

        [OperationContract]
        [ContentType("audio/wav")]
        [WebGet(UriTemplate = "media/{trackName}")]
        Stream GetAudio(string trackName);
    }
}

The configuration of the WCF service in web.config sets up streaming by using transferMode set to Streamed on a webHttpBinding.

  <system.serviceModel>

    <services>
      
      <service name="WcfStreamAudioDemo.Host.AudioService">
        <endpoint behaviorConfiguration="RestBehaviorConfig" binding="webHttpBinding" bindingConfiguration="HttpStreaming" contract="WcfStreamAudioDemo.Common.IAudioServiceContract" />
      </service>
    </services>

    <bindings>
      <webHttpBinding>
        <binding name="HttpStreaming" transferMode="Streamed" maxReceivedMessageSize="1000000000" />
      </webHttpBinding>
    </bindings>
    
    <behaviors>

      <serviceBehaviors>
        <behavior>
          <!-- To avoid disclosing metadata information, set the values below to false before deployment -->
          <serviceMetadata httpGetEnabled="true" httpsGetEnabled="true"/>
          <!-- To receive exception details in faults for debugging purposes, set the value below to true.  Set to false before deployment to avoid disclosing exception information -->
          <serviceDebug includeExceptionDetailInFaults="false"/>
        </behavior>
      </serviceBehaviors>
     
      <endpointBehaviors>
        <behavior name="RestBehaviorConfig">
          <webHttp />
        </behavior>
      </endpointBehaviors>

    </behaviors>
    <protocolMapping>
        <add binding="basicHttpsBinding" scheme="https" />
    </protocolMapping>    
    <serviceHostingEnvironment aspNetCompatibilityEnabled="true" multipleSiteBindingsEnabled="true" />
  </system.serviceModel>


Finally, to test out this Audio Service you can either enter the url of an audio file the WCF service recognizes into a browser to download the .WAV file or for example use an HTML 5 <audio> element. Here is a sample page I created to test out the Audio service (a simple ASP.NET Web form)!

<%@ Page Language="C#" %>

<script runat="server">

</script>

<html xmlns="http://www.w3.org/1999/xhtml">
<head runat="server">
    <title>Demo Audio Stream wcf</title>
</head>
<body>
<form id="HtmlForm" runat="server">
    <div>
        
        <h3>WCF Sample Audio streaming example</h3>
        
        <p>Playing an audio file (.wav) using a custom WCF IDispatchMessageFormatter with REST (webHttpBinding).</p>
        
        <audio controls>
            <source src="http://localhost/WcfStreamAudioDemo.Host/AudioService.svc/media/Sample" type="audio/wav" />
            <p>Your browser doesn't support HTML5 audio. Here is a <a href="http://localhost/WcfStreamAudioDemo.Host/AudioService.svc/media/Sample.wav">link to the audio</a> instead.</p> 
        </audio>

    </div>
</form>
</body>
</html>


Wednesday 1 August 2018

Controlling WCF serialization and deserialization with IXmlSerializable

It is possible to customize how WCF serializes and deserializes objects to be sent over the wire. The default way to serialize and deserialize objects with WCF is using DataContractSerializer. There are many scenarios where you instead want to control this more in your WCF services. For interoperability scenarios with other platforms or perhaps you want to change the way WCF serializes objects. Perhaps using attributes more than child elements, so the XML can be condensed more. Either way, you can end up in situations where you must handle the serialization and deserialization in WCF in more detail, then IXmlSerializable is one option. Read on for a simple demo. Another, more fine-grained way of actually customizing the way WCF serializes objects and deserialize them is using IXmlSerializable interface. I have added a solution on Bitbucket, which allows you to see how this is done here:

git clone https://toreaurstad@bitbucket.org/toreaurstad/wcfixmlserializabledemo.git The source code is here: WcfIXmlSerializableDemo
The core of the serialization is done implementing the interface IXmlSerializable. The following class serves as a demonstration:
 using System.Xml;
using System.Xml.Schema;
using System.Xml.Serialization;

namespace CustomWcfSerialization.Common
{
  
    // Use a data contract as illustrated in the sample below to add composite types to service operations.
    [XmlRoot("Animal", Namespace ="http://schemas.toreaurstad.no/2018/08")]
    public class Animal : IXmlSerializable
    {
       
        public Animal()
        {

        }

        bool _isBipedal;
        public bool IsBipedal
        {
            get { return _isBipedal; }
            set { _isBipedal = value; }
        }

        string _name;
        public string Name
        {
            get { return _name; }
            set { _name = value; }
        }

        public XmlSchema GetSchema()
        {
            return null;
        }

        public void ReadXml(XmlReader reader)
        {
            reader.MoveToContent();
   
            Name = reader.GetAttribute("Name");
            reader.ReadStartElement(); 

            IsBipedal = bool.Parse(reader.ReadElementString("IsBipedal") == "Yes" ? "true" : "false");
            reader.ReadEndElement(); 
        }

        public void WriteXml(XmlWriter writer)
        {
            writer.WriteAttributeString("Name", Name);
            writer.WriteElementString("IsBipedal", IsBipedal ? "Yes" : "No");
        }

    }
}

The serialized request and response from WCF now is changed from the default serialization of DataContractSerializer, to not only support XML attributes - but also represent booleans as a custom boolean where true and false is exchanged with "Yes" and "No".

<s:Envelope xmlns:s="http://schemas.xmlsoap.org/soap/envelope/"><s:Body>

<GetAnimalsResponse xmlns="http://tempuri.org/">
<GetAnimalsResult xmlns:a="http://schemas.datacontract.org/2004/07/CustomWcfSerialization.Common" xmlns:i="http://www.w3.org/2001/XMLSchema-instance">
<a:Animal Name="Rex"><IsBipedal>No</IsBipedal></a:Animal>
<a:Animal Name="Bubbles"><IsBipedal>Yes</IsBipedal>
</a:Animal>
</GetAnimalsResult> </GetAnimalsResponse></s:Body></s:Envelope>

Note though, that even we used special values for boolean values in our sample ("Yes" and "No"), it was possible to deserialize this by implementing the deserialization in the ReadXml method of our WCF service entity class Animal. This image shows that Visual Studio is able to deserialize the data into objects properly even that the XML presents data that is not directly compatible by .NET:


This is done by manually parsing the data retrieved from WCF like this:

IsBipedal = bool.Parse(reader.ReadElementString("IsBipedal") == "Yes" ? "true" : "false");

You can quickly end up with much code if there is much code you want to serialize in a specific manner. It is possible use .NET reflection, generics and the [KnownType] argument for this in case you want to support this is a more generic manner. I will look into this in a future article.

Tuesday 24 July 2018

Getting started with Transactions in WCF

Transactions is a powerful concept in many parts of the software industry, they ensure that two or more procedures are either all carried out and persisted, or not any of them. This ensures that data is consistent, that the operation that performs the procedures are atomic, it is isolated and durable (ACID-principle). But what about WCF? Is it possible to easily support transactions in WCF in a full-stack scenario? Can you try to carry out two or more WCF service calls and either have all the calls changes on data in for example a SQL Server database persisted or not any of them? Is it possible to make a transaction that spans two or more WCF service calls? Yes it is! I have created a sample solution here that you can clone with Git:

git clone https://toreaurstad@bitbucket.org/toreaurstad/wcfdemotransactions.git

The repository with the code sample is available as a public repository on Bitbucket where you can view the code here: https://bitbucket.org/toreaurstad/wcfdemotransactions/src/master/ The code sample is a full-stack WPF application with a backend implemented in WCF serviced under WAS / IIS and the data layer uses Entity Framework and Model first (EDMX). This scenario will display that we can implement transactions that span multiple WCF calls and be able to either commit the update of data in the database that all these WCF calls inflict, or abort them all, i.e. a transaction. The GUI looks like this:


Enabling transactions for the WCF service

First off, enable transactionflow on the binding of the service (web.config)

  <system.serviceModel>

    <bindings>
      <wsHttpBinding>
        <binding name="wsHttpBindingWithTransactionFlow"  transactionFlow="true" >
          <security>
            <transport clientCredentialType="None"></transport>
          </security>
        </binding>
      </wsHttpBinding>
    </bindings>

    <services>
      <service name="WcfTransactionsDemo.ServiceImplementation.SampleServiceImplementation" behaviorConfiguration="SampleServiceBehavior">
        <endpoint bindingConfiguration="wsHttpBindingWithTransactionFlow" binding="wsHttpBinding" address="http://localhost/WcfTransactionsDemo.Host/sampleservice.svc" contract="WcfTransactionsDemo.Common.ServiceContract.ISampleServiceContract"></endpoint>
      </service>
    </services>

 
Next, define that the transactionflow from the client is mandatory in the WCF methods that will support this in the Service Contract of the WCF service: (this is done setting the TransactionFlow attribute to Mandatory on the WCF service methods (operations) that will join a transaction flowed downstream from the client.

 [ServiceContract(Namespace = Constants.ServiceContractsNamespace)]
    public interface ISampleServiceContract
    {

        [OperationContract]
        [FaultContract(typeof(FaultDataContract))]
        [TransactionFlow(TransactionFlowOption.NotAllowed)]
        List GetAllCustomers();

        [OperationContract]
        [FaultContract(typeof(FaultDataContract))]
        [TransactionFlow(TransactionFlowOption.NotAllowed)]
        List GetAllProducts();

        [OperationContract]
        [FaultContract(typeof(FaultDataContract))]
        [TransactionFlow(TransactionFlowOption.Mandatory)]
        string PlaceOrder(OrderDataContract order);

        [OperationContract]
        [FaultContract(typeof(FaultDataContract))]
        [TransactionFlow(TransactionFlowOption.Mandatory)]
        string AdjustInventory(int productId, int quantity);

        [OperationContract]
        [FaultContract(typeof(FaultDataContract))]
        [TransactionFlow(TransactionFlowOption.Mandatory)]
        string AdjustBalance(int customerId, decimal amount);

    }
Next, specify the transaction isolation level of the WCF service implementation, using a ServiceBehavior attribute.

    [ServiceBehavior(TransactionIsolationLevel = IsolationLevel.Serializable, TransactionTimeout = "00:00:30")]
    public class SampleServiceImplementation : ISampleServiceContract
    {
Serializable is default in .NET and provides the consistency, it is though not recommended in high traffic scenarios as it causes too much database locking. (ReadCommitted can then be used for instance instead) Each WCF method in the service implementation that will join a transaction flowing from the client now specifies this with an OperationBehavior attribute, for example as the sample solution's AdjustBalance method:
         [OperationBehavior(TransactionScopeRequired = true, TransactionAutoComplete = true)] 
        public string AdjustBalance(int customerId, decimal amount)
        {

Setting up a transaction at the client side

The WCF service is now configured to support transactions in our sample demo. Moving on next to the app.config file, updating service reference should set the transaction flow attribute correct. Note that the servicePrincipalName in this demo must be adjusted to match your computer's name (or use localhost).

<system.serviceModel>
        <bindings>
            <wsHttpBinding>
                <binding name="WSHttpBinding_ISampleServiceContract" transactionFlow="true"  />
            </wsHttpBinding>
        </bindings>
        <client>
            <endpoint address="http://localhost/WcfTransactionsDemo.Host/sampleservice.svc"
                binding="wsHttpBinding" bindingConfiguration="WSHttpBinding_ISampleServiceContract"
                contract="SampleService.ISampleServiceContract" name="WSHttpBinding_ISampleServiceContract">
                <identity>
                    <servicePrincipalName value="host/AlienHivemind" />
                </identity>
            </endpoint>
        </client>
    </system.serviceModel>

The demo of this article works in the following manner :
  • Client selects a row from the list of customers in the GUI
  • Client selects a row from the list of products in the GUI
  • Client enters a quantity of the selected product to order
  • Client clicks Place Order to place the order
If the client does this, three WCF service calls are invoked. If no transactions were done, the client could cause inconsistent data in the database. There are three WCF calls (this scenario is perhaps not so realistic, but it gives you the idea of WCF calls that are related and should all succeed or neither succeed. Ignore for now the semantics and just accept the fact that there are multiple WCF calls that must succeed or not any of them).

Now try to do the following: Do not select a customer but select a product. Also enter a quantity such as 10. Then click the button to place an order. What happens is that the WCF service expects the client to have selected a customer and a product. Since the client has not selected a customer, the AdjustBalance() methods throws a FaultException at the WCF service. The method AdjustInventory() however succeeds. If there was no transaction scope at the client side, you would see that the InStock / OnHand value is reduced, but there are no Balance reduction on either Customer, since the client forgot to select a Customer. Actually, using WCF transaction, it is possible to roll back data and get consistent data still - since the client defines a transaction. The client does it in the following manner:


    private void PlaceOrderCommandExecute(object obj)
        {
            using (var client = new SampleServiceContractClient())
            {

                using (var transactionScope = new TransactionScope())
                {
                    try
                    {


                        string orderPlacement = client.PlaceOrder(new OrderDataContract
                        {
                            CustomerId = SelectedCustomer != null ? SelectedCustomer.CustomerId : 0,
                            ProductId = SelectedProduct != null ? SelectedProduct.ProductId : 0,
                            Quantity = Quantity
                        });
                        MessageBox.Show("Placing order: " + orderPlacement);


                        string adjustedInventory = client.AdjustInventory(SelectedProduct != null ?
                            SelectedProduct.ProductId : 0, -1 * Quantity);

                        MessageBox.Show("Adjusting inventory: " + adjustedInventory);


                        string adjustedBalance = client.AdjustBalance(SelectedCustomer != null ?
                            SelectedCustomer.CustomerId : 0, -1 * (SelectedProduct != null && SelectedProduct.Price > 0 ? SelectedProduct.Price.Value : 0) * Quantity);

                        MessageBox.Show("Adjusting balance: " + adjustedBalance);

                        transactionScope.Complete(); 

                    }
                    catch (FaultException err)
                    {
                        MessageBox.Show("FaultException: " + err.Message);
                    }
                    catch (ProtocolException perr)
                    {
                        MessageBox.Show("ProtocolException: " + perr.Message);
                    }
                }

                try
                {
                    LoadCustomers();
                    LoadProducts();
                }
                catch (Exception err)
                {
                    Console.WriteLine(err.Message);
                }
            }
        }

As the client code shows, there are multiple WCF calls (three WCF calls) and the second call gave a FaultException when the client did not enter a Customer. The change inflicted was not persisted to the database and we managed to keep a consistent content of our two tables and the transaction rolled back the persistence of data data Entity Framework was about to inflict - accross multiple WCF calls. Transaction support is rather easy to add to your WCF services and at the client side there is little code that must be writted to ensure that multiple WCF calls inflict consistent change in data. Adding WCF transactions are a much more elegant way to add transaction support to your API accross multiple WCF methods than manually trying to undo WCF operations or refactor / rewrite much code to achieve what you always want with your API - to persist data supporting all four ACID principles. Note that you must use SQL Server database (I have used SqlExpress) and give access to the database I have added a SQL script for (Transactionsdemo.sql) to the app pool user so that the database TransactionsDemo can be accessed and updated (grant db_datareader and db_datawriter access in SQL Management Studio). Hope you found this sample interesting.

Monday 23 July 2018

Using MSMQ with WCF and message security

This article will present how you can get started using MSMQ as the communication protocol with WCF and apply message level security. MSMQ has got some strengths compared to HTTP requests and other communication protocols:
  • Requests are default durable, that is if the server is down, the client can send the messages to the server later when it is back again
  • There are no responses as the protocol is one-way and sometimes avoiding a response is a gain
  • All requests are queued and can be made ordered. Using transactional MSMQ queues allows requests only be sent once
  • It can utilize features such as Journal, system queues such as poison messages and dead letters and integrates well with Biztalk
  • It is the most resilient and sturdy communication protocol around and works well also in server-server scenarios and for clients
It also has some weaknesses:
  • There are no responses, so it requires to inspect the queue(s) if something went wrong
  • If there are a lot of messages, chances are that MSMQ queues will go full - it is not the quickest protocol
  • Clients must also have MSMQ installed, not default set up in Windows
  • There is a learning curve for developers and users as MSMQ is less known protocol compared to HTTP, HTTPS and TCP
I have created a sample to get you started with WCF and MSMQ. It will support Message-level security with self signed certificates for client and server. First clone this repo with Git:
git clone https://toreaurstad@bitbucket.org/toreaurstad/demonetmsmqwcfgit.git

Open up the solution in Visual Studio (2017 or 2015). First off, the solution needs to set up self signed certificates for client and server on your developer PC. Run the Script in the Scripts folder in the Host project, the Powershell script is: CreateCertificatesMsmqDemo.ps1 Run it as admin, as it will use Powershell to generate a new certificate, copy over Openssl.exe to c:\openssl folder (if you already have c:\openssl populated, you might want to change this) and convert the certificate to have a RSA format instead of CNG. There are more setup to do, such as selecting your web site in Internet Information Server admin (inetmgr) and setting up enabled protocols to http, net.msmq for the web site for this solution. You need to install MSMQ as a feature in Windows with required subfeatures. Also after the certificates are installed, right click them (in MMC you select Local Computer and Personal certificate store) and select Manage private keys. Now adjust security settings here so that your App Pool user can access the certificates for MSMQ.

Here is where you in Inetmgr (IIS Admin) set up enabled protocols to MSMQ for the web site of this article:
Moving on to the solution itself, I will describe the implementation details. Note that the creation of the MSMQ queue is helped programatically, as the queue cannot be created automatically by WCF. I created a ServiceHostFactory class to create the MSMQ queue that is used in the communication between the client and server.
using System;
using System.Configuration;
using System.Messaging;
using System.ServiceModel;
using System.ServiceModel.Activation;

namespace WcfDemoNetMsmqBinding.Host
{
    public class MessageQueueFactory : ServiceHostFactory
    {

        public override ServiceHostBase CreateServiceHost(string constructorString, Uri[] baseAddresses)
        {
            CreateMsmqIfMissing();
            return base.CreateServiceHost(constructorString, baseAddresses);
        }

        public static void CreateMsmqIfMissing()
        {
            string queueName = string.Format(@".\private$\{0}", MessageQueueName);
            if (!MessageQueue.Exists(queueName))
            {
                MessageQueue createdMessageQueue = MessageQueue.Create(queueName, true);
                string usernName = System.Security.Principal.WindowsIdentity.GetCurrent().Name;
                createdMessageQueue.SetPermissions(usernName, MessageQueueAccessRights.FullControl);

            }
        }

        public static string MessageQueueName
        {
            get
            {
                return ConfigurationManager.AppSettings["QueueName"];

            }
        }

    }
}
This class will create the MessageQueue if it is missing. The QueueName is an appsetting in web config. The .svc file for the Msmq service contains a reference to the factory.

<%@ ServiceHost Language="C#" Debug="true" Service="WcfDemoNetMsmqBinding.Host.MessageQueueService" Factory="WcfDemoNetMsmqBinding.Host.MessageQueueFactory" %>

Now, the setup of the wcf service is done declaratively in web.config (it could be done in code, but I chose to use web.config for most of this sample for defining the MSMQ service). This is the web.config that define the MSMQ service, as you can see it is not very extensive to get started with MSMQ and WCF:

<?xml version="1.0"?>
<configuration>

  <appSettings>
    <add key="aspnet:UseTaskFriendlySynchronizationContext" value="true" />
    <add key="QueueName" value="DemoQueue3" />
  </appSettings>
  <system.web>
    <compilation debug="true" targetFramework="4.6.1" />
    <httpRuntime targetFramework="4.6.1"/>
  </system.web>
  
  <system.serviceModel>

    <services>
      <service name="WcfDemoNetMsmqBinding.Host.MessageQueueService" behaviorConfiguration="NetMsmqBehavior">
        <endpoint contract="WcfDemoNetMsmqBinding.Host.IMessageQueueService" name="NetMsmqEndpoint" 
                  binding="netMsmqBinding" bindingConfiguration="NetMsmq" address="net.msmq://localhost/private/DemoQueue3" />
      </service>    
    </services>

    <bindings>
      <netMsmqBinding>
        <binding name="NetMsmq" durable="true" exactlyOnce="true" receiveErrorHandling="Move" useActiveDirectory="False" queueTransferProtocol="Native">
          <security mode="Message">
            <message clientCredentialType="Certificate"/>
          </security>
        </binding>
      </netMsmqBinding>
    </bindings>
    
      
    <behaviors>
      <serviceBehaviors>
        <behavior name="NetMsmqBehavior">
          <!-- To avoid disclosing metadata information, set the values below to false before deployment -->
          <serviceMetadata httpGetEnabled="true" />
          <!-- To receive exception details in faults for debugging purposes, set the value below to true.  Set to false before deployment to avoid disclosing exception information -->
          <serviceDebug includeExceptionDetailInFaults="true"/>
        <serviceCredentials>
          <serviceCertificate findValue="MSMQWcfDemoserver" storeLocation="LocalMachine" storeName="My" x509FindType="FindBySubjectName" />
            <clientCertificate>
              <certificate findValue="MSMQWcfDemoClient" storeLocation="LocalMachine" storeName="My" x509FindType="FindBySubjectName" />
              <authentication certificateValidationMode="PeerTrust" />
            </clientCertificate>
        </serviceCredentials>
        
        </behavior>
      </serviceBehaviors>
    </behaviors>

  </system.serviceModel>
  <system.webServer>
    <modules runAllManagedModulesForAllRequests="true"/>
    <!--
        To browse web app root directory during debugging, set the value below to true.
        Set to false before deployment to avoid disclosing web app folder information.
      -->
    <directoryBrowse enabled="true"/>
  </system.webServer>

</configuration>

Note that the two certificates that were generated in this sample is set up in serviceCredentials element. We define the serviceCertificae and clientCertificate here. The client takes note to point to the same queue, net.msmq://localhost/private/DemoQueue3 Note that this example is tested with the client and server on same machine. The client could have a local queue in case the server was on a different machine to support durability in the scenario of many computers The client sets up the corresponding certificates in the app.config:
 
 <?xml version="1.0" encoding="utf-8" ?>
<configuration>
    <startup> 
        <supportedRuntime version="v4.0" sku=".NETFramework,Version=v4.6.1" />
    </startup>
    <system.serviceModel>
        <bindings>
            <netMsmqBinding>
                <binding name="NetMsmqEndpoint">
                    <security mode="Message">
                        <message clientCredentialType="Certificate" algorithmSuite="Default" />
                    </security>
                </binding>
            </netMsmqBinding>
        </bindings>
      <behaviors>
        <endpointBehaviors>
          <behavior name="MsmqEndpointBehavior">
            <clientCredentials>
              <clientCertificate storeName="My" storeLocation="LocalMachine" x509FindType="FindBySubjectName"
                                  findValue="MSMQWcfDemoClient" />
              <serviceCertificate>
                <defaultCertificate storeLocation="LocalMachine" storeName="My" x509FindType="FindBySubjectName" findValue="MSMQWcfDemoserver"/>
              </serviceCertificate>
            
            </clientCredentials>
            
          </behavior>
        </endpointBehaviors>
      </behaviors>
        <client>
            <endpoint address="net.msmq://localhost/private/DemoQueue3" binding="netMsmqBinding"
                bindingConfiguration="NetMsmqEndpoint" behaviorConfiguration="MsmqEndpointBehavior" contract="MessageQueueServiceProxy.IMessageQueueService"
                name="NetMsmqEndpoint">
              <identity>
                <dns value="MSMQWcfDemoServer"/>
              </identity>

            </endpoint>
        </client>
    </system.serviceModel>
  <system.web>
    <compilation debug="true" />
  </system.web>
</configuration>

All in all, we end up with a sample where you can communicate between a client and a service using WCF with durable and ordered requests using NetMsmqBinding. As I have presented in earlier articles, the communication is actually in the form of WCF message inside every MSMQ message. The WCF message itself is protected, as this picture shows.

(it is protected using the self signed certificate we generated)
The Powershell script InspectMessageQueueWcfContent.ps1 is included, if you want to inspect the WCF messages themselves of the queue themselves. Note that if you enable Journal on the MSMQ queue this solution creates, you can see the MSMQ messages after they have been received and consumed, using compmgmt.msc Or an alternative is to use QueueExplorer instead, available as a trial here: Queue Explorer
This tool can view the WCF message inside the MSMQ message as in my Powershell script, but also display syntax coloring and other functionality for quickly navigation of your MSMQ queues. Are MSMQ in WCF an alternative for ordinary scenarios using HTTP, TCP or Federated bindings? This article was meant at least to give a demo of the capability WCF gives developers to utilize MSMQ as the communication protocol between client and server. Hope you found this article interesting.

Sunday 22 July 2018

Self-signed certificates in .NET with RsaCryptoServiceProvider

This article is written after experiencing how difficult it is today to create self-signed certificates that works with .NET and specificially WCF. If you use the default method in Windows, using the cmdlet New-SelfSignedCertificate in Powershell, chances are high that you will stumble upon this error: System.Security.Cryptography.CryptographicException: Invalid provider type specified. A few years back, creating certificates was way easier using makecert.exe Then Windows required the certificates to have length of minimum 1024. After some years passed, makecert.exe was deprecated. Microsoft now offers .NET developers to create a self signed certificate the cmdlet New-SelfSignedCertificate to use in development and test environments. Actually it turns out that you still must adjust the private part of certificate to use the RSACryptoServiceProvider by using OpenSSL to achieve this and then import to the certificate, sadly Microsoft gives developers tools for self-signed certificate generation that needs to use third-part libraries such as SSLR to work properly with .NET, at least this is the case with WCF.. Here is the Powershell script I ended up with:
 Write-Host "Generating a self signed certificate for client in MSMQ WCF demo"

$clientCertFile = "C:\temp\MSMQWcfDemoClient.pfx" 

$clientCertFileRsaFormatted = "C:\temp\MSMQWcfDemoClient.RSAConverted.pfx"

$cert = New-SelfSignedCertificate -Subject "CN=MSMQWcfDemoClient" -certstorelocation cert:\localmachine\my `
-NotAfter (Get-Date).AddYears(3) -KeyLength 2048 -KeySpec KeyExchange
$pwd = ConvertTo-SecureString -String ‘bongo’ -Force -AsPlainText 
$path = 'cert:\localMachine\my\' + $cert.thumbprint 
Export-PfxCertificate -cert $path -FilePath $clientCertFile -Password $pwd

$clientCertPasswordSec = ConvertTo-SecureString "bongo" -AsPlainText -Force


Write-Host "Generating a self signed certificate for server in MSMQ WCF demo"

$serverCertFile = "C:\temp\MSMQWcfDemoServer.pfx" 

$serverCertFileRsaFormatted =  "C:\temp\MSMQWcfDemoServer.RSAConverted.pfx"

$certServer = New-SelfSignedCertificate -Subject "CN=MSMQWcfDemoserver" -certstorelocation cert:\localmachine\my `
  -NotAfter (Get-Date).AddYears(3) -KeyExportPolicy Exportable -KeyLength 2048  -KeySpec KeyExchange
$pwdServer = ConvertTo-SecureString -String ‘kongo’ -Force -AsPlainText
$pathServer = 'cert:\localMachine\my\' + $certServer.thumbprint 
Export-PfxCertificate -cert $pathServer -FilePath $serverCertFile -Password $pwdServer

$serverCertPasswordSec = ConvertTo-SecureString "kongo" -AsPlainText -Force

$command = @'
cmd.exe /c c:\temp\rsaconvert.bat
'@

Write-Host "Starting bat file to convert from CNG to RSA format.." 

Invoke-Expression -Command:$command 

Write-Host "Importing RSA formatted certificates.."

Import-PfxCertificate -FilePath $clientCertFileRsaFormatted -CertStoreLocation Cert:\LocalMachine\My -Password $clientCertPasswordSec
Import-PfxCertificate -FilePath $clientCertFileRsaFormatted -CertStoreLocation Cert:\LocalMachine\root -Password $clientCertPasswordSec


Import-PfxCertificate -FilePath $serverCertFileRsaFormatted -CertStoreLocation Cert:\LocalMachine\My -Password $serverCertPasswordSec
Import-PfxCertificate -FilePath $serverCertFileRsaFormatted -CertStoreLocation Cert:\LocalMachine\root -Password $serverCertPasswordSec

The powershell script uses a bat file that calls Openssl to convert the pfx certificate to use the RSACryptoServiceProvider. This is how the bat file looks like:
echo Generating RSA format certificates for server using OpenSSL..

c:\openssl\openssl.exe pkcs12 -in "C:\temp\MSMQWcfDemoserver.pfx" -nokeys -out "C:\temp\MSMQWcfDemoserver.cer" -passin "pass:kongo"
c:\openssl\OpenSSL.exe pkcs12 -in "C:\temp\MSMQWcfDemoserver.pfx" -nocerts -out "C:\temp\MSMQWcfDemoserver.pem" -passin "pass:kongo" -passout "pass:kongo"
c:\openssl\OpenSSL.exe rsa -inform PEM -in "C:\temp\MSMQWcfDemoserver.pem" -out "C:\temp\MSMQWcfDemoserver.rsa" -passin "pass:kongo" -passout "pass:kongo"
c:\openssl\openssl.exe pkcs12 -export -in  "C:\temp\MSMQWcfDemoserver.cer" -inkey "C:\temp\MSMQWcfDemoserver.rsa" -out "C:\temp\MSMQWcfDemoserver.RSAConverted.pfx" -passin "pass:kongo" -passout "pass:kongo"


echo Generating RSA format certificates for client using OpenSSL..

c:\openssl\openssl.exe pkcs12 -in "C:\temp\MSMQWcfDemoclient.pfx" -nokeys -out "C:\temp\MSMQWcfDemoclient.cer" -passin "pass:bongo"
c:\openssl\OpenSSL.exe pkcs12 -in "C:\temp\MSMQWcfDemoclient.pfx" -nocerts -out "C:\temp\MSMQWcfDemoclient.pem" -passin "pass:bongo" -passout "pass:bongo"
c:\openssl\OpenSSL.exe rsa -inform PEM -in "C:\temp\MSMQWcfDemoclient.pem" -out "C:\temp\MSMQWcfDemoclient.rsa" -passin "pass:bongo" -passout "pass:bongo"
c:\openssl\openssl.exe pkcs12 -export -in  "C:\temp\MSMQWcfDemoclient.cer" -inkey "C:\temp\MSMQWcfDemoclient.rsa" -out "C:\temp\MSMQWcfDemoclient.RSAConverted.pfx" -passin "pass:bongo" -passout "pass:bongo"


The bat file uses OpenSSL to extract (dismantle) the public part of the certificate into a .cer file (this part could have been done with MMC). The next step is to generate a from our existing pfx file to export to a pem file and then a rsa file with OpenSSL. We then meld the .cer file and .rsa file into a converted .pfx file. This file is with the Powershell script automatically imported into the certificate store Personal (My) of certificate location Local Computer. The Powershell script also Import-PfxCertificate to Trusted Root Certification Authorities. Anyways, my goal was to give you a demo about .NET, WCF and NetMsmqBinding using message security, but I first had to get over this hurdle to be able to have some protection in WCF with certificate and had no idea that Microsoft had given developers so cumbersome tools to generate a self signed certificate to actually work with WCF. Now my MSMQ message queue is filled with encrypted and protection MSMQ messages (containing WCF message to be consumed)! :)
Note: the MSMQ queue was inspected using this Powershell script:

#
# InspectMessageQueueWcfContent.ps1
#


#
# InspectMessageQueue.ps1
#

[System.Reflection.Assembly]::LoadWithPartialName("System.Messaging") | Out-Null
[System.Reflection.Assembly]::LoadWithPartialName("System.Xml") | Out-Null
[System.Reflection.Assembly]::LoadWithPartialName("System.ServiceModel") | Out-Null
[System.Reflection.Assembly]::LoadWithPartialName("System.IO") | Out-Null


$queuePath = ".\private$\demoqueue3"

Write-Host "Powershell MSMQ queue WCF inspector v0.1. Inspecting queue contents of the queue: $queuePath"
Write-Host ""


Run-MainDemoIterateMsmq $queuePath


Function Get-XmlFromWcfMessage([System.Messaging.Message] $msg) {
   
    $doc = New-Object System.Xml.XmlDocument;
    $messageLength = [int] $msg.BodyStream.Length


    $buffer = New-Object byte[] $messageLength

    
    $msg.BodyStream.Read($buffer, 0, $messageLength)

    $envelopeStart = Find-SoapEnvelopeStart($buffer)

    $envelopeStart = $envelopeStart - 0

    $envelopeLength = $($buffer.Length - $envelopeStart)
    #Write-Host $envelopeStart


    $stream = New-Object System.IO.MemoryStream($buffer, $envelopeStart, $envelopeLength)

    $elm = New-Object System.ServiceModel.Channels.BinaryMessageEncodingBindingElement
    $elm.ReaderQuotas.MaxStringContentLength = 10000000
    $elm.ReaderQuotas.MaxBytesPerRead = 10000000


    $msg1 = $elm.CreateMessageEncoderFactory().Encoder.ReadMessage($stream, 10000000);

    $doc.Load($msg1.GetReaderAtBodyContents());

    $msg.BodyStream.Position = 0;


    return $doc;
}

Function Find-SoapEnvelopeStart([byte[]] $stream)
{
    $i = 0;
    $j = 0;
    $prevByte = $stream[$i];
    $curByte = [byte]$j;
    for ($i = 0; $i -lt $stream.Length; $i++)
    {
        $curByte = $stream[$i];
        if ($curByte -eq [byte] 0x02 -and $prevByte -eq [byte] 0x56) {
            break;
        }
        $prevByte = $curByte;
    }
    return $i - 1;
}


Function Run-MainDemoIterateMsmq([string] $queuePath) {

$queue = New-Object System.Messaging.MessageQueue $queuePath

foreach ($message in $queue.GetAllMessages()){
  $xmlDoc = Get-XmlFromWcfMessage $message 
  Write-Host $xmlDoc.OuterXml
 } 


}


Saturday 21 July 2018

Reading WCF messages in MSMQ queues in Powershell

The last article looked at displaying MSMQ contents for a MSMQ queue used with NetMsmqBinding using Powershell. The message queues contained characters that were unreadable. That is because the message queue items contains actually ready to consume WCF messages. This article will present a new Powershell script where the MSMQ body contents is finally readable using Powershell and .NET WCF classes in System.ServiceModel. Here is how the contents looks using regular methods to extract the MSMQ Message queue items with garbled contents. This is as noted due to the MSMQ queue items each containing a corresponding WCF message.
Let's fix this up by using System.ServiceModel classes!
[System.Reflection.Assembly]::LoadWithPartialName("System.Messaging") | Out-Null
[System.Reflection.Assembly]::LoadWithPartialName("System.Xml") | Out-Null
[System.Reflection.Assembly]::LoadWithPartialName("System.ServiceModel") | Out-Null
[System.Reflection.Assembly]::LoadWithPartialName("System.IO") | Out-Null


$queuePath = ".\private$\demoqueue4"

Write-Host "Powershell MSMQ queue WCF inspector v0.1. Inspecting queue contents of the queue: $queuePath"
Write-Host ""


Run-MainDemoIterateMsmq $queuePath


Function Get-XmlFromWcfMessage([System.Messaging.Message] $msg) {
   
    $doc = New-Object System.Xml.XmlDocument;
    $messageLength = [int] $msg.BodyStream.Length


    $buffer = New-Object byte[] $messageLength

    
    $msg.BodyStream.Read($buffer, 0, $messageLength)

    $envelopeStart = Find-SoapEnvelopeStart($buffer);

    $envelopeLength = $($buffer.Length - $envelopeStart)
    #Write-Host $envelopeStart


    $stream = New-Object System.IO.MemoryStream($buffer, $envelopeStart, $envelopeLength)

    $elm = New-Object System.ServiceModel.Channels.BinaryMessageEncodingBindingElement
    $elm.ReaderQuotas.MaxStringContentLength = 10000000
    $elm.ReaderQuotas.MaxBytesPerRead = 10000000


    $msg1 = $elm.CreateMessageEncoderFactory().Encoder.ReadMessage($stream, 10000000);

    $doc.Load($msg1.GetReaderAtBodyContents());

    $msg.BodyStream.Position = 0;


    return $doc;
}

Function Find-SoapEnvelopeStart([byte[]] $stream)
{
    $i = 0;
    $j = 0;
    $prevByte = $stream[$i];
    $curByte = [byte]$j;
    for ($i = 0; $i -lt $stream.Length; $i++)
    {
        $curByte = $stream[$i];
        if ($curByte -eq [byte] 0x02 -and $prevByte -eq [byte] 0x56) {
            break;
        }
        $prevByte = $curByte;
    }
    return $i - 1;
}


Function Run-MainDemoIterateMsmq([string] $queuePath) {

$queue = New-Object System.Messaging.MessageQueue $queuePath

foreach ($message in $queue.GetAllMessages()){
  $xmlDoc = Get-XmlFromWcfMessage $message 
  Write-Host $xmlDoc.OuterXml
 } 


}
The soap envelope is found looking after the escape sequence "V" followed with the special ANSI character 0x02 (STX = Start of Text). From this point on, the rest of the WCF Message is our SOAP body! We then get readable output!
Finally, the WCF messages inside the MSMQ queue that is filled up using NetMsmqBinding is readable! In my next article I will present a demo solution of how to use NetMsmqBinding in WCF! Until then, you can clone the solution already from here: git clone git@bitbucket.org:toreaurstad/demonetmsmqwcfgit.git

Reading MSMQ contents with Powershell

This article will present two ways to read a MSMQ (Microsoft Message Queue) using Powershell. First, the queue will be read using the GetString method of System.Text.UTF8Encoding:

[System.Reflection.Assembly]::LoadWithPartialName("System.Messaging") | Out-Null
 
$queuePath = ".\private$\myqueue"

$queue = New-Object System.Messaging.MessageQueue $queuePath

foreach ($message in $queue.GetAllMessages()){

 Write-Host (New-Object System.Text.UTF8Encoding).GetString($message.BodyStream.ToArray())

 Write-Host $msg 
}

As an alternative, it is also possible to use the StreamReader (more ceremony really):

[System.Reflection.Assembly]::LoadWithPartialName("System.Messaging") | Out-Null
 
$queuePath = ".\private$\myqueue"

$queue = New-Object System.Messaging.MessageQueue $queuePath

foreach ($message in $queue.GetAllMessages()){

 Write-Host ([Environment]::NewLine)

 $sr = New-Object System.IO.StreamReader($message.BodyStream)

 $message.Formatter = New-Object System.Messaging.XmlMessageFormatter(@(""));
 
 $msg = "";

 while ($sr.Peek() -ge 0){
  $msg += $sr.ReadLine()
 }

 Write-Host $msg 
}

Actually, I was needing a simple way to look at some messages sent with the NetMsmqBinding in WCF, so making a Powershell script seemed the quickest way! WCF does some strange formatting on the message that is sent through the wire, you can though see that our two alternatives gives also a bit different formatting, the first alternative being the most clean and with shortest syntax.
As the reader can see, the contents of the MSMQ queue that the NetMsmqBinding uses shows unreadable characters. That is because the MSMQ message item are containing actually WCF Messages. QueueExplorer showed me this fact, so next article will present a more lengthy version where the content can be properly decoded using Powershell to the rescue!

Tuesday 3 July 2018

Basic WCF solution in Monodevelop

Basic WCF Solution in Monodevelop

I created a basic solution with a WCF Servicehost and client in Monodevelop today using MX Linux 17 "Horizon". To check it out, clone the following repository:
git clone https://bitbucket.org/toreaurstad/hellowcfmono
The source code is small and can be seen in a browser here: HelloWcfMono source code
If you have not installed Monodevelop in Linux yet, it is available as package "Monodevelop", "Monodevel" or "Monodevelop-complete", for example in MX-Linux I used:
apt-get install monodevel

The HelloWcf solution consists of three projects. The Service project is a console project, running the ServiceHost through the console. You will want to tweak Monodevelop to use External Console by right clicking and selecting Options=>Run=>General: "Run on external console". I just installed xterm to use the console as it is (apt get install xterm). In case Monodevelop crashes when you open the .sln file, another problem with Monodevelop, you can run the following command to open the .sln file directly in the root folder of the cloned repository.: monodevelop HelloWcf.sln
To run the WCF sample, right click on the Host project and choose Set as Startup project Choose first to Rebuild all (Ctrl+F8) to build the Service, Host and Client projects. Now press F5 to debug the Host project. The terminal window should show up, indicating that the WCF Service is running:


Now, switch over to a new terminal window and navigate to the Client project. Go to the bin folder, then the Debug folder. If you did not build Client, there are no files here, so do this now by right clicking on the Client project in Monodevelop and choose build. Now a file called Client.exe should pop up in your console. To run the client, enter: mono Client.exe Then you provide the Service a string through a call WCF service call with the proxy (Client) and get a reply. This project is really the basic set up of a client to get started coding WCF Servicehost and a proxy supporting BasicHttpBinding in .NET System.ServiceModel (which Mono actually supports). Developers can now use Linux and Monodevelop for example and commit code, while other developers use other platforms. The same .sln file can be openened in Visual Studio in Windows for example, while front-end guys use Apple to do their bit. Monodevelop is truly a possible bridge and will you will save money on license costs and freedom to add a lot of free software to use to build your projects. So what are you waiting for, grab hold of Monodevelop today and Linux and try it out! Nice thing to see that Mono framework supports WCF, much can be developed for .NET in Linux!

Saturday 19 May 2018

Call a Javascript function from Blazor page

This article will show how a Js function can be called from a Blazor page. First off, create a button like this:
 <button class="btn btn-warning" onclick="@SayHelloToBlazor">Click me!</button>
Then define the .Net method to handle the onclick event.
@using Microsoft.AspNetCore.Blazor.Browser.Interop

 private async void ShowAlert()
 {
    if (RegisteredFunction.Invoke("showAlert", "Hello World!"))
        Console.WriteLine("The Js function showAlert was called!");
 }
The code invokes a registered function with the invoke method and passing in the method name and an argument. Note that you must add the Interop namespace to Blazor in AspNetCore. We then add the Js function, but Blazor will give you a compiler error if you put the Js function in the same file as the Blazor page. Instead, add it in the index.html file under wwwroot folder of your Blazor project (check the wwwroot folder). You can define the Js function in a .js file or right into the index.html file.

    Blazor.registerFunction('showAlert', (msg) => {
        console.log(msg);
        alert(msg);
        return true;

    });

Note that if you refactor the Js method, your reference in the .DotNet code of Blazor will of course go stale, and you must update it. Since we return true (as Blazor wants you to do), we can act upon that in the Blazor code as a callback (check the async modifier of the DotNet method). That is what you need to do to get started with calling Javascript from Blazor page running in DotNetCore 2.1 and later.

Thursday 10 May 2018

Powershell - Search for big files and output to Excel

Here is a Powershell script that you can run to search for the ten biggest files in your current file directory and display them in Excel. My version of Powershell is 5.1 according to the built in Powershell variable $PSVersionTable.PSVersion, so if you run the script in earlier versions of Powershell, the script must be changed a bit.

Write-Host 'Look for big files in current directory' 

$alternatingOddRowColor = 19
$alternatingEventRowColor = 20

$filename = ''

#$filename = Read-Host 'Directory to output filelist? (c:\temp) default'


if ([string]::IsNullOrEmpty($filename)){
 $filename = "c:\temp\\" 
}

$filename = $filename + 
 ([TimeSpan](Get-Date).ToLongTimeString()).Ticks.ToString() + '_Bigfiles' + '.csv'

Write-Host $filename


gci -r | sort Length -desc |
Select-Object @{Name='Filesize(MB)'; Expression = { [int]$($_.Length /1MB) }}, Name, FullName, LastWriteTime -First 10 | 
Export-Csv $filename -NoTypeInformation -Encoding ASCII -UseCulture

$excelFileName = $filename.Replace('.csv', '.xlsx')


$excel = New-Object -ComObject Excel.Application 
$excel.Visible = $true
$excel.Workbooks.Open($filename)

$excel.DisplayAlerts = false

$objWorksheet = $excel.Workbooks.Item(1)

$activeRange = $excel.ActiveWorkbook.ActiveSheet.UsedRange

$activeRange.EntireColumn.AutoFit()

For ($i = 1; $i -le $activeRange.Rows.Count; $i++) { 
 $themeColorIndex = $(If ($($i %2) -eq 0) { $alternatingOddRowColor } 
   Else { $alternatingEventRowColor });

 $currentRow = $excel.ActiveWorkbook.ActiveSheet.UsedRange.Rows($i).EntireRow
 $currentRow.Font.Name = 'Comic Sans MS'
 $currentRow.Interior.ColorIndex =  $themeColorIndex;
 if ($i -eq 1){
  $currentRow.Font.Bold = true 
  $currentRow.Font.Size = 14
 } 
}


$excel.SaveAs($excelFileName,51)

#$excel.Quit()


A timestamp can be created in Powershell using the Get-Date cmdlet, converting the Get-Date DateTime object to a string with ToLongTimeString(), then casting that string into a timestamp and performing a ToString. Like this:

 ([TimeSpan](Get-Date).ToLongTimeString()).Ticks.ToString()

It is nice to have a file size in megabyte with Get-ChildItem That can be achieved using a calculated property in Powershell. This is done with the following construct ${ .. }
@{ Name : 'PropertyName', Expression { $( ..calculation here .. ) }}

#Like this! 

gci -r | sort Length -desc |
Select-Object  @{Name='Filesize(MB)'; Expression = { [int]$($_.Length /1MB) }} , Name, FullName, LastWriteTime -First 10 | 
Export-Csv $filename -NoTypeInformation -Encoding ASCII -UseCulture

After running the Powershell script I could find out why my source code repository seemingly had grown so much in size. The repo was not increased, but the folder Test Results contained almost a gigabyte of disk space after running some web tests and load tests. My .hgignore file ignore these files anyways. The picture below shows how the generated file looks. Of course with a Comic Sans MS. Font

Sunday 10 December 2017

Compressing files in a MVC environment

This article will present a way to compress files in a MVC environment. For compression, we will use the DotNetZip Nuget package, which is an open and free compression library hosted on Codeplex and supported also by Xceed. The DotNetZip produces of course Zip files. DotNetZip website We install this compression library by initiating the following Nuget command: Install-Package DotNetZip We then define a simple view in MVC that has got a file upload input and a submit button:

@model ZipAndMvc.Models.HomeViewModel
@{
    ViewBag.Title = "Home Page";
}

<div class="jumbotron">
    <h2>Test out zipping a file</h2>   
</div>

<div class="row">

    @using (Html.BeginForm("ZipIt", "Home", FormMethod.Post, new {  enctype = "multipart/form-data" }))
    {
        <div class="col-md-3">@Html.Label("Zip password") @Html.TextBoxFor(m => m.ZipPassword) </div>
        <div class="col-md-3"><input type="file" name="FileUpload" /> </div>
        <div>  <input type="submit" id="Submit" value="Upload and zip file" /> </div>
    }
</div>

This view allows the user to type in a password for the file to compress, where the user also selects the file to compress. The user then hits the submit button. The HomeViewModel is very simple with a simple property for setting the zip password. Then we define the following code in the MVC controller:

        public FileStreamResult ZipIt(HomeViewModel viewmodel)
        {
            if (Request.Files.Count > 0)
            {
                using (var zip = new ZipFile())
                {
                    zip.Encryption = EncryptionAlgorithm.PkzipWeak;
                    zip.Password = viewmodel.ZipPassword;
                    zip.CompressionLevel = Ionic.Zlib.CompressionLevel.Default; 
                    var memoryStream = new MemoryStream();
                    zip.AddFile(Request.Files[0].FileName, "");
                    zip.Save(memoryStream);
                    memoryStream.Position = 0;
                    return new FileStreamResult(memoryStream, contentType: "application/zip")
                    {
                        FileDownloadName = Path.ChangeExtension(Request.Files[0].FileName, "zip")
                    };
                }
            }
            return null;
        }


The client posts the file to compress. The controller then inspects the Request.Files collection and selects the first file if there is present any files there. Here we return a FileStreamResult where the compressed data inside the memorystream is returned to the client. We use DotNetZip to do the compression. The benefit of DotNetZip compared to .Net built-in support for compression is more functionality. The code above should be sufficient for basic compression scenario in MVC. Feel free to experiment with DotNetZip. As you can see, you can specify compression level. You can also choose to add directories and much more. The reason for the second argument in AddFile method is to ensure that the file to be added to the zip package is put in the root folder of the zipped file. Also, set the values of Encryption and Password before adding files or directories (Folders) in the ZipFile. You can actually use different passwords also in the Zip file.

Friday 8 December 2017

Finding old Git Branches with WSL and Bash

Finding old branches in Git

I had to find out which branches in a Git repository was old and output it to a file. An old branch is defined to have no commits the last four months. Here is the bash script I ended up with.


#!/bin/bash

resolveOldBranches(){
branchfile="oldbranches.txt"
declare -i branchiteration=0
branchcount=$(git branch -a | wc -l)

if [ ! -e $branchfile ] ; then
 touch $branchfile
fi

#empty the oldbranch file
: > $branchfile

for k in $(git branch -a | sed /\*/d); do


 if [ -z "$(git log -1 --since='4 months ago' -s $k)" ]; then
  echo $k | cut -d/ -f3 >> $branchfile
 fi
 branchiteration=$branchiteration+1
 percentage= bc <<< "scale=2;($branchiteration/$branchcount)*100"


 read -n 1 -t 0.1 input                  # so read doesn't hang
   if [[ $input = "q" ]] || [[ $input = "Q" ]]
   then
      echo # to get a newline after 
echo -e "XXX\n$($percentage)\nAnalyzing $branchiteration of $branchcount $(bc <<< "scale=2;($branchiteration/$branchcount)*100") % done. \n(Exit: Q/q)... \nXXX"

done | whiptail --title "Resolving OpPlan 4 branch ages" --gauge "Analyzing.. (Press Q or q to exit)" 10 60 0


}

resolveOldBranches
cat $branchfile